Search Website
Adding 3rd Party Tools
OWL Brightspace can integrate 3rd party eLearning Tools for a more seamless learning experience for students.
To learn which tools are integrated with Brightspace and how instructors can request an external tool, please visit this page.
Adding Integrated External Tools
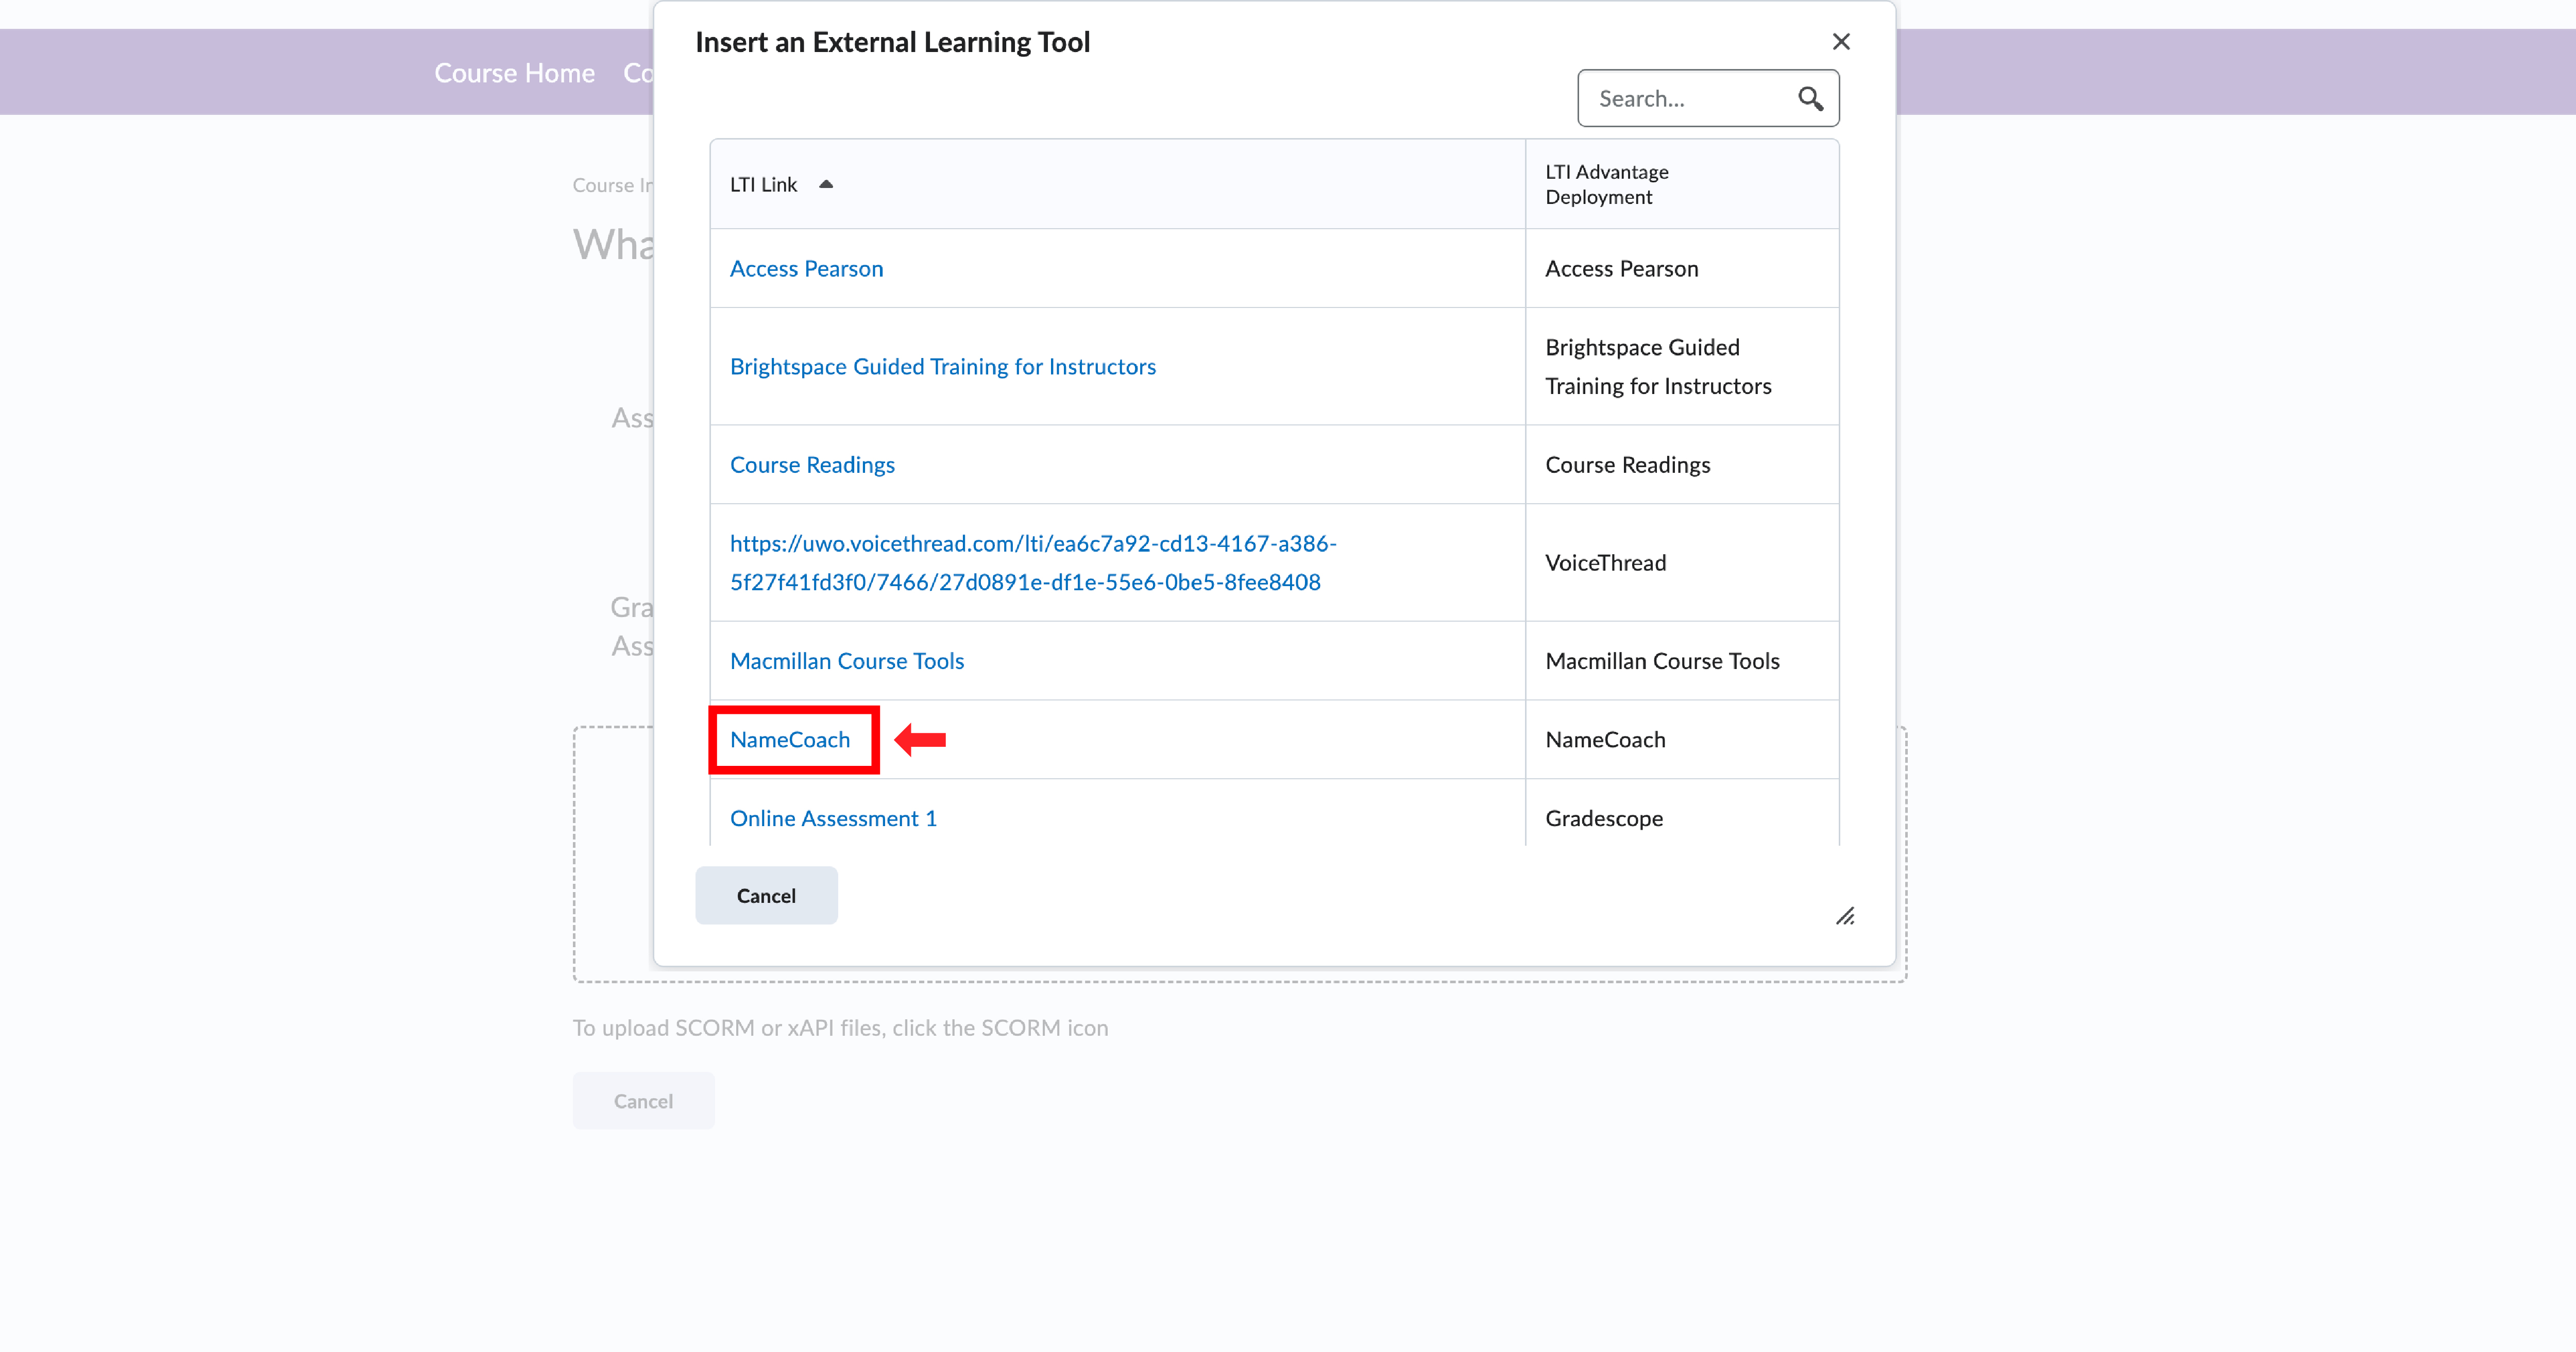
NameCoach is a valuable tool that helps students record the correct pronunciation of their names for their instructors. By using this tool, instructors can create an inclusive and respectful learning environment by addressing each student with their preferred name. It also helps them to communicate better with their students.
Please note that only the instructors have access to the NameCoach roster view. Students, on the other hand, can only access the NameCoach recorder and cannot see their classmates’ names or recordings.
To use NameCoach in your course, follow these steps.
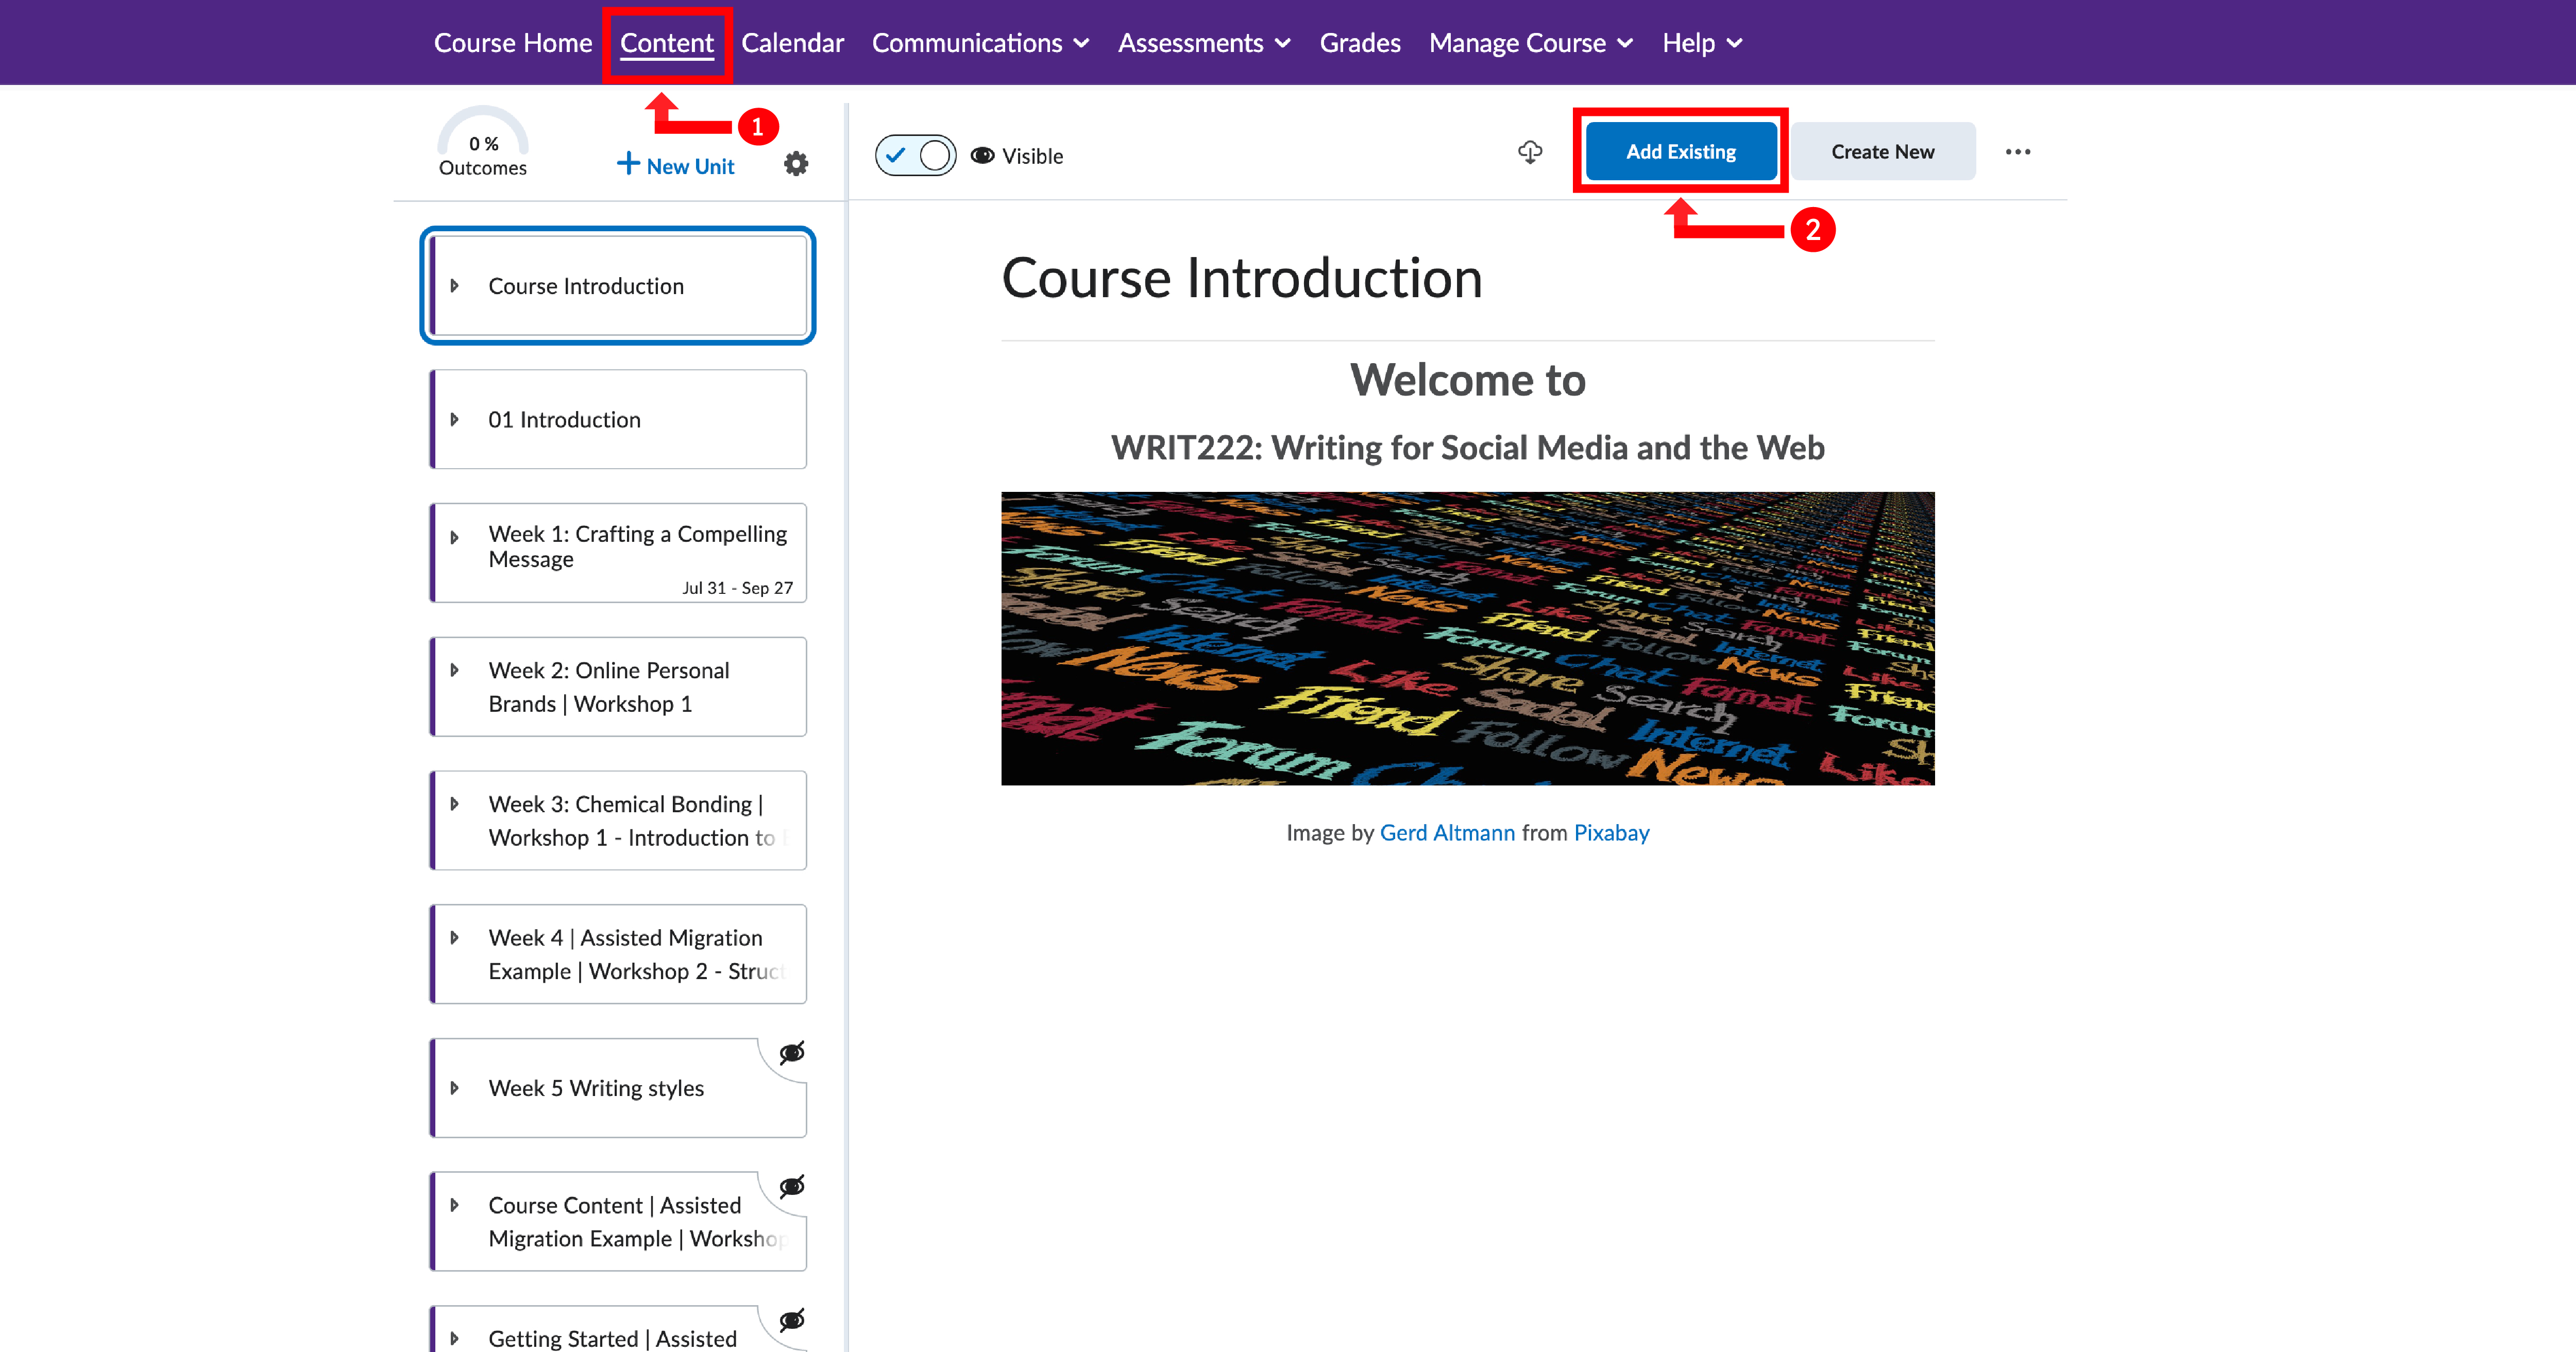
- Navigate to the Content tool on your course site.
- In a new or existing unit, select “Add Existing”.
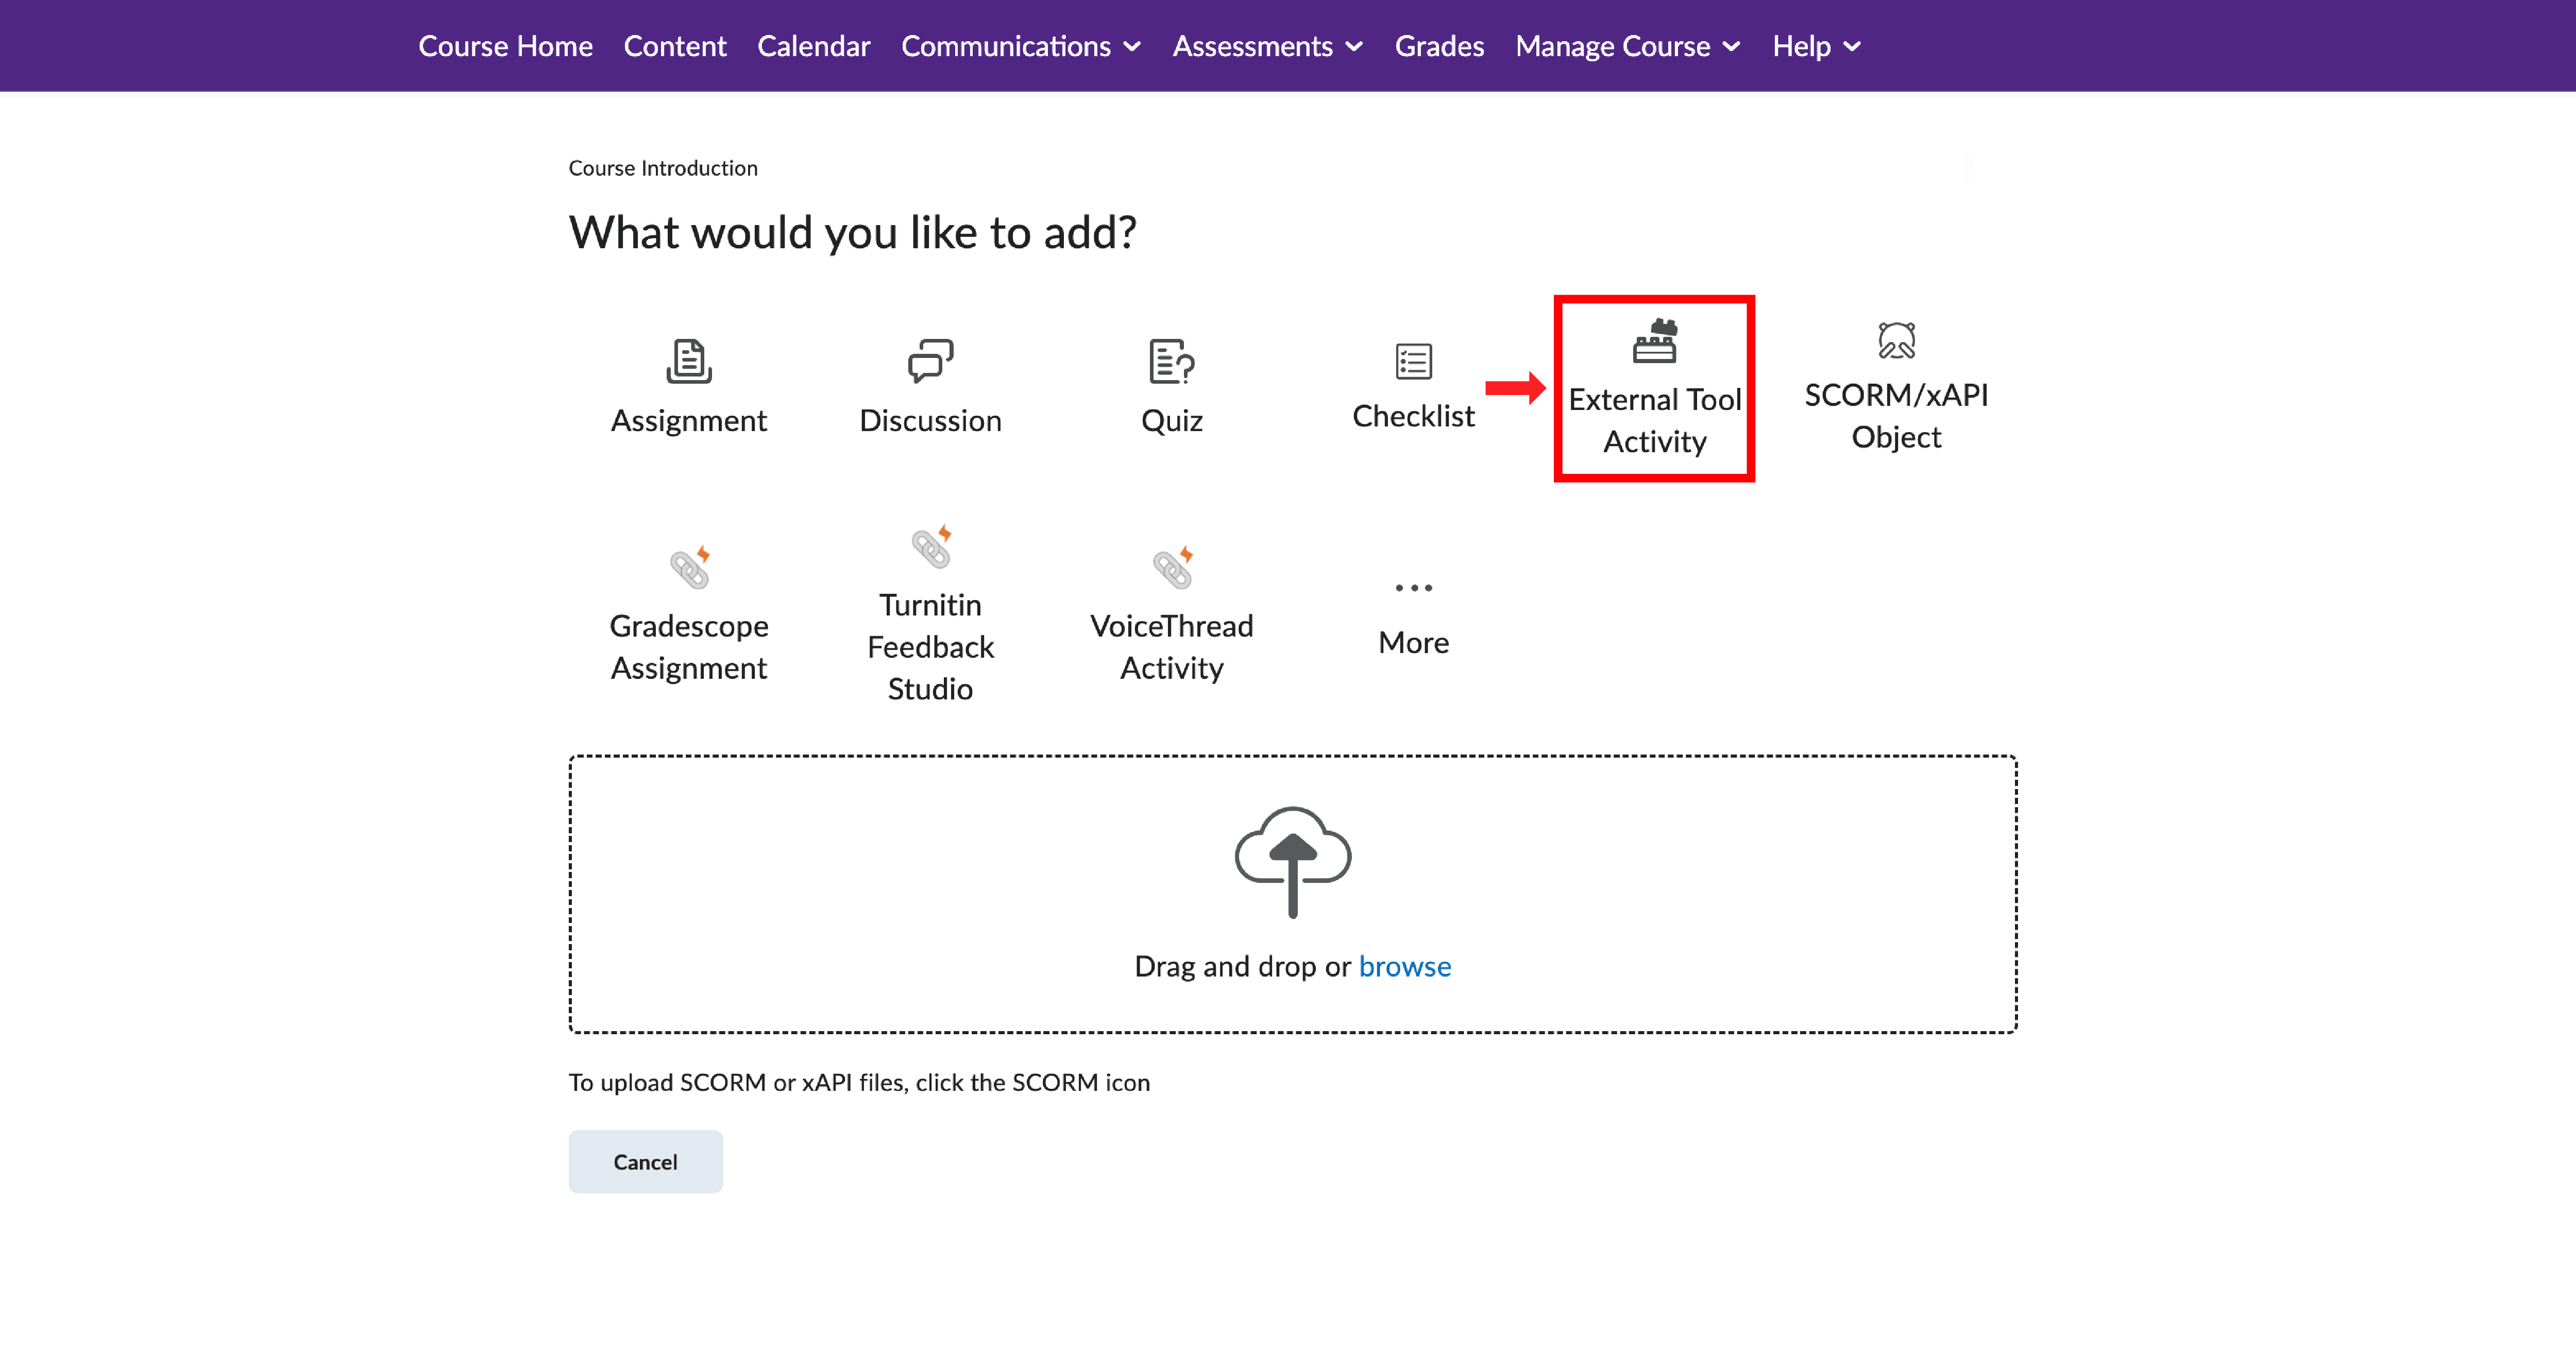
- Select External Tool Activity.
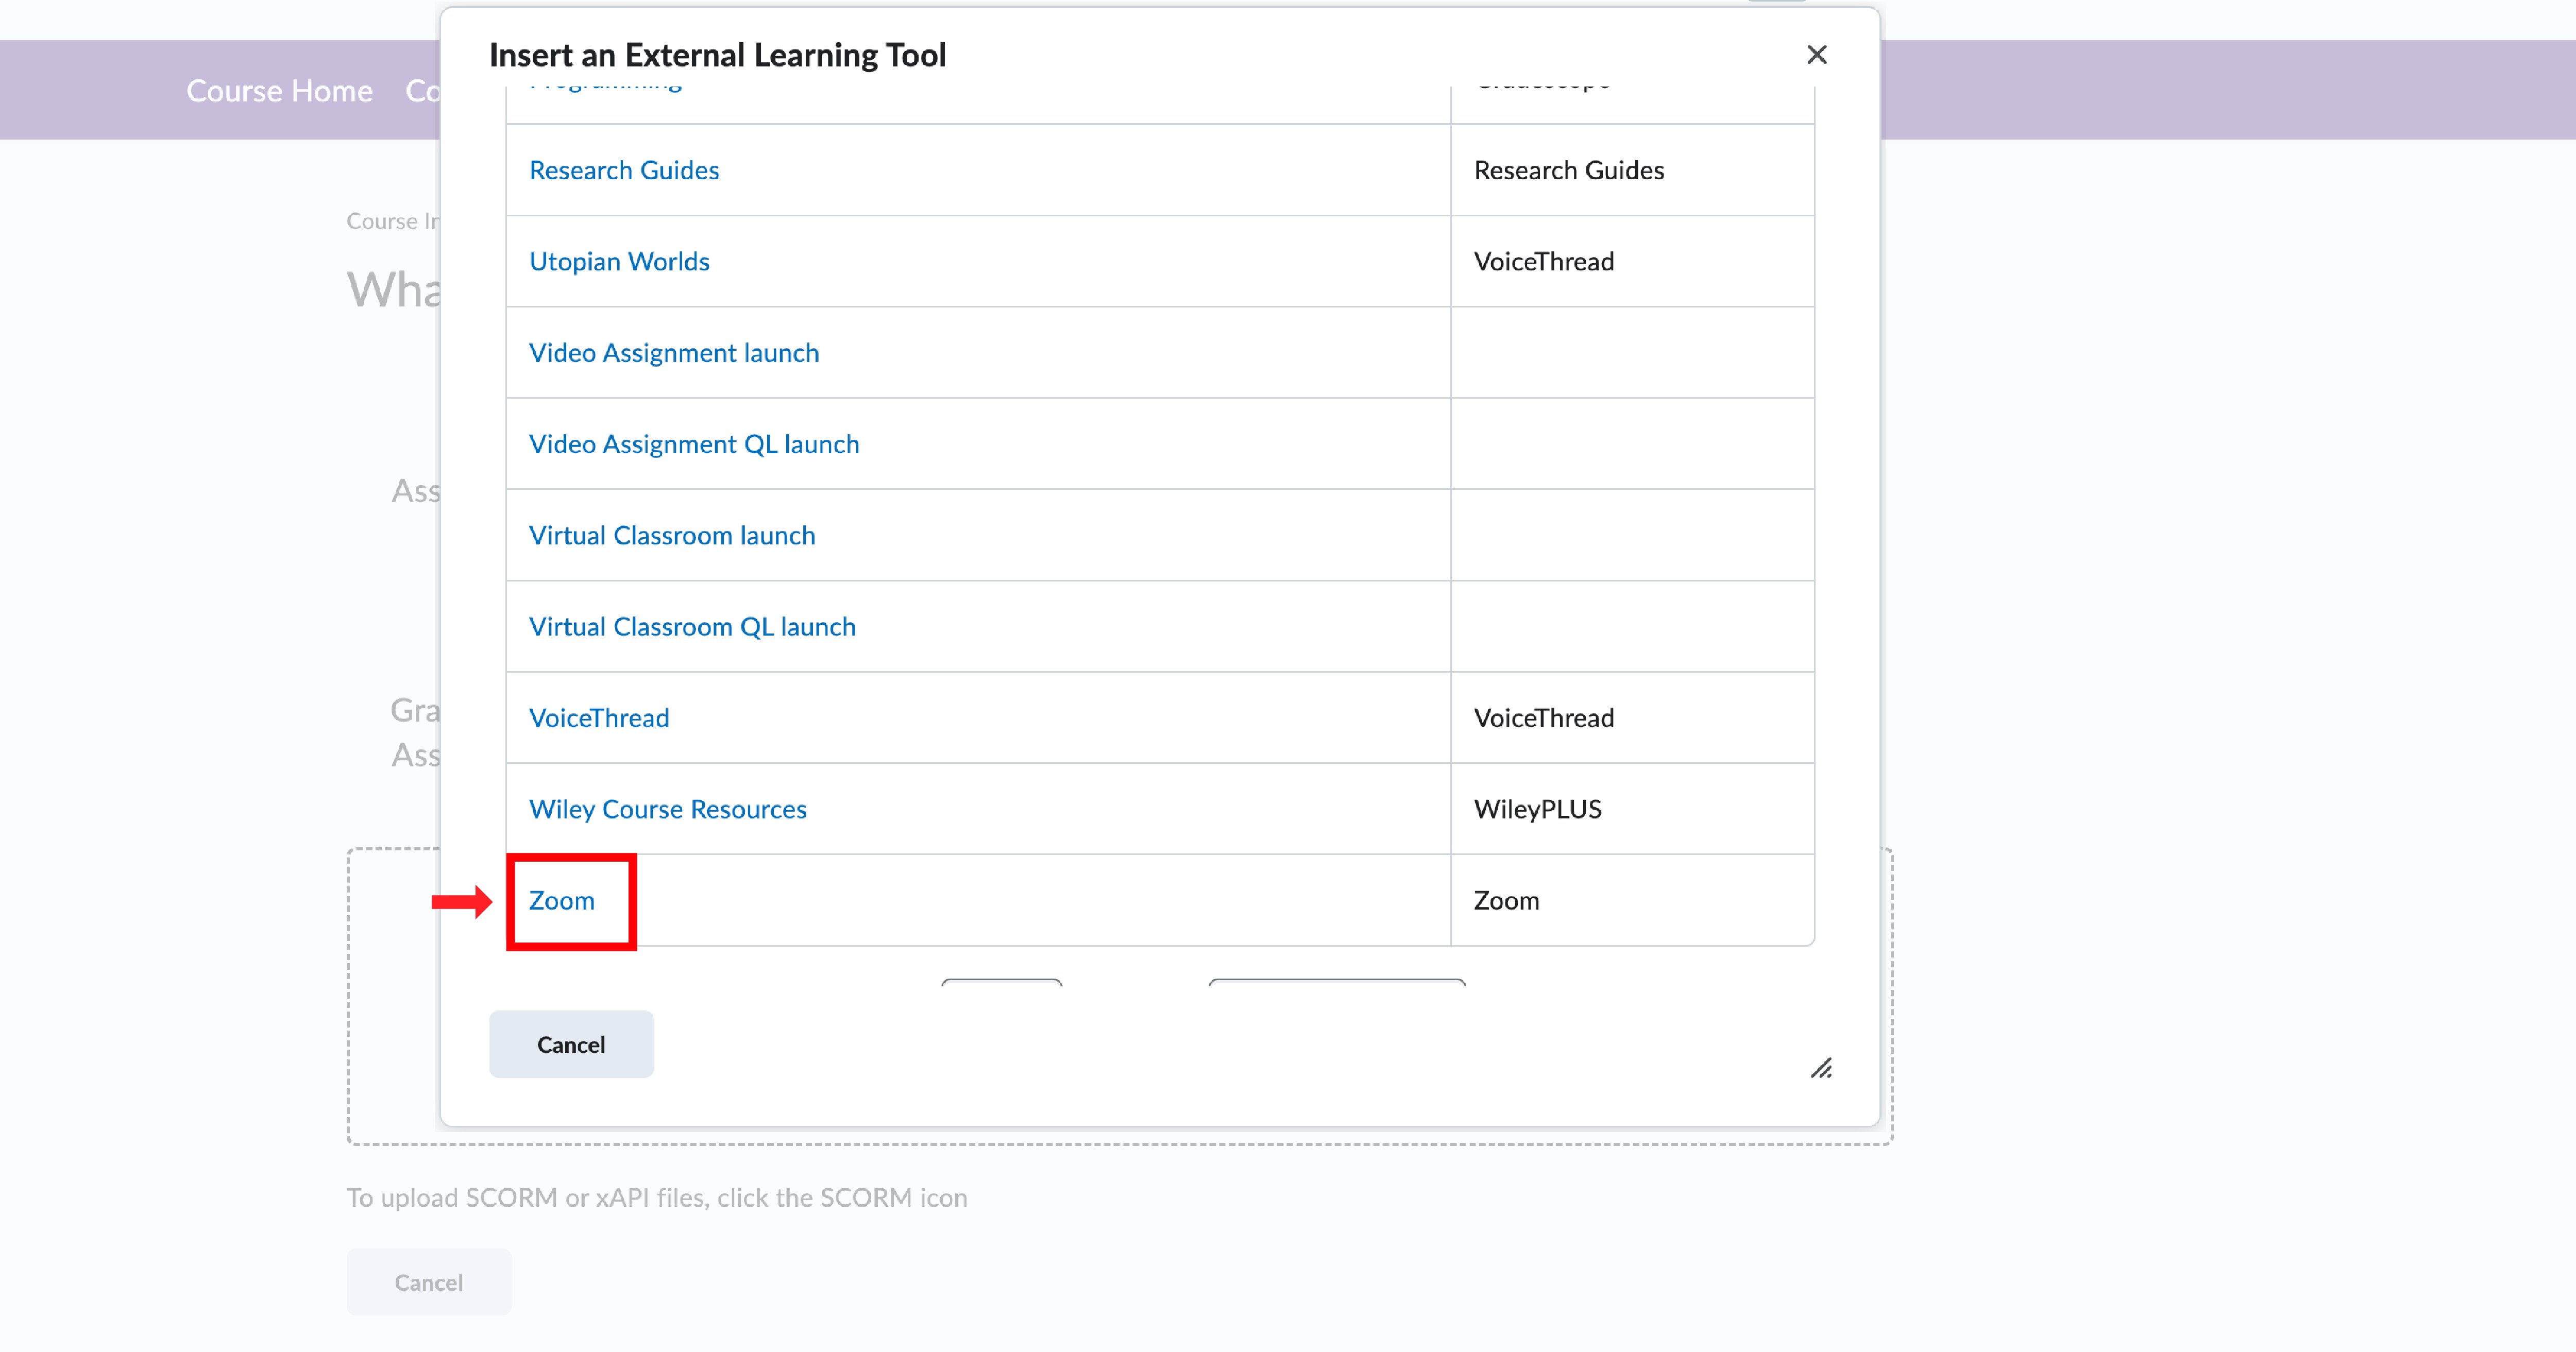
- From the list, choose NameCoach.
- Be sure to make the page visible to your students.
If you encounter problems accessing NameCoach in Brightspace, check NameCoach’s system status page.
To enable Turnitin for a specific assignment, please follow these steps:
1. Log in to your account and go to the Assessment section on the navigation bar of your course page.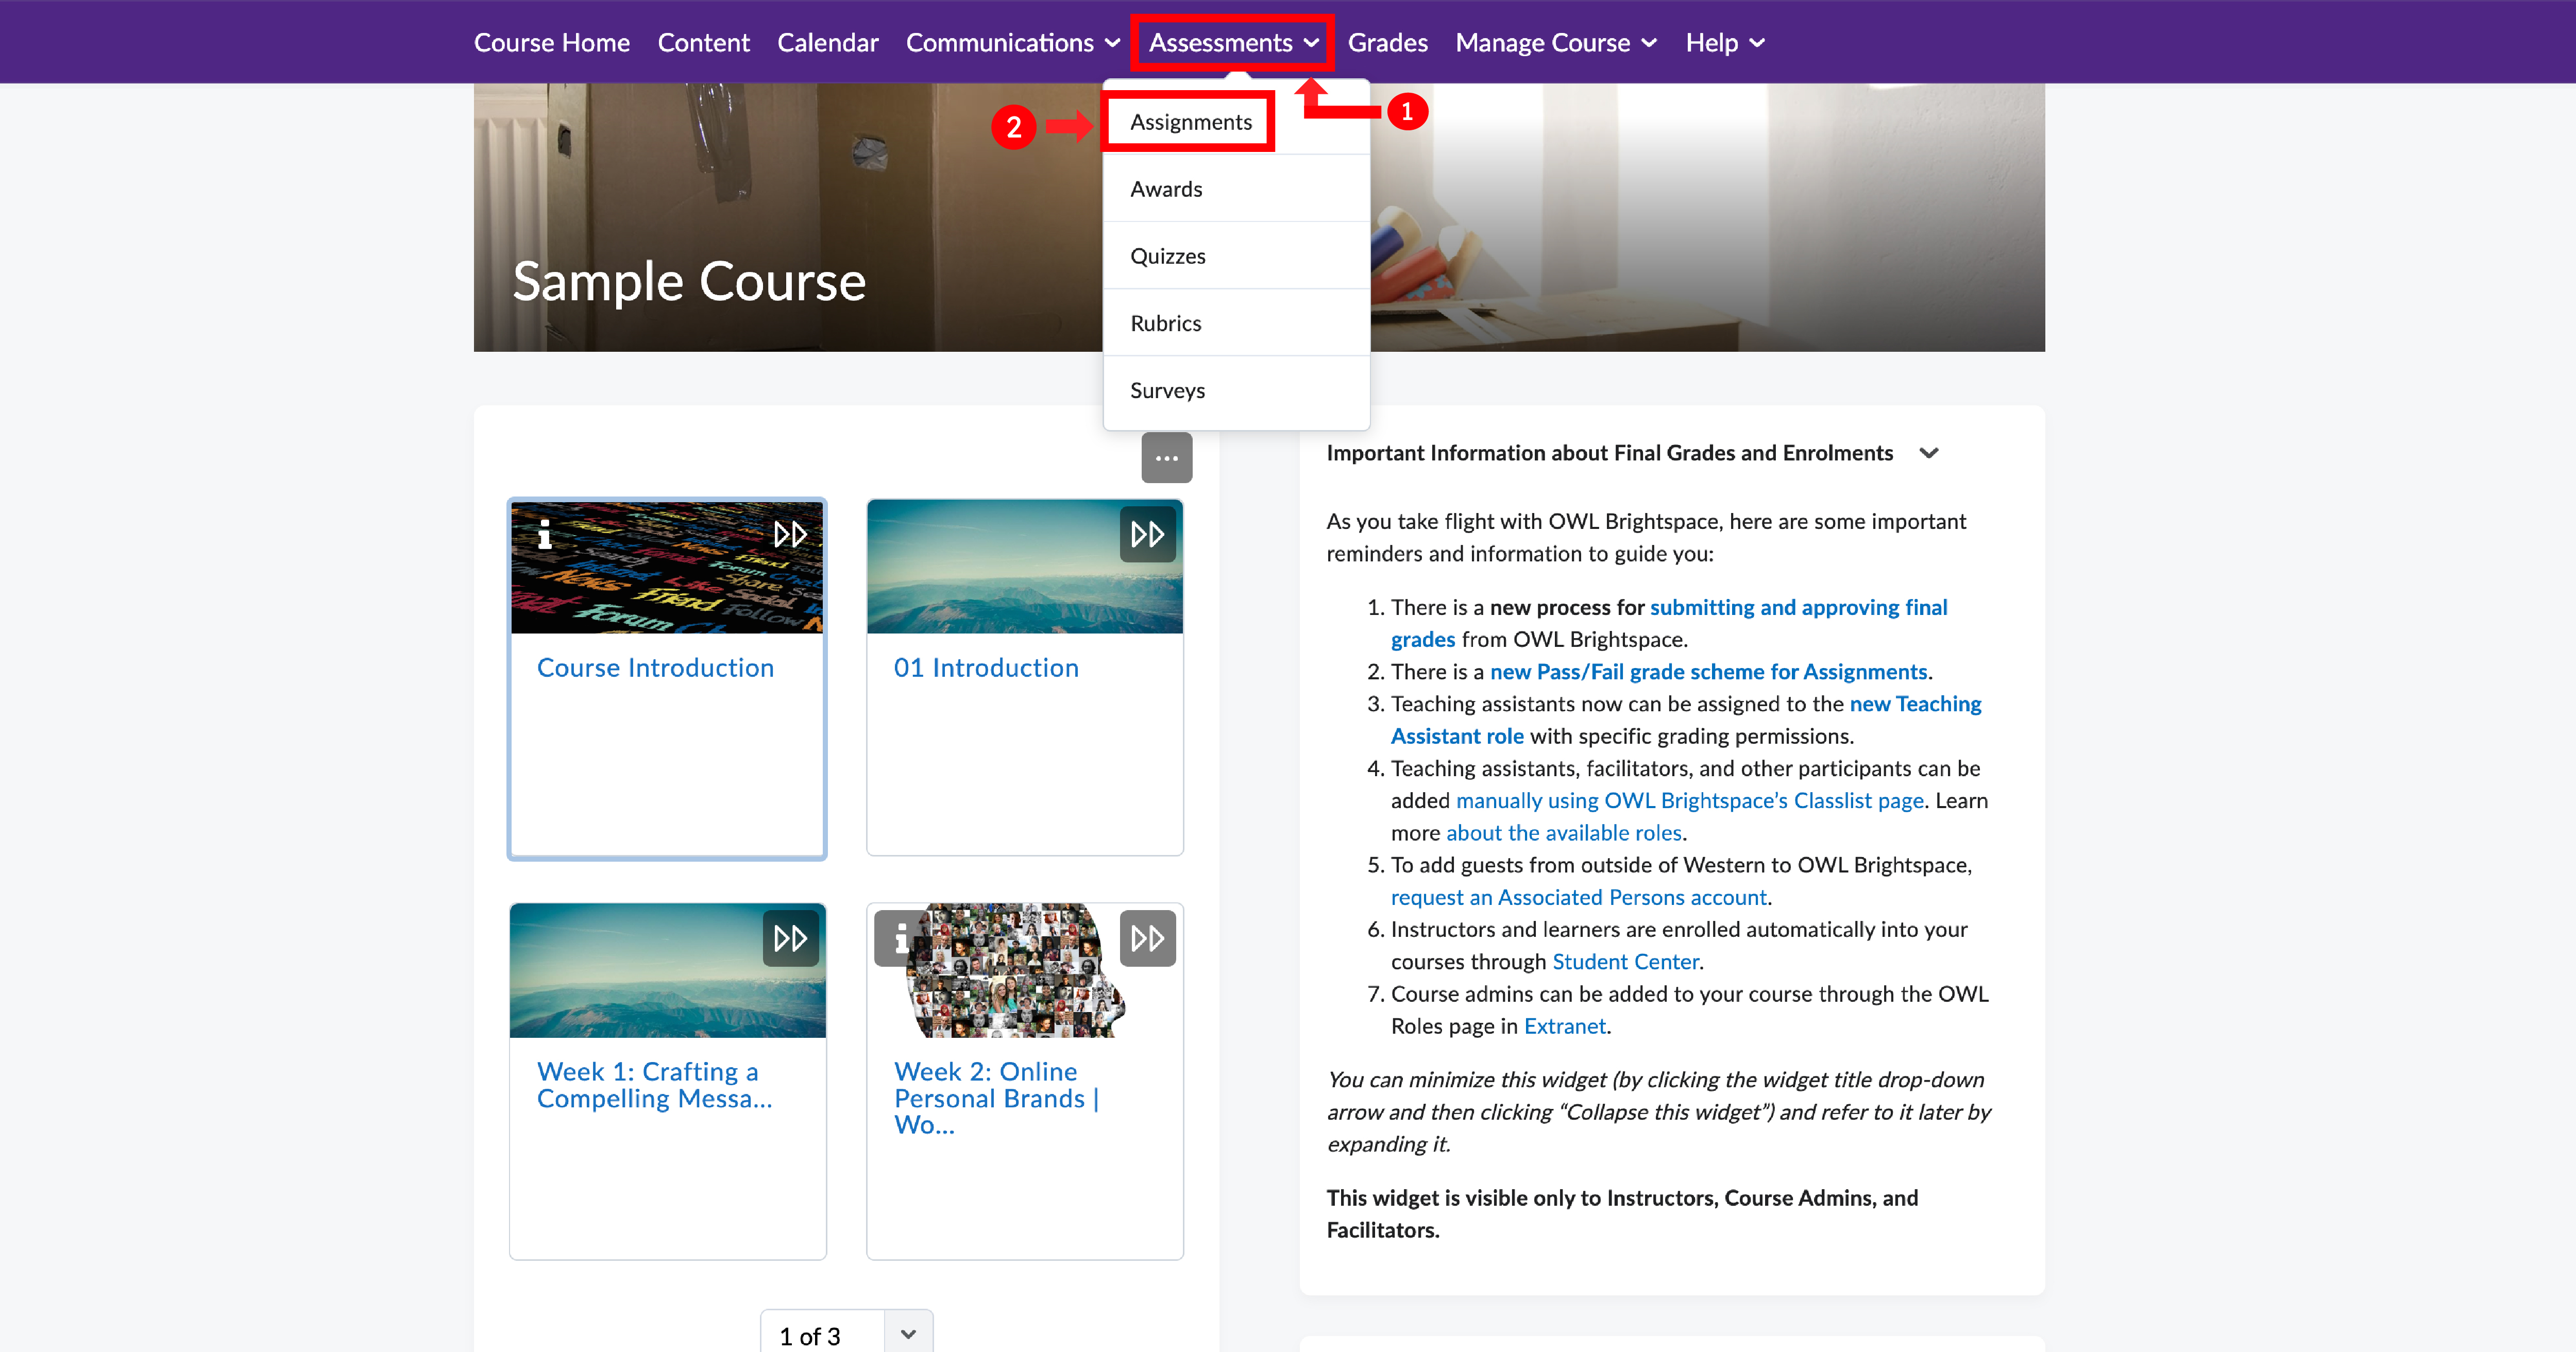
2. Select Assignments from the drop-down menu and choose the assignment you want to enable Turnitin on or create a new one.
3. Click on 'Edit assignment' from the drop-down option next to the assignment name.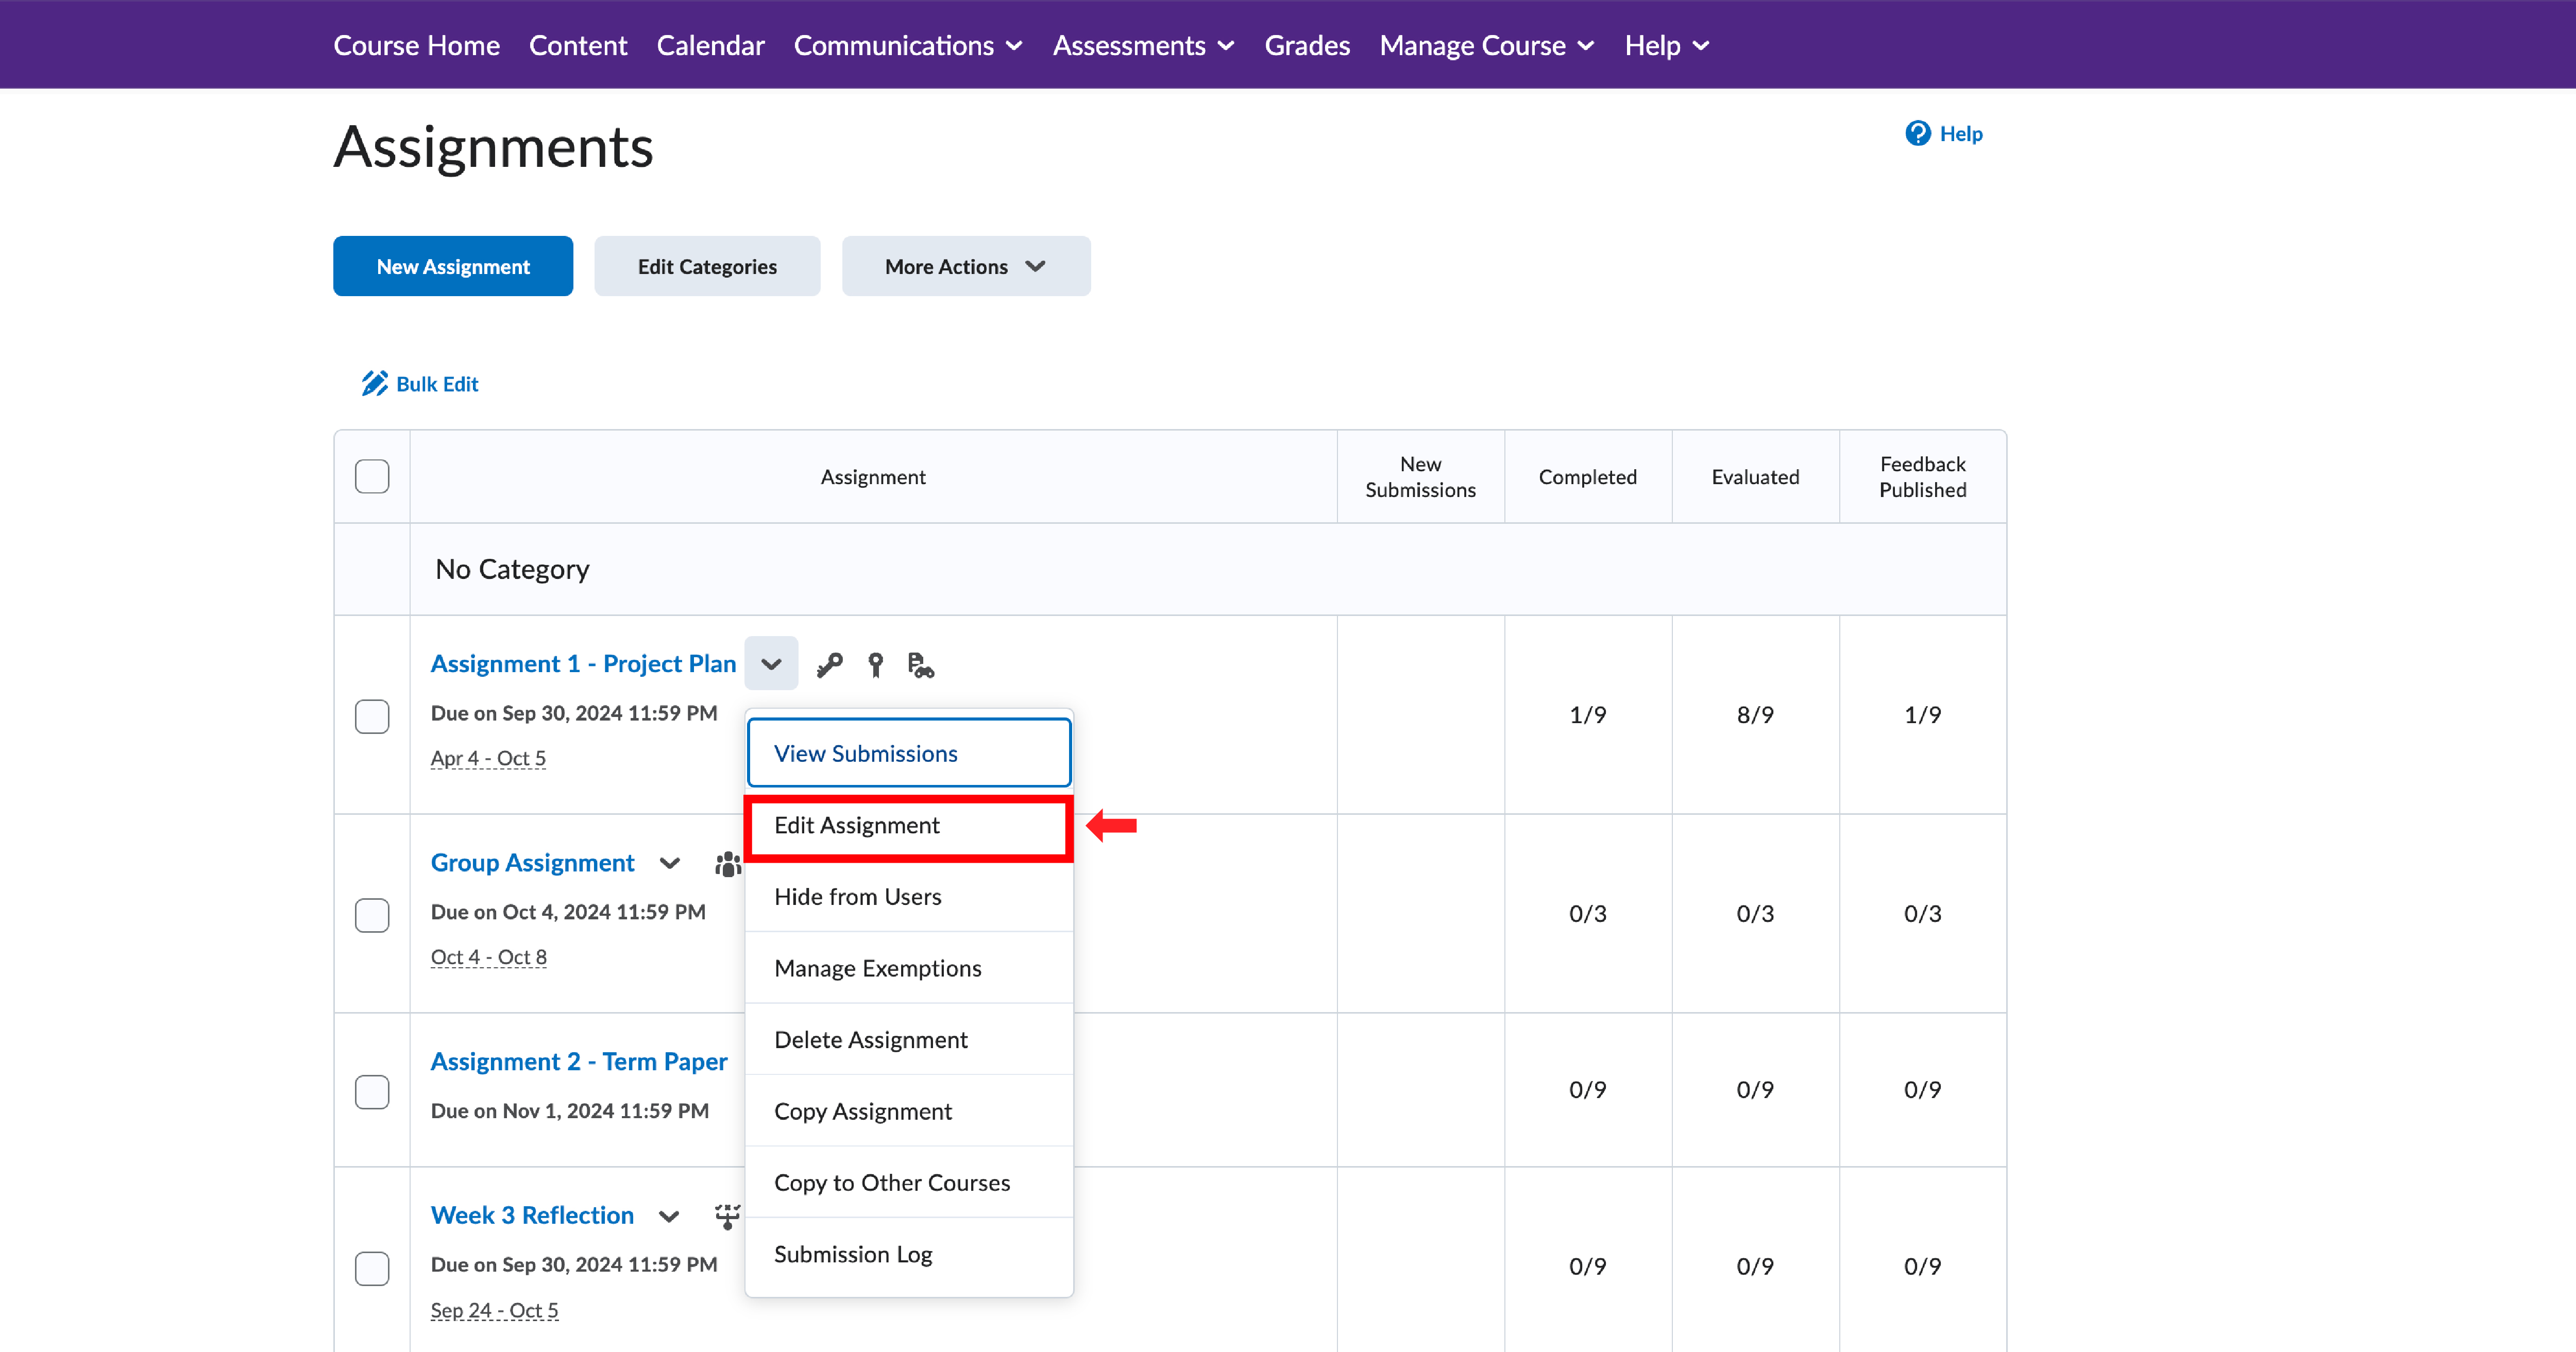
4. In the right-sided assignment editor, under Evaluation & Feedback, select 'Manage Turnitin'.
5. You will be presented with various options to use Turnitin for the specific assignment. Please select the options that best apply.
Create an Assignment with Turnitin Enabled (Video)
A) Creating or Linking a Gradescope Course: This means you are connecting your course to Gradescope. This can be done when linking for the first time or to a course you have already created in Gradescope. Once you do this, you can sync your roster. To link your OWL Brightspace course to Gradescope, follow these steps:
1. On your course homepage, select "Content" on the navigation bar.
2. Create or select a unit where you want to add your Gradescope course.
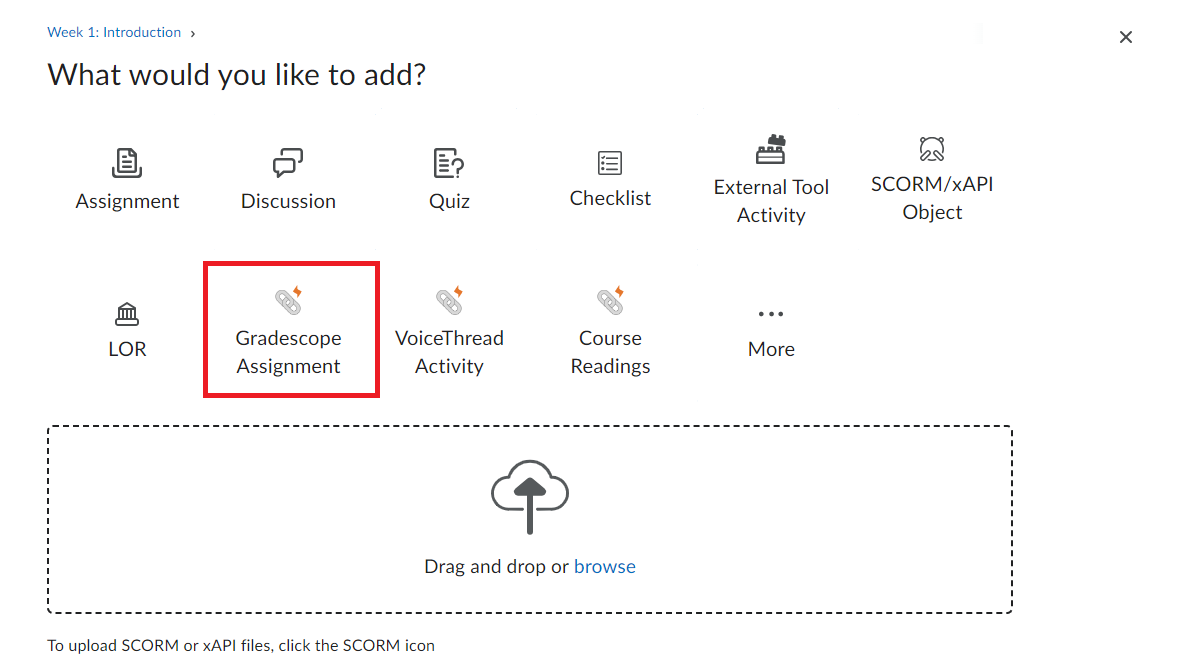
3. Click on 'Add Existing' located on the top right of your screen, and select 'Gradescope Assignment'.
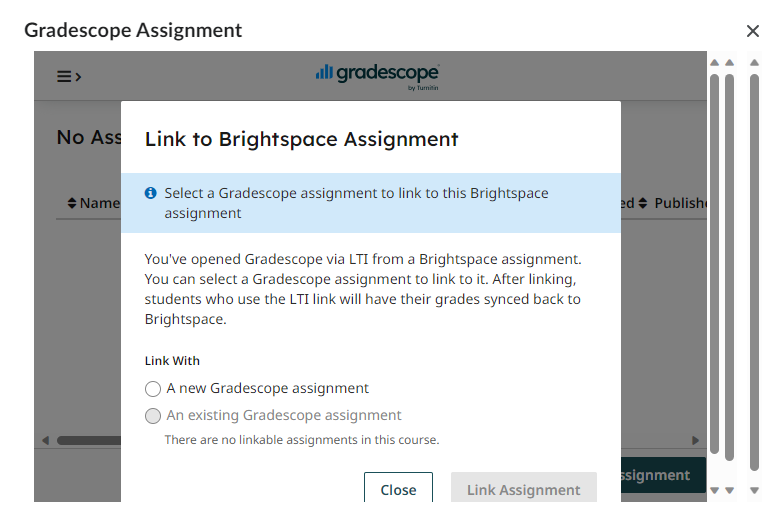
4. In the pop-up window, you can either link with a new Gradescope course (this will create a new Gradescope course for your OWL Brightspace course) or link with an existing Gradescope course (this will link with an unlinked course you have already created on Gradescope.ca).
5. Note: Creating an assignment at this stage is optional. You can close the assignment window which pops up.
Video Demo (Please make sure your YouTube video quality settings are set to high; otherwise, the video will appear blurry):
B) Creating or Linking a Gradescope Assignment: This involves linking or creating a Gradescope assignment that will be connected to your Brightspace course's grade book, contributing to final grades. To do this, please follow the steps below:
1. Go to your course homepage and click on "Content" in the navigation bar.
2. Create a new unit or select the unit where you want to add your Gradescope assignment.
3. Click on 'Add Existing' at the top right of your screen, and choose 'Gradescope Assignment'.
4. In the pop-up window, you can either link to a new Gradescope assignment or link to an existing one if it already exists.
5. Once you have completed these steps, save your work, and the Gradescope assignment will appear in Content.
Video Demo (Please make sure your YouTube video quality settings are set to high; otherwise, the video will appear blurry):
C) Using Gradescope Bubble Sheet: It is not recommended for instructors to use ScanExam or Scantron for uploading DPC files into Brightspace as it is not supported by the system. Instead, instructors can use Gradescope's Bubble Sheets which is integrated into Brightspace and serves a similar purpose. To use Gradescope Bubble Sheet, please follow the steps below:
1. Make sure to follow step A above to link your course in OWL Brightspace. You need to do this so that you can sync your grades back into Brightspace after evaluating them.
2. Once your course is in Brightspace, please visit Gradescope.ca and log in using the School Credentials option and select Western University. You will be brought to a page where you need to use your Western credentials to log in.
3. On your Gradescope dashboard, find and click on your created course site.
4. Select "assignment" on the left sidebar and create the assignment.
5. Under the assignment type, select "Bubble sheet" (Please be sure to download and print Gradescope's Bubble Sheet Template for your in-person tests).
6. Then click "Create assignment."
It is important to note that Brightspace uses OrgID, which is the Western username, for grading instead of student numbers. Therefore, please advise students to enter their Western usernames in the ID field.
Video Demo:
Useful Links
- Upload and process bubble sheet scans * (Managing scans)
- Match student names to submissions * (Managing submissions)
- Review uncertain marks and optionally add more descriptive rubric items (Reviewing Uncertain Marks)
- Grade the bubble sheet assignment (Grading a Bubble Sheet Assignment)
And when grading is completed, you can:
- Publish grades and email students (Reviewing grades)
- Export grades (Exporting Grades)
- Manage regrade requests (Managing regrade requests)
To add a VoiceThread, please follow these steps:
1. Log in to your account and navigate to the content tool on the navigation bar of your course page.
2. Look for the unit where you want to add your VoiceThread.
3. Click on 'Add Existing' located on the top right of your screen, and select 'VoiceThread activity'.

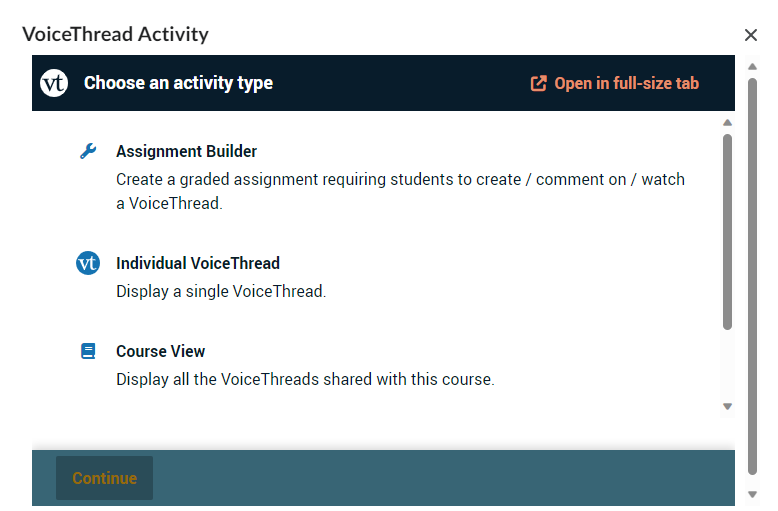
4. After logging in to VoiceThread, you need to choose which of the VoiceThread activities you want to use. For instance, if you want to add a video for your students to watch, you can select an individual VoiceThread.
5. Once you have chosen the activity, simply follow the steps provided by VoiceThread to display your video(s) within your content.
Video Demo (Please make sure your YouTube video quality settings are set to high; otherwise, the video will appear blurry):
Instructors can use iClicker in conjunction with Brightspace. This means that they can synchronize their class list and grade book with iClicker.
If you want more information on how to use the iClicker Cloud Roster & Grade Sync with Brightspace, visit: Instructor Guide: iClicker Cloud Roster & Grade Sync with Brightspace
You can also find more information on iClicker and its capabilities here: About iClicker - WTS
Unlike OWL Sakai, instructors can add ProctorTrack to their courses without contacting WTS. To add Proctortrack and Proctortrack's Student Support link, follow these steps:
Adding Proctortrack
1. Log in to your account and navigate to the content tool on the navigation bar of your course page.
2. Create or look for the unit where you want to add Proctortrack.
3. Click on 'Add Existing' located on the top right of your screen, and select 'External Tools Activity'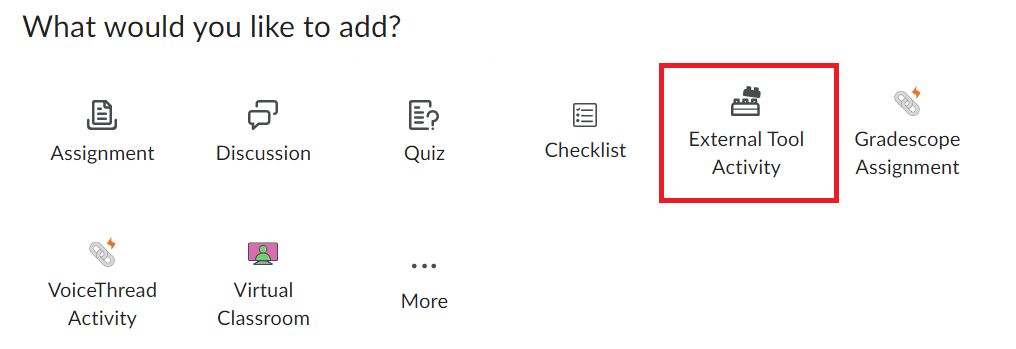
4. In the list, choose Proctortrack
5. After adding, follow the instructions to create or link an existing quiz.
Note: To prevent students from accessing the quiz directly through the Quiz tool instead of using Proctortrack, you can set a password for the quiz when creating it. During the test, students will be prompted to enter the password, which will only be visible in Proctortrack. This ensures that they cannot take the quiz using the Quiz tool directly. It's crucial to remember that students should not receive the password in advance.
Adding the Proctortrack Student Support link
1. In the same unit as Proctortrack, click on "Create New" on the top right of the content editor.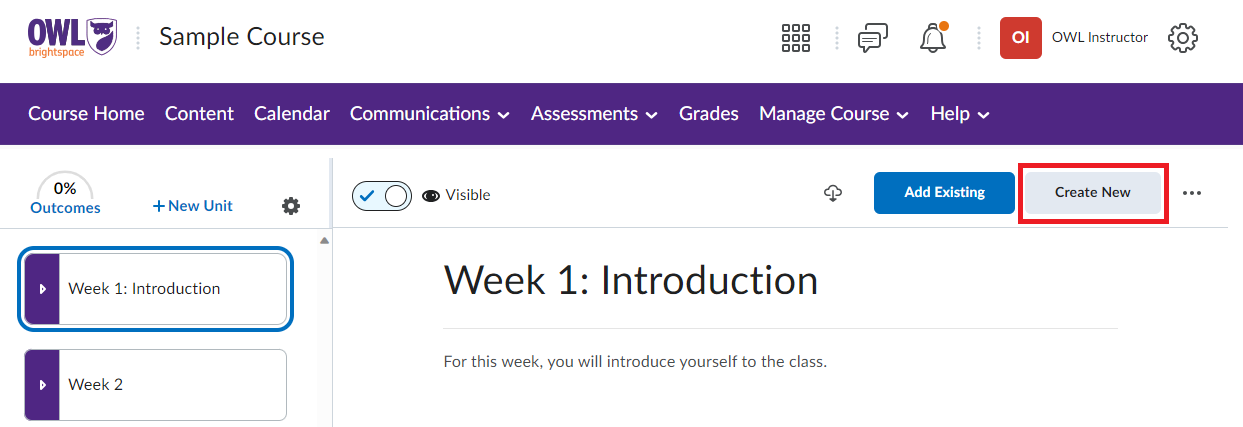
2. From the options provided, select "Weblink".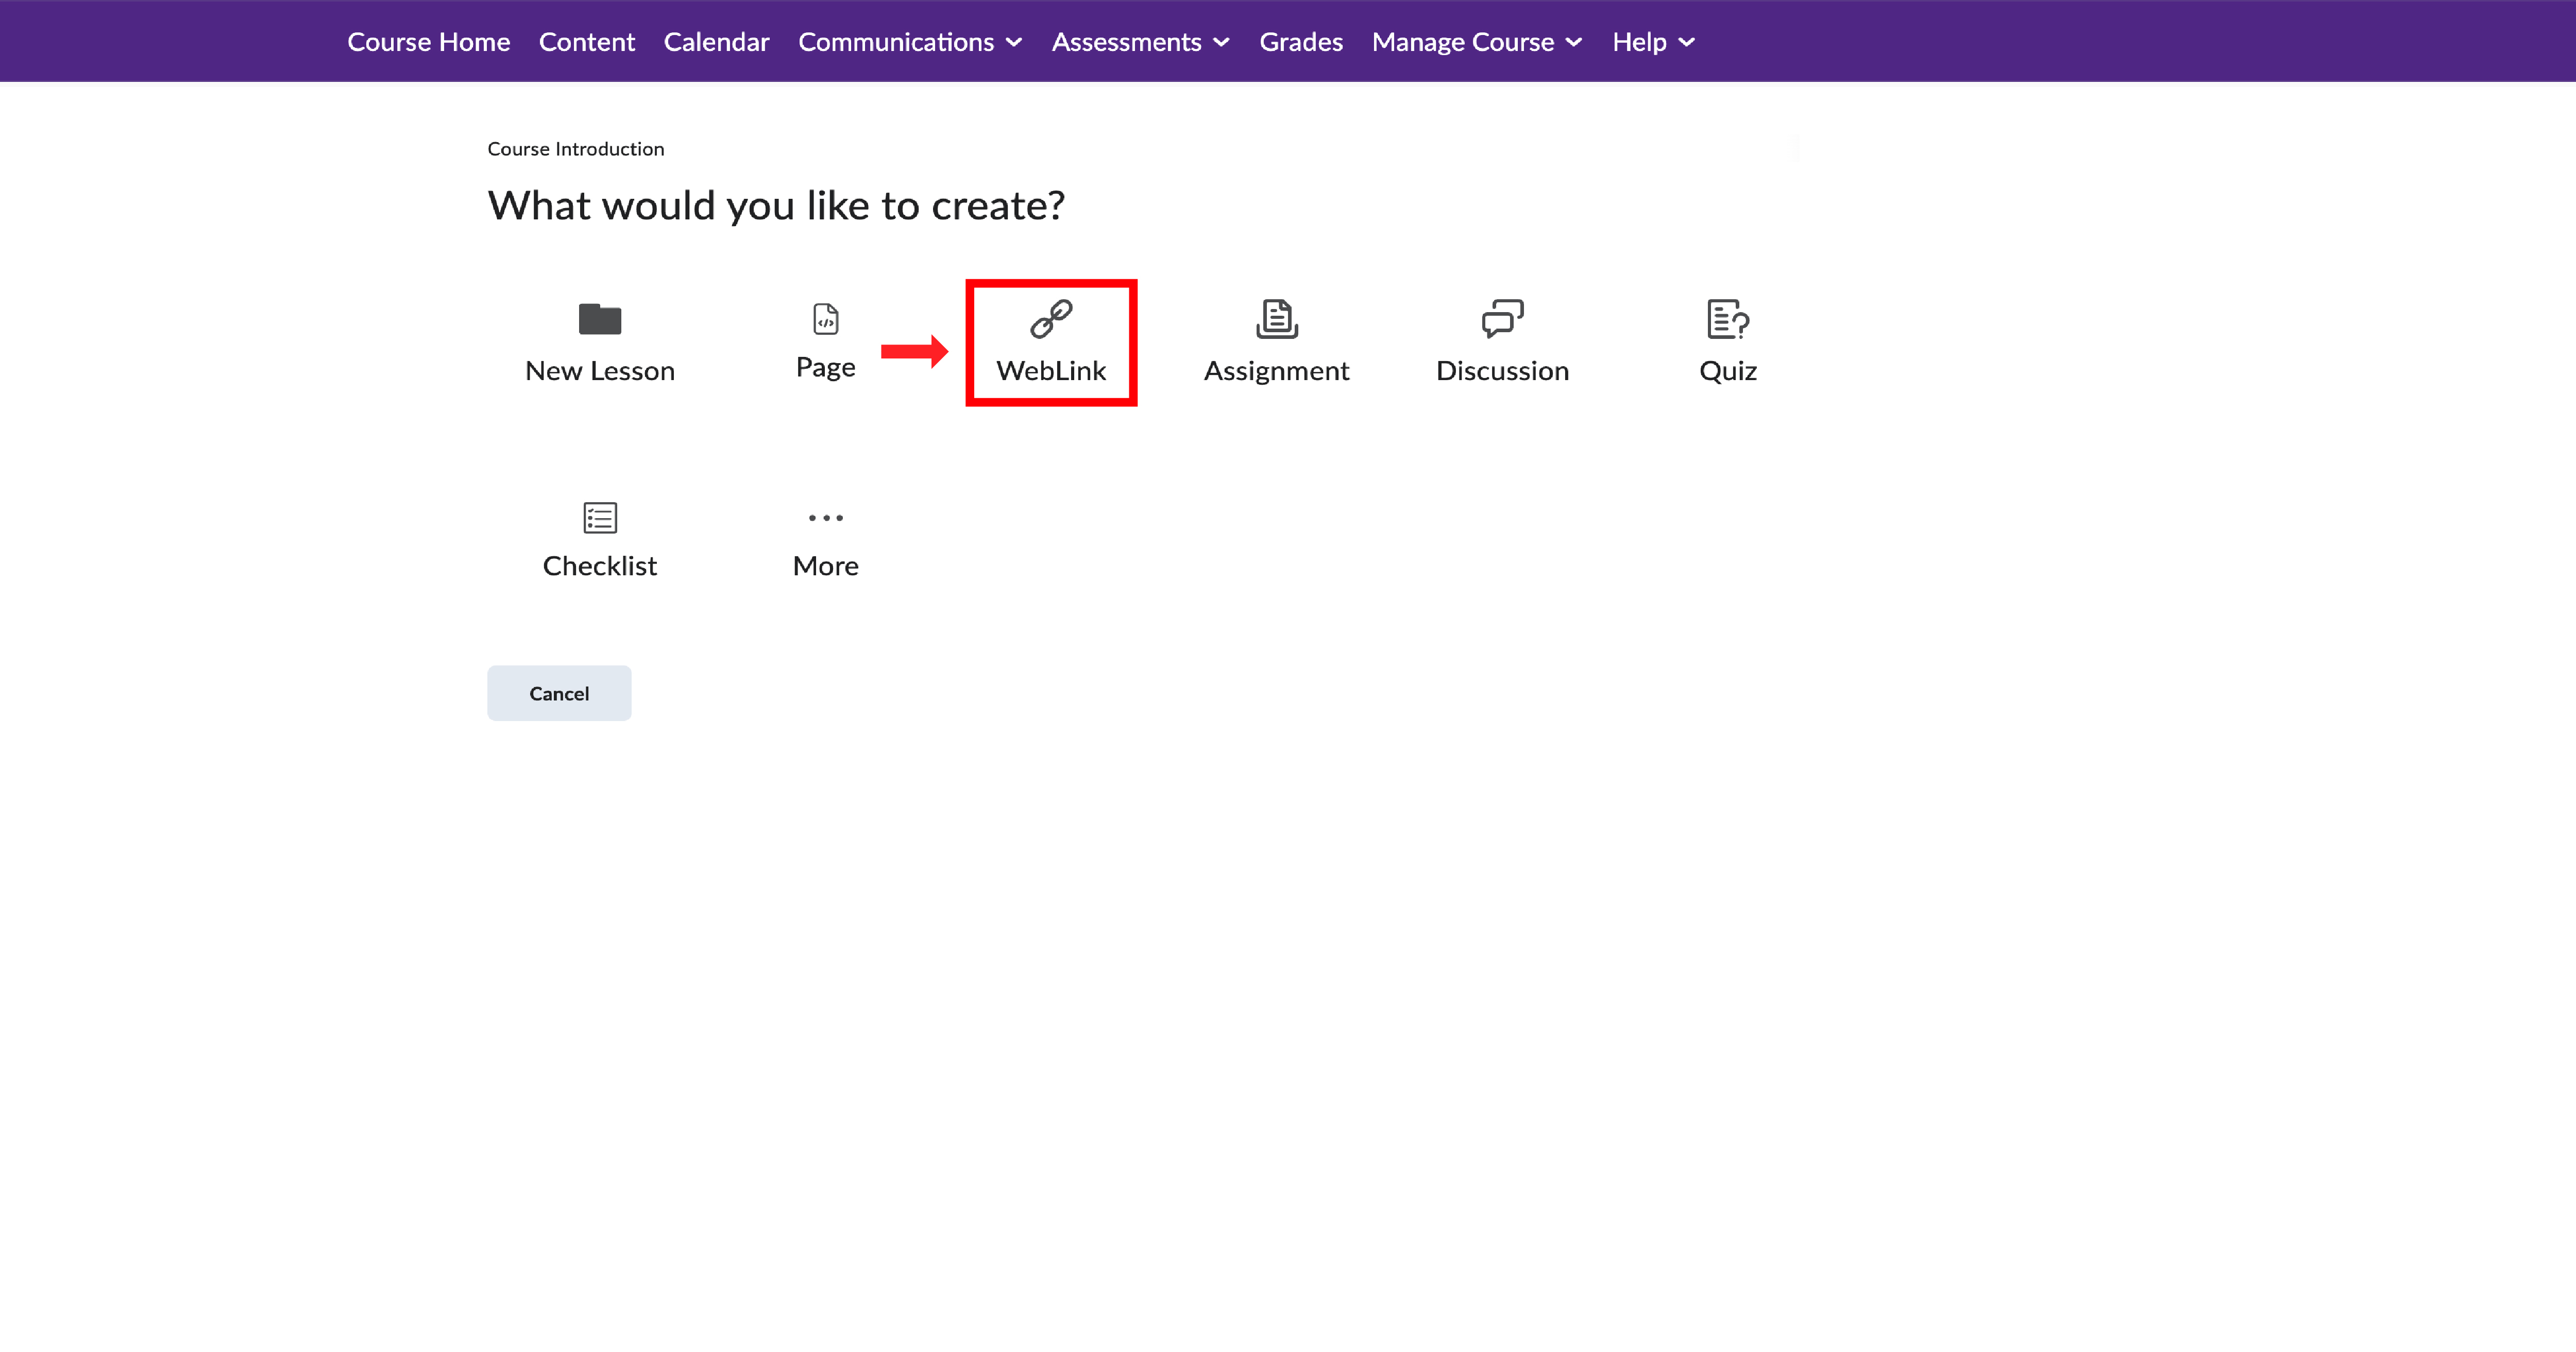
3. Insert the title and link (Proctortrack Student Support), and select the option to open in a new tab.
4. Finally, click on "Save and Close" to complete the process.
For more information on Proctortrack, visit: Instructors -Use of Proctortrack.
For support with Proctortrack, please refer to eCampusOntario’s Instructor guide here https://ecampusontario.pressbooks.pub/proctortrack/, or contact Proctortrack directly at https://proctortrack.com/support/.
For more information on the student onboarding process, visit: https://ecampusontario.pressbooks.pub/proctortrack/chapter/creating-an-onboarding-exam/
To link course readings and research guides to your course page, please follow these steps:
1. Log in to your account and go to the content tool on the navigation bar of your course page.
2. Select the unit where you want to add either Course Readings or Research Guides.
3. Click on 'Add Existing' located on the top right of your screen and choose 'External Tool Activity'.
Option A - Course Readings
4. A new window will open, select 'Course Readings' from the list.
5. You will then see a list of readings that you have set up with the library for your course.
Learn more about course readings: Course Readings - Western Libraries - Western University (uwo.ca)
Option B - Research Guides
4. Choose 'Research Guides' from the list.
5. A new window will open that allows you to search for research guides on the Library site.
Learn about research guides: Research Guides at Western University (uwo.ca)
PeerMark is a peer review assignment tool offered by Turnitin. It enables students to read, review, and evaluate each other's work and get an opportunity to learn from a peer's feedback.
Please note that students are not permitted to assign grades for the peer reviews for OWL Brightspace. Only Instructors can grade.
Video: About PeerMark Assignments
Learn more about PeerMark: Creating a PeerMark assignment and questions
To add/enable the Turnitin Peer Review tool, please follow these steps:
1. Log in to your Brightspace account and navigate to the content tool on the navigation bar of your course page.
2. Create or look for the unit where you want to add Proctortrack.
3. Click on 'Add Existing' located on the top right of your screen, and select 'Turnitin Feedback Studio'.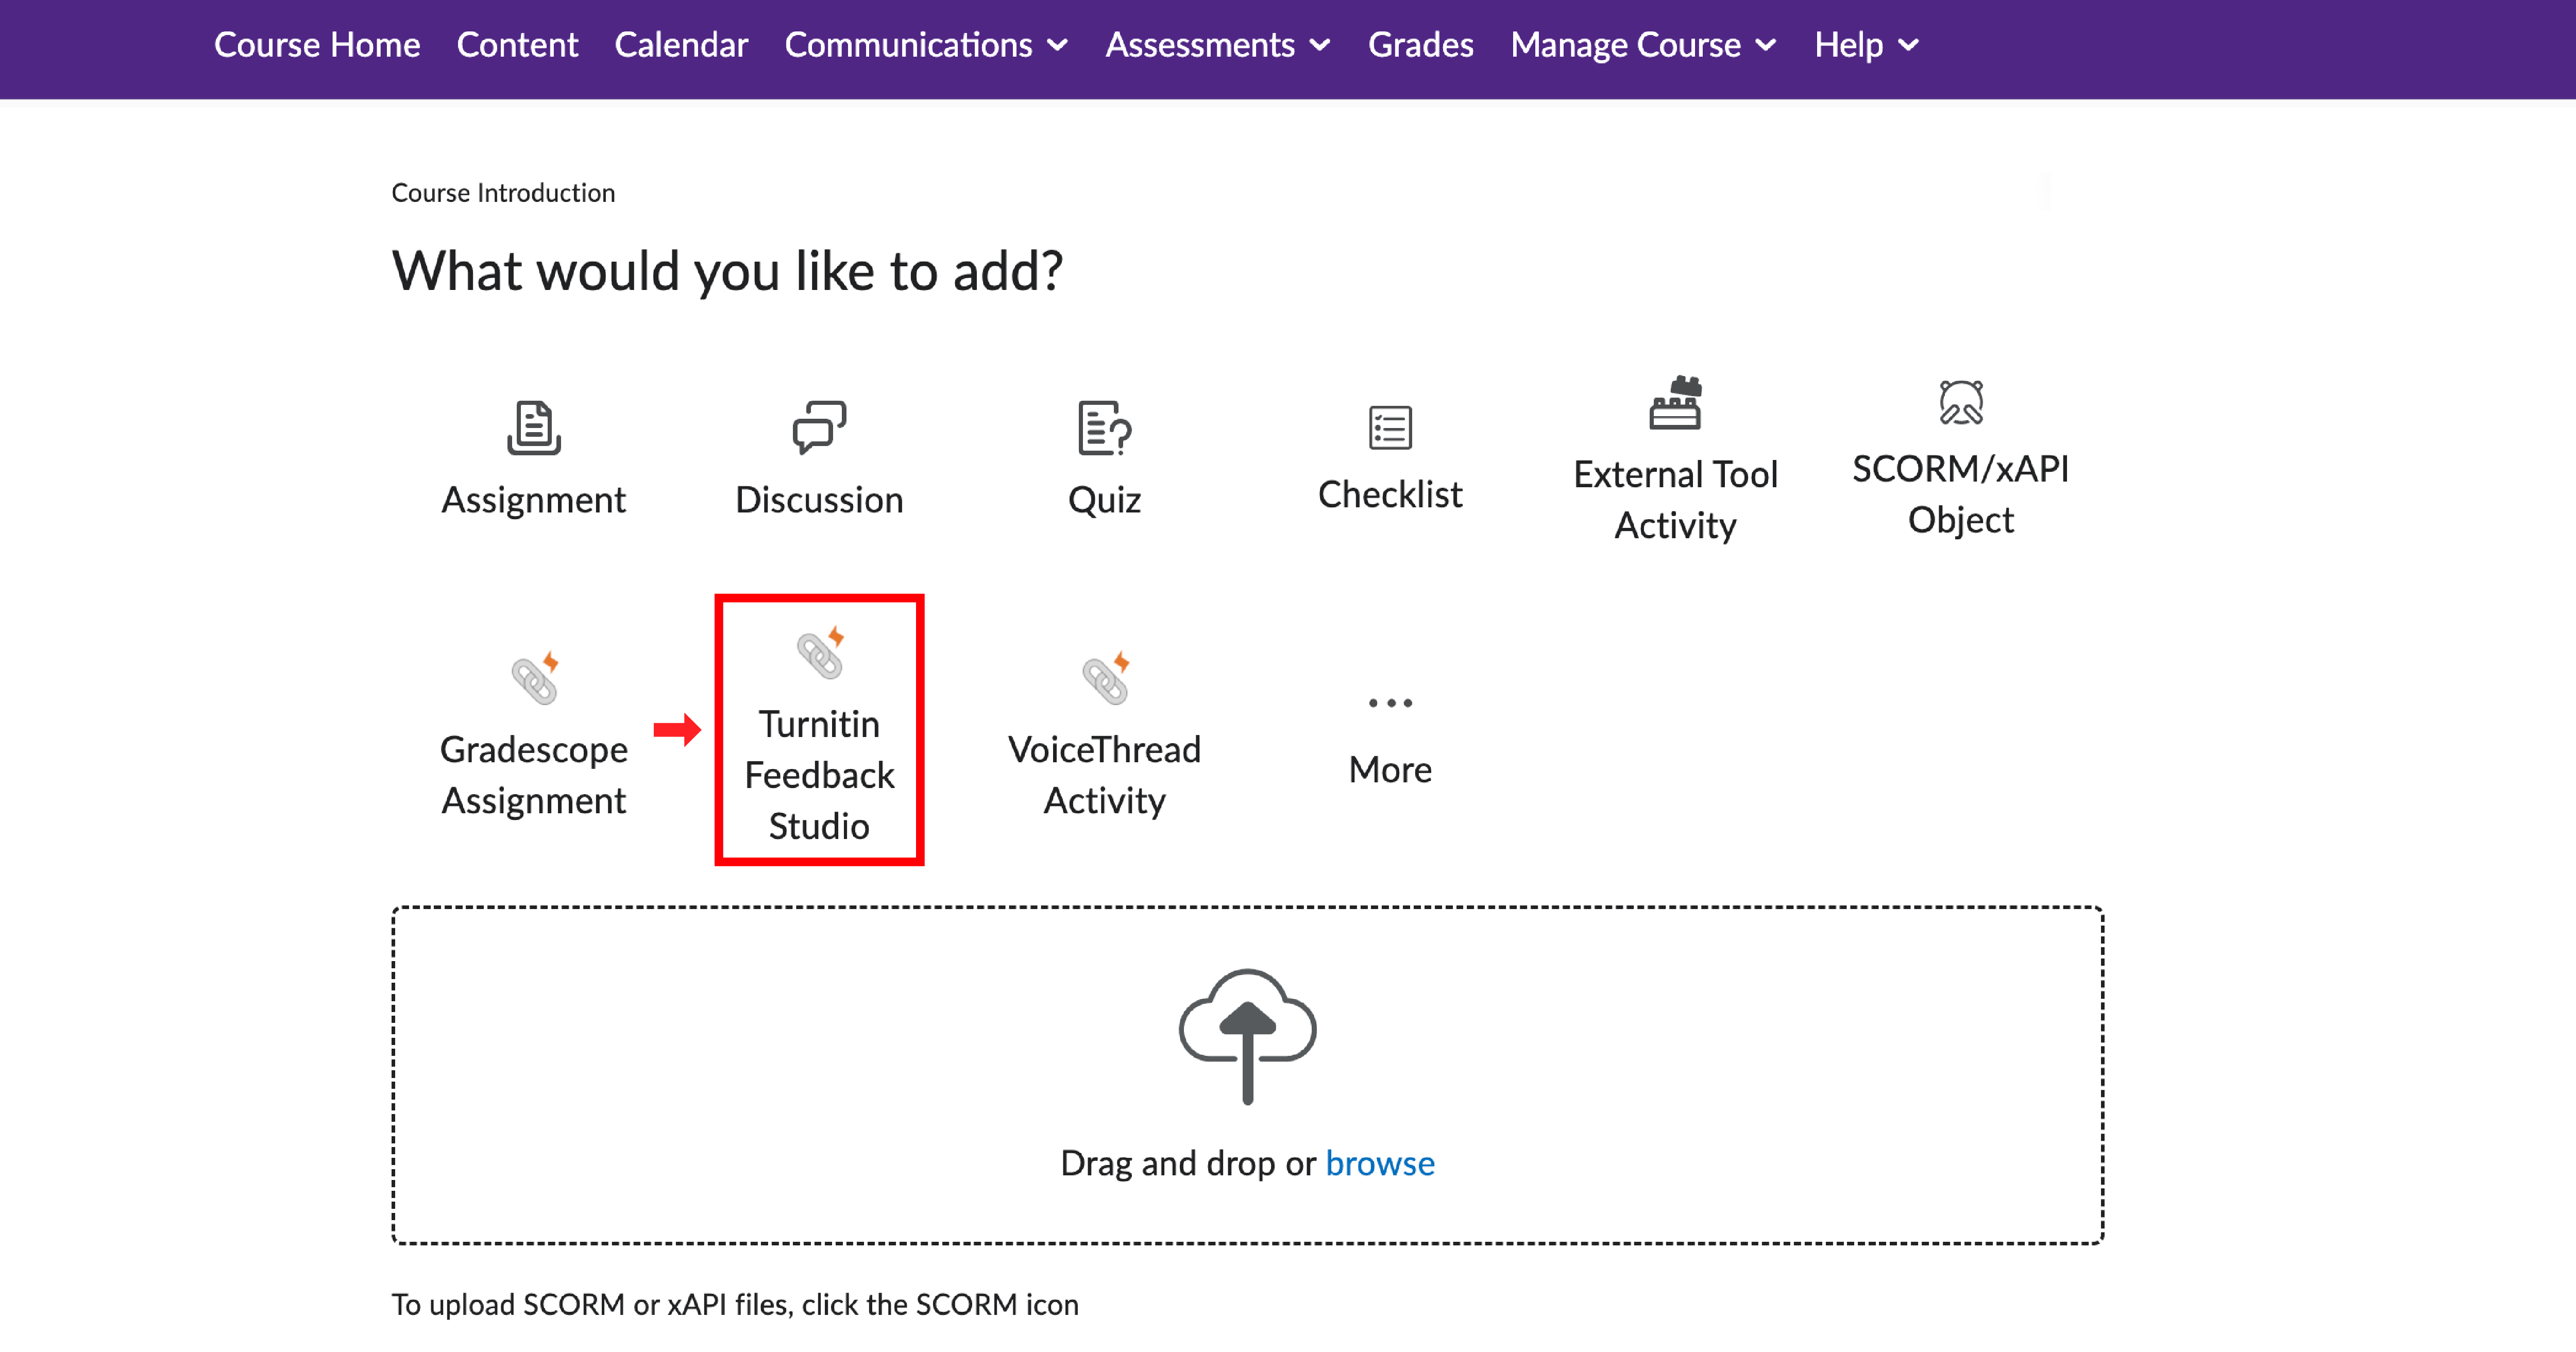
4. A new window will open with an option to create or copy an existing assignment (Only existing assignments with Turnitin may appear).
5. Once you have created or copied an assignment, you can check the "Enable PeerMark" box before submitting.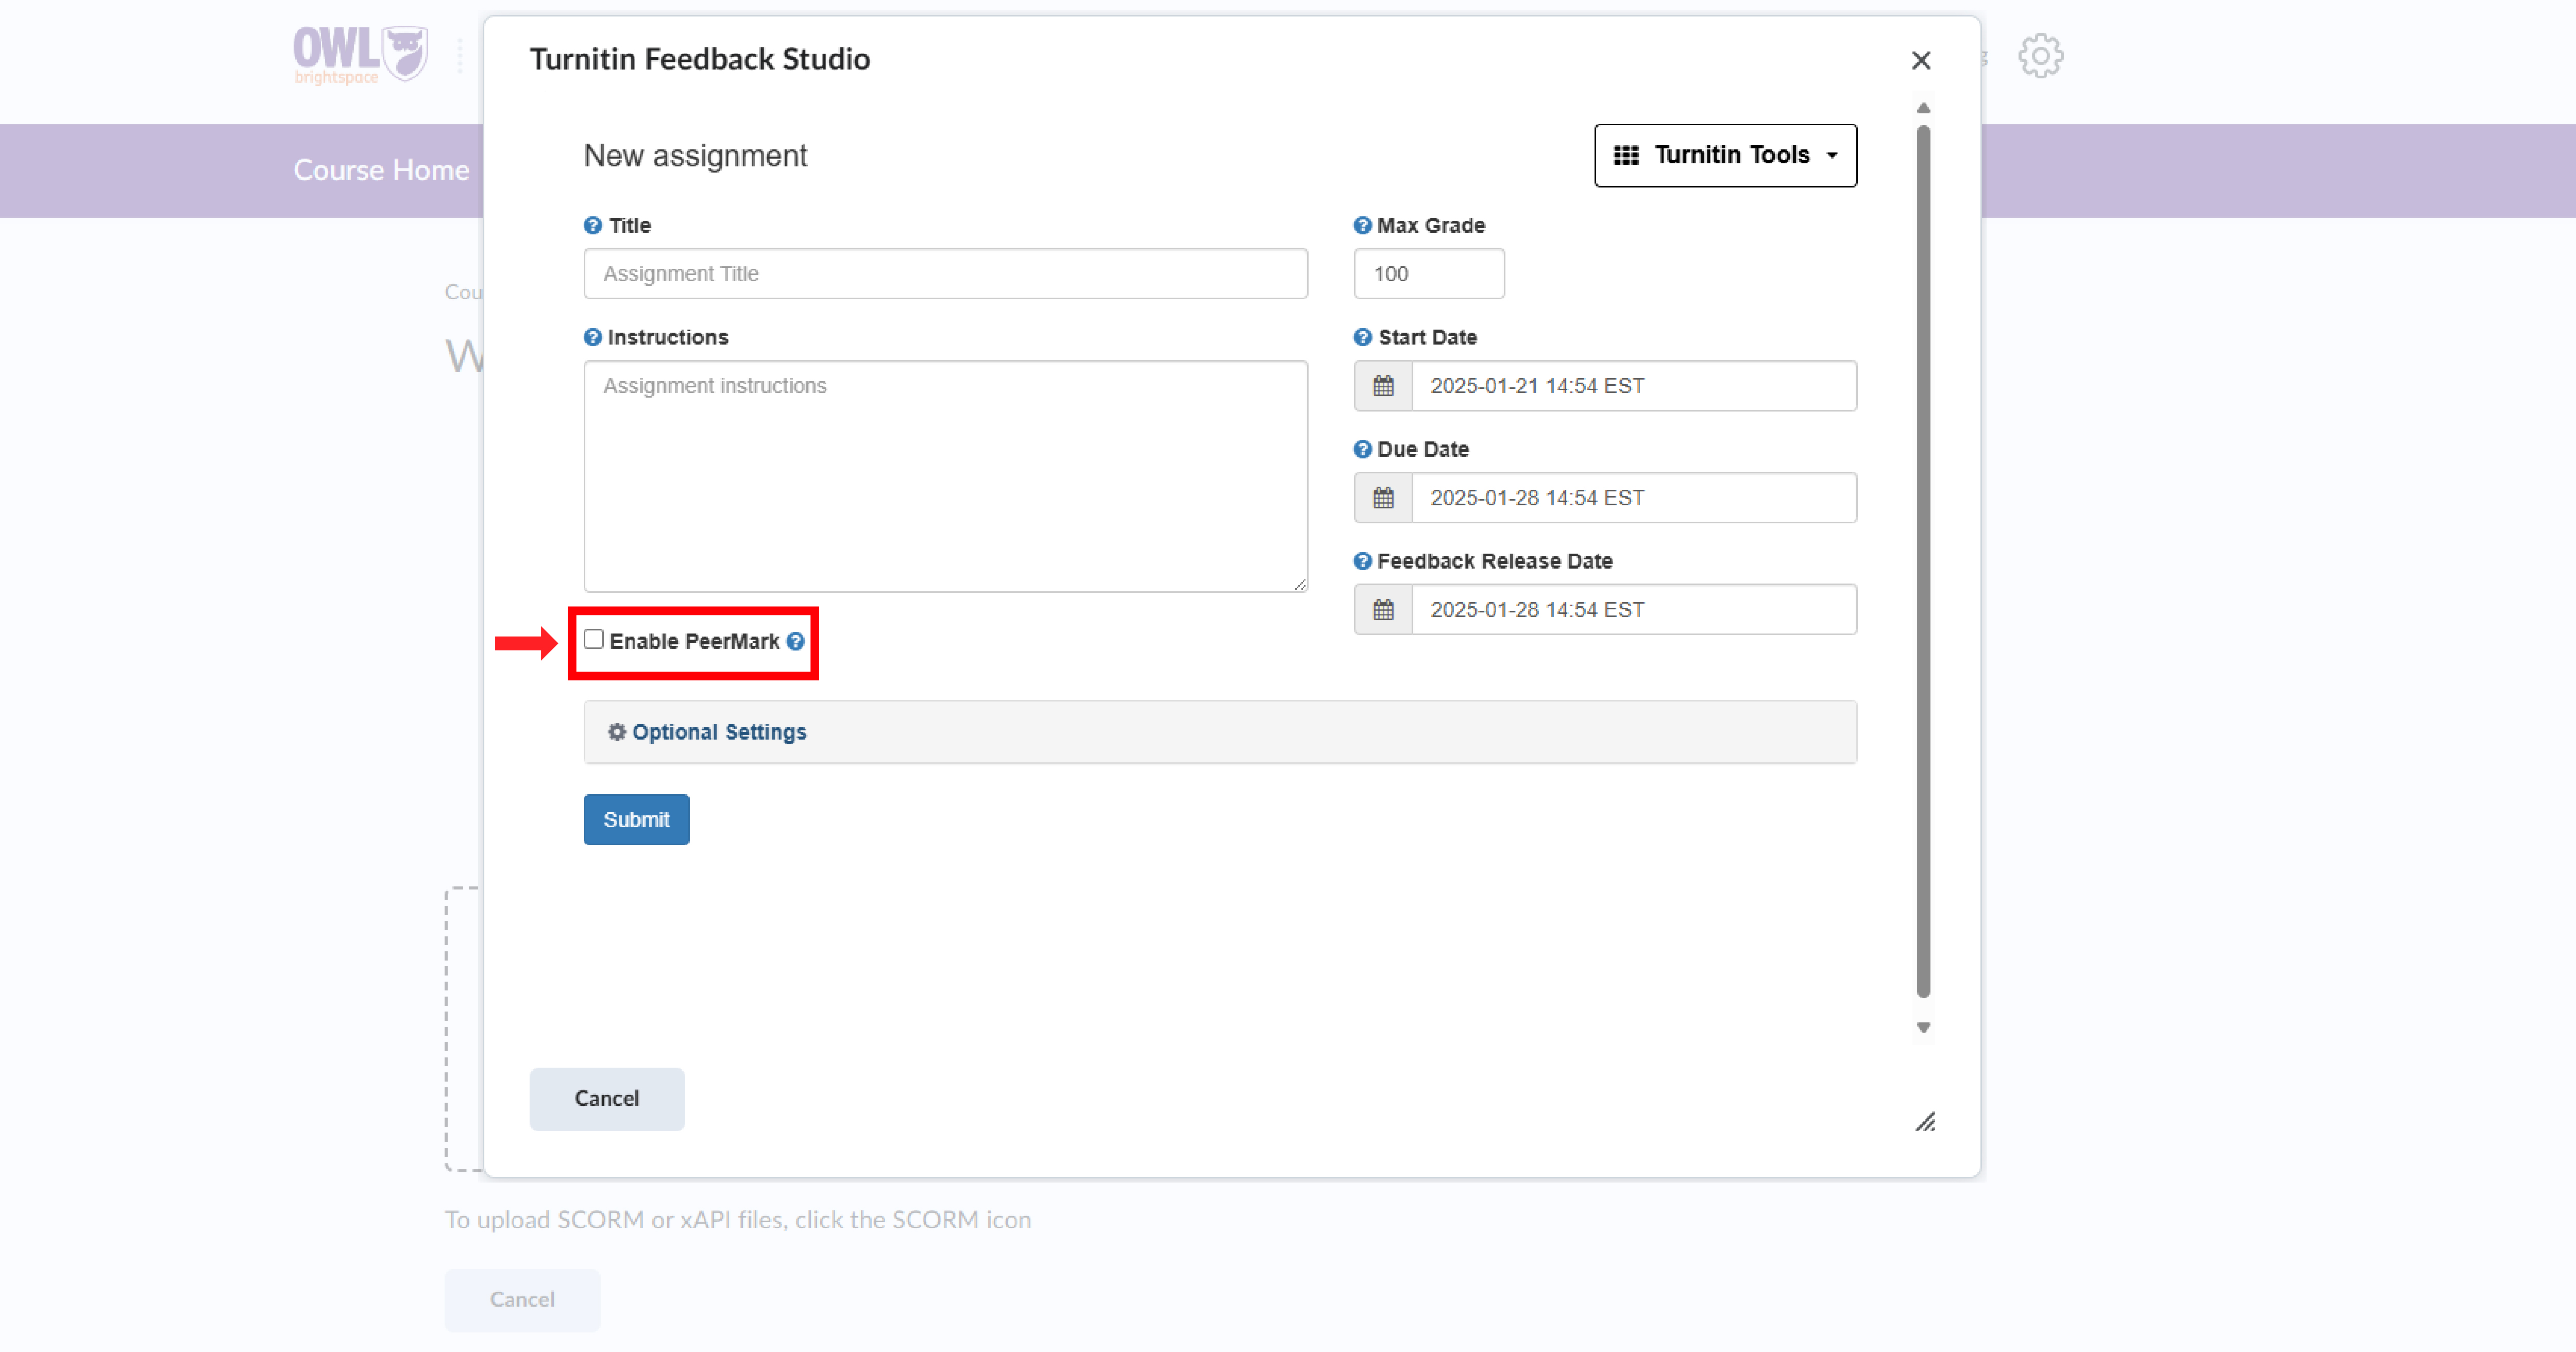
6. Once your assignment is submitted, you can edit the PeerMark setup options. Use the PeerMark Setup feature to specify how you would like students to review other assignments. You can access PeerMark Reviews to view the list of all works that have been reviewed once they are ready.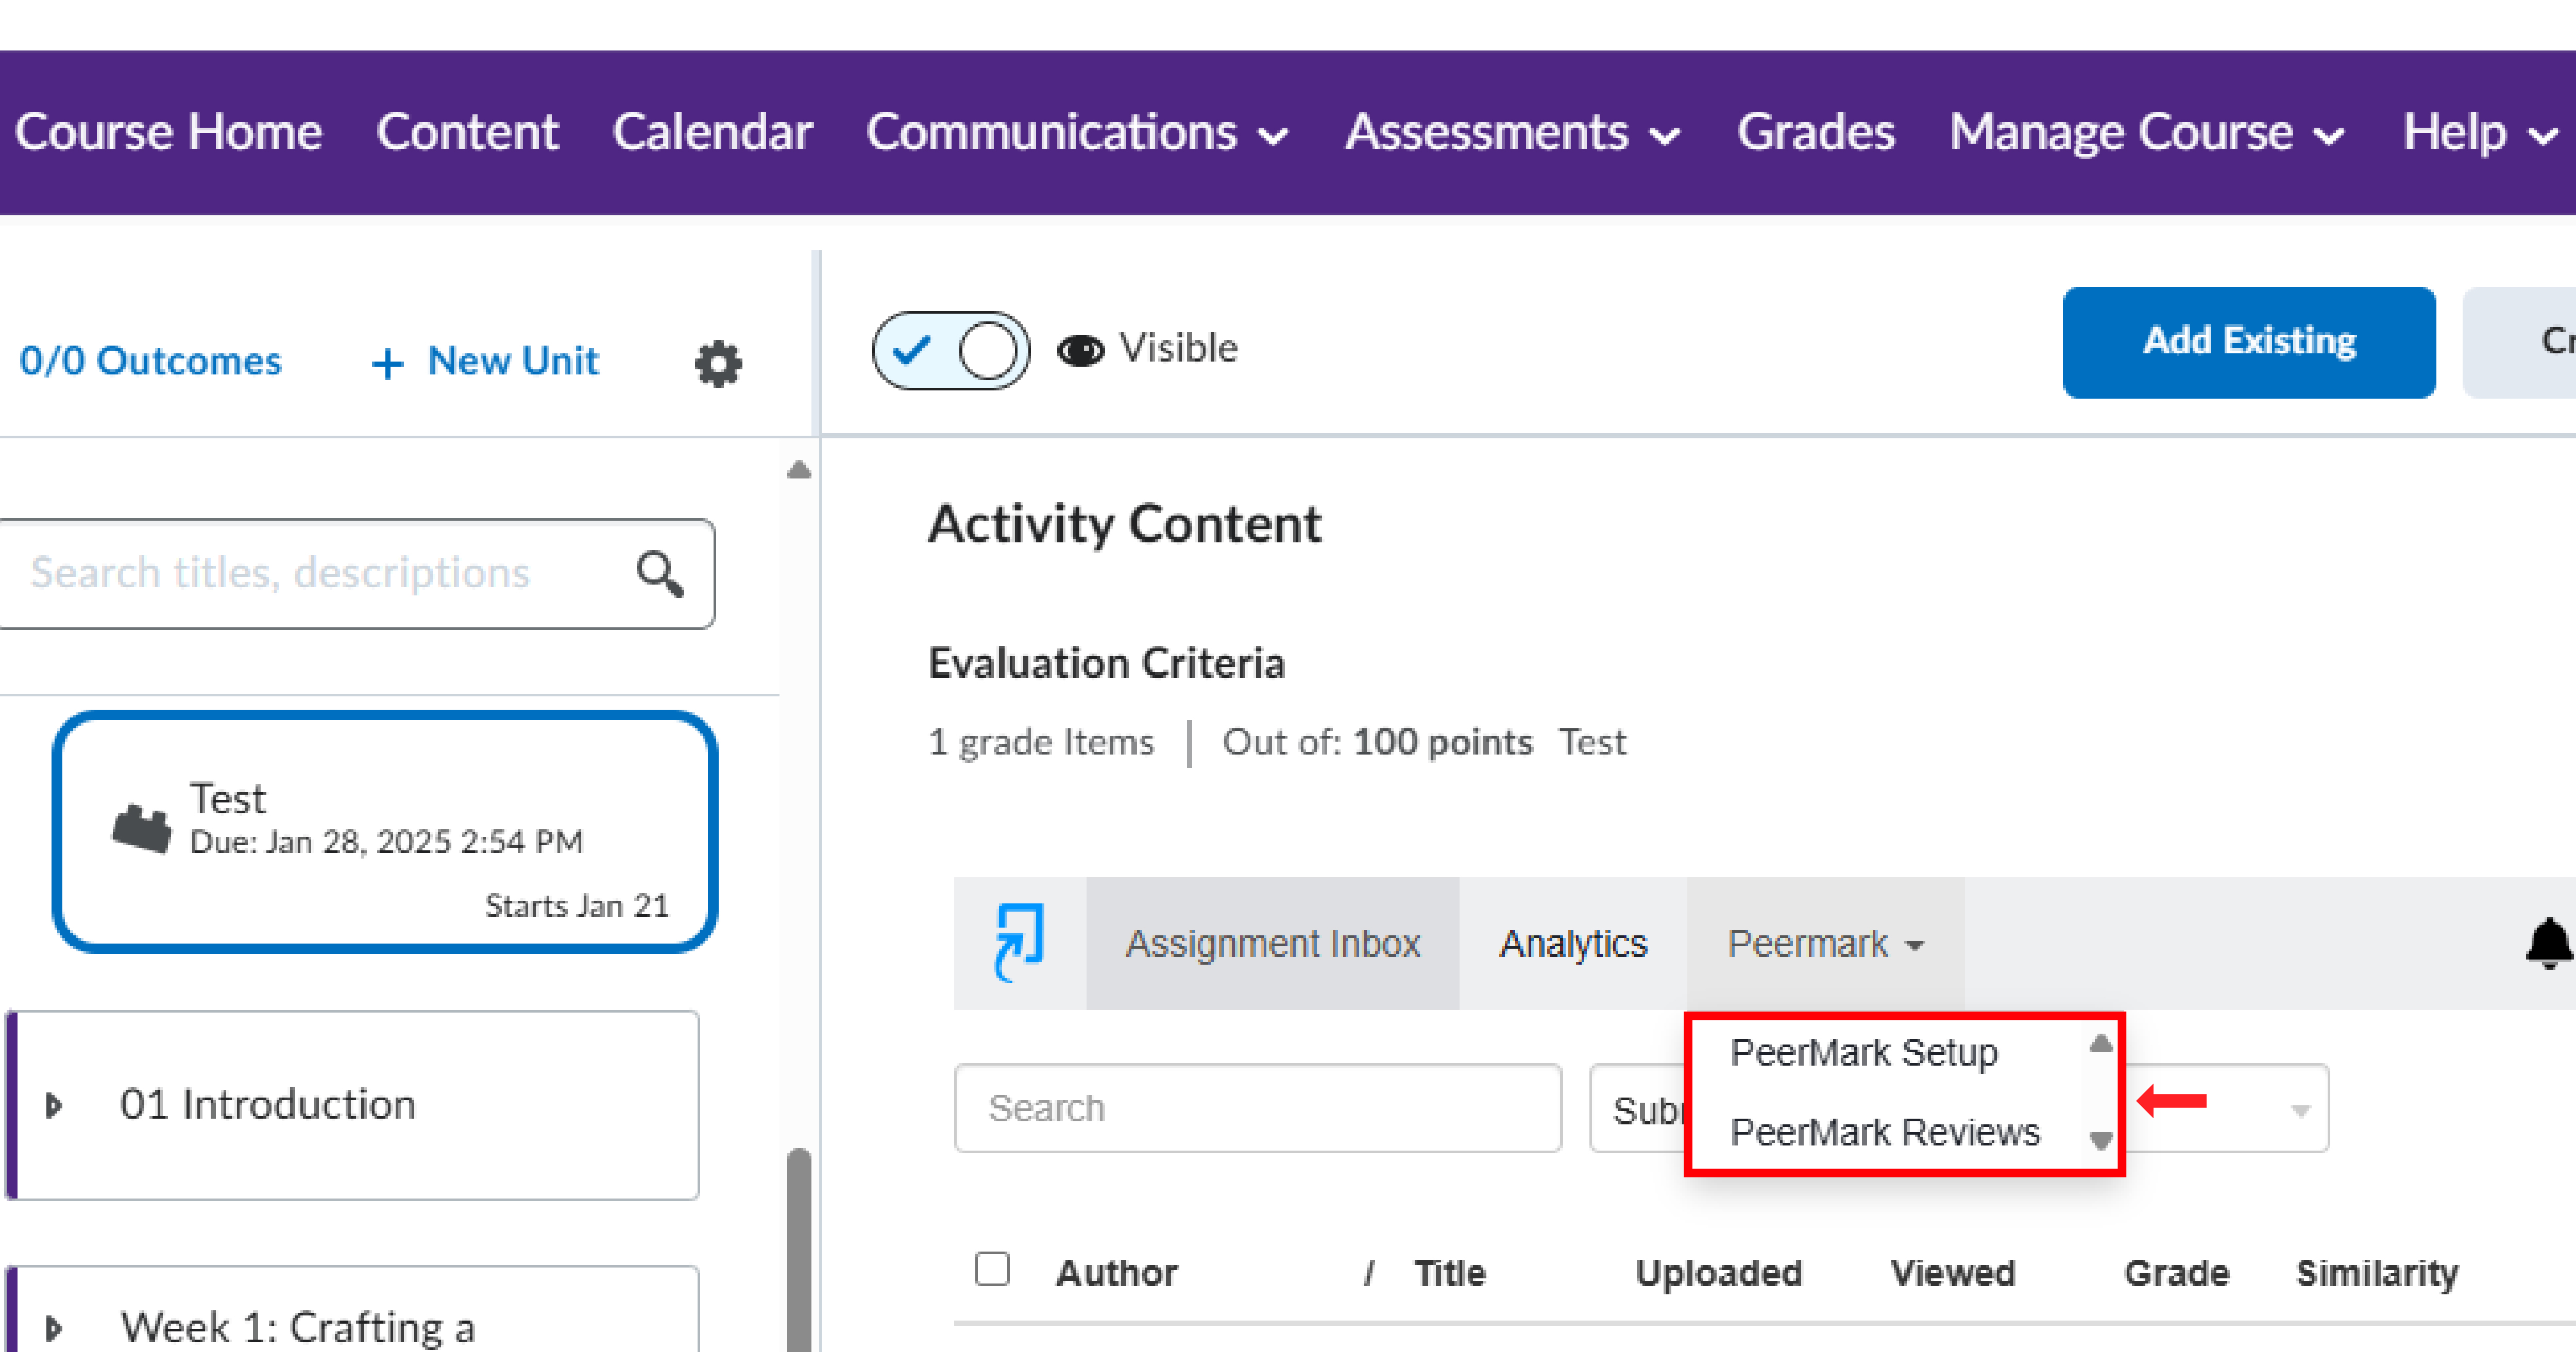
A) Using Bongo Virtual Classroom:
1. Log in to your account and go to the content tool on the navigation bar of your course page.
2. Find the unit where you want to add your virtual classroom meeting, then click on 'Add Existing' located on the top right of your screen and select 'More'.
3. A new window will open with an option to choose either a course material or a Third-Party Tool.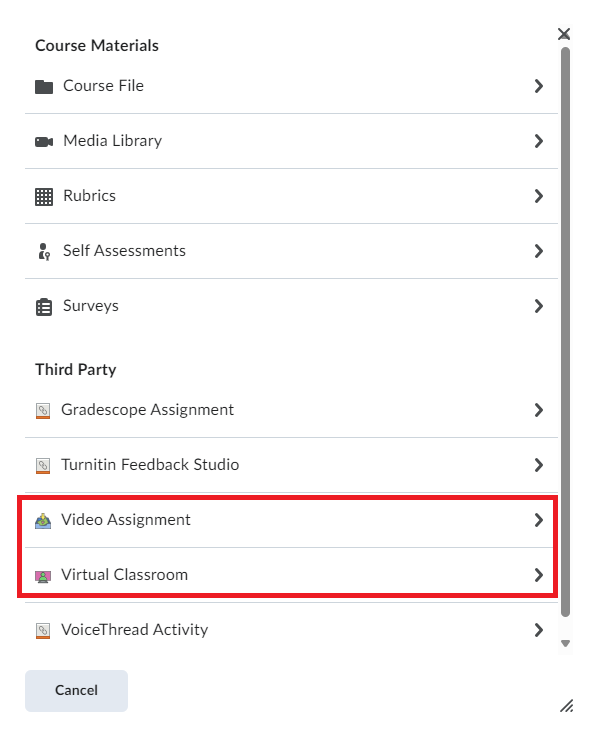
4. Under Third-Party Tools, select either Video Assignment or Virtual Classroom, depending on what option you are looking for.
For more information on how to use Bongo please visit here: Get Started & Set up – Bongo: Help Center (zendesk.com)
B) Using the Groups and Calendar Tools
Brightspace does not have a native "sign-up sheet" feature, but you can effectively repurpose various tools within the platform to serve this function.
You can utilize the Groups and Calendar tools in OWL Brightspace to set up a scheduling system for your students to book a meeting with you. This method can be used to create either a one-on-one appointment or a drop-in style for multiple students.
Below are the steps for setting up groups and creating calendar invites with meeting links:
Step 1: Create Groups
- Log in to OWL Brightspace
- In the navigation bar, go to Communication and select Groups.
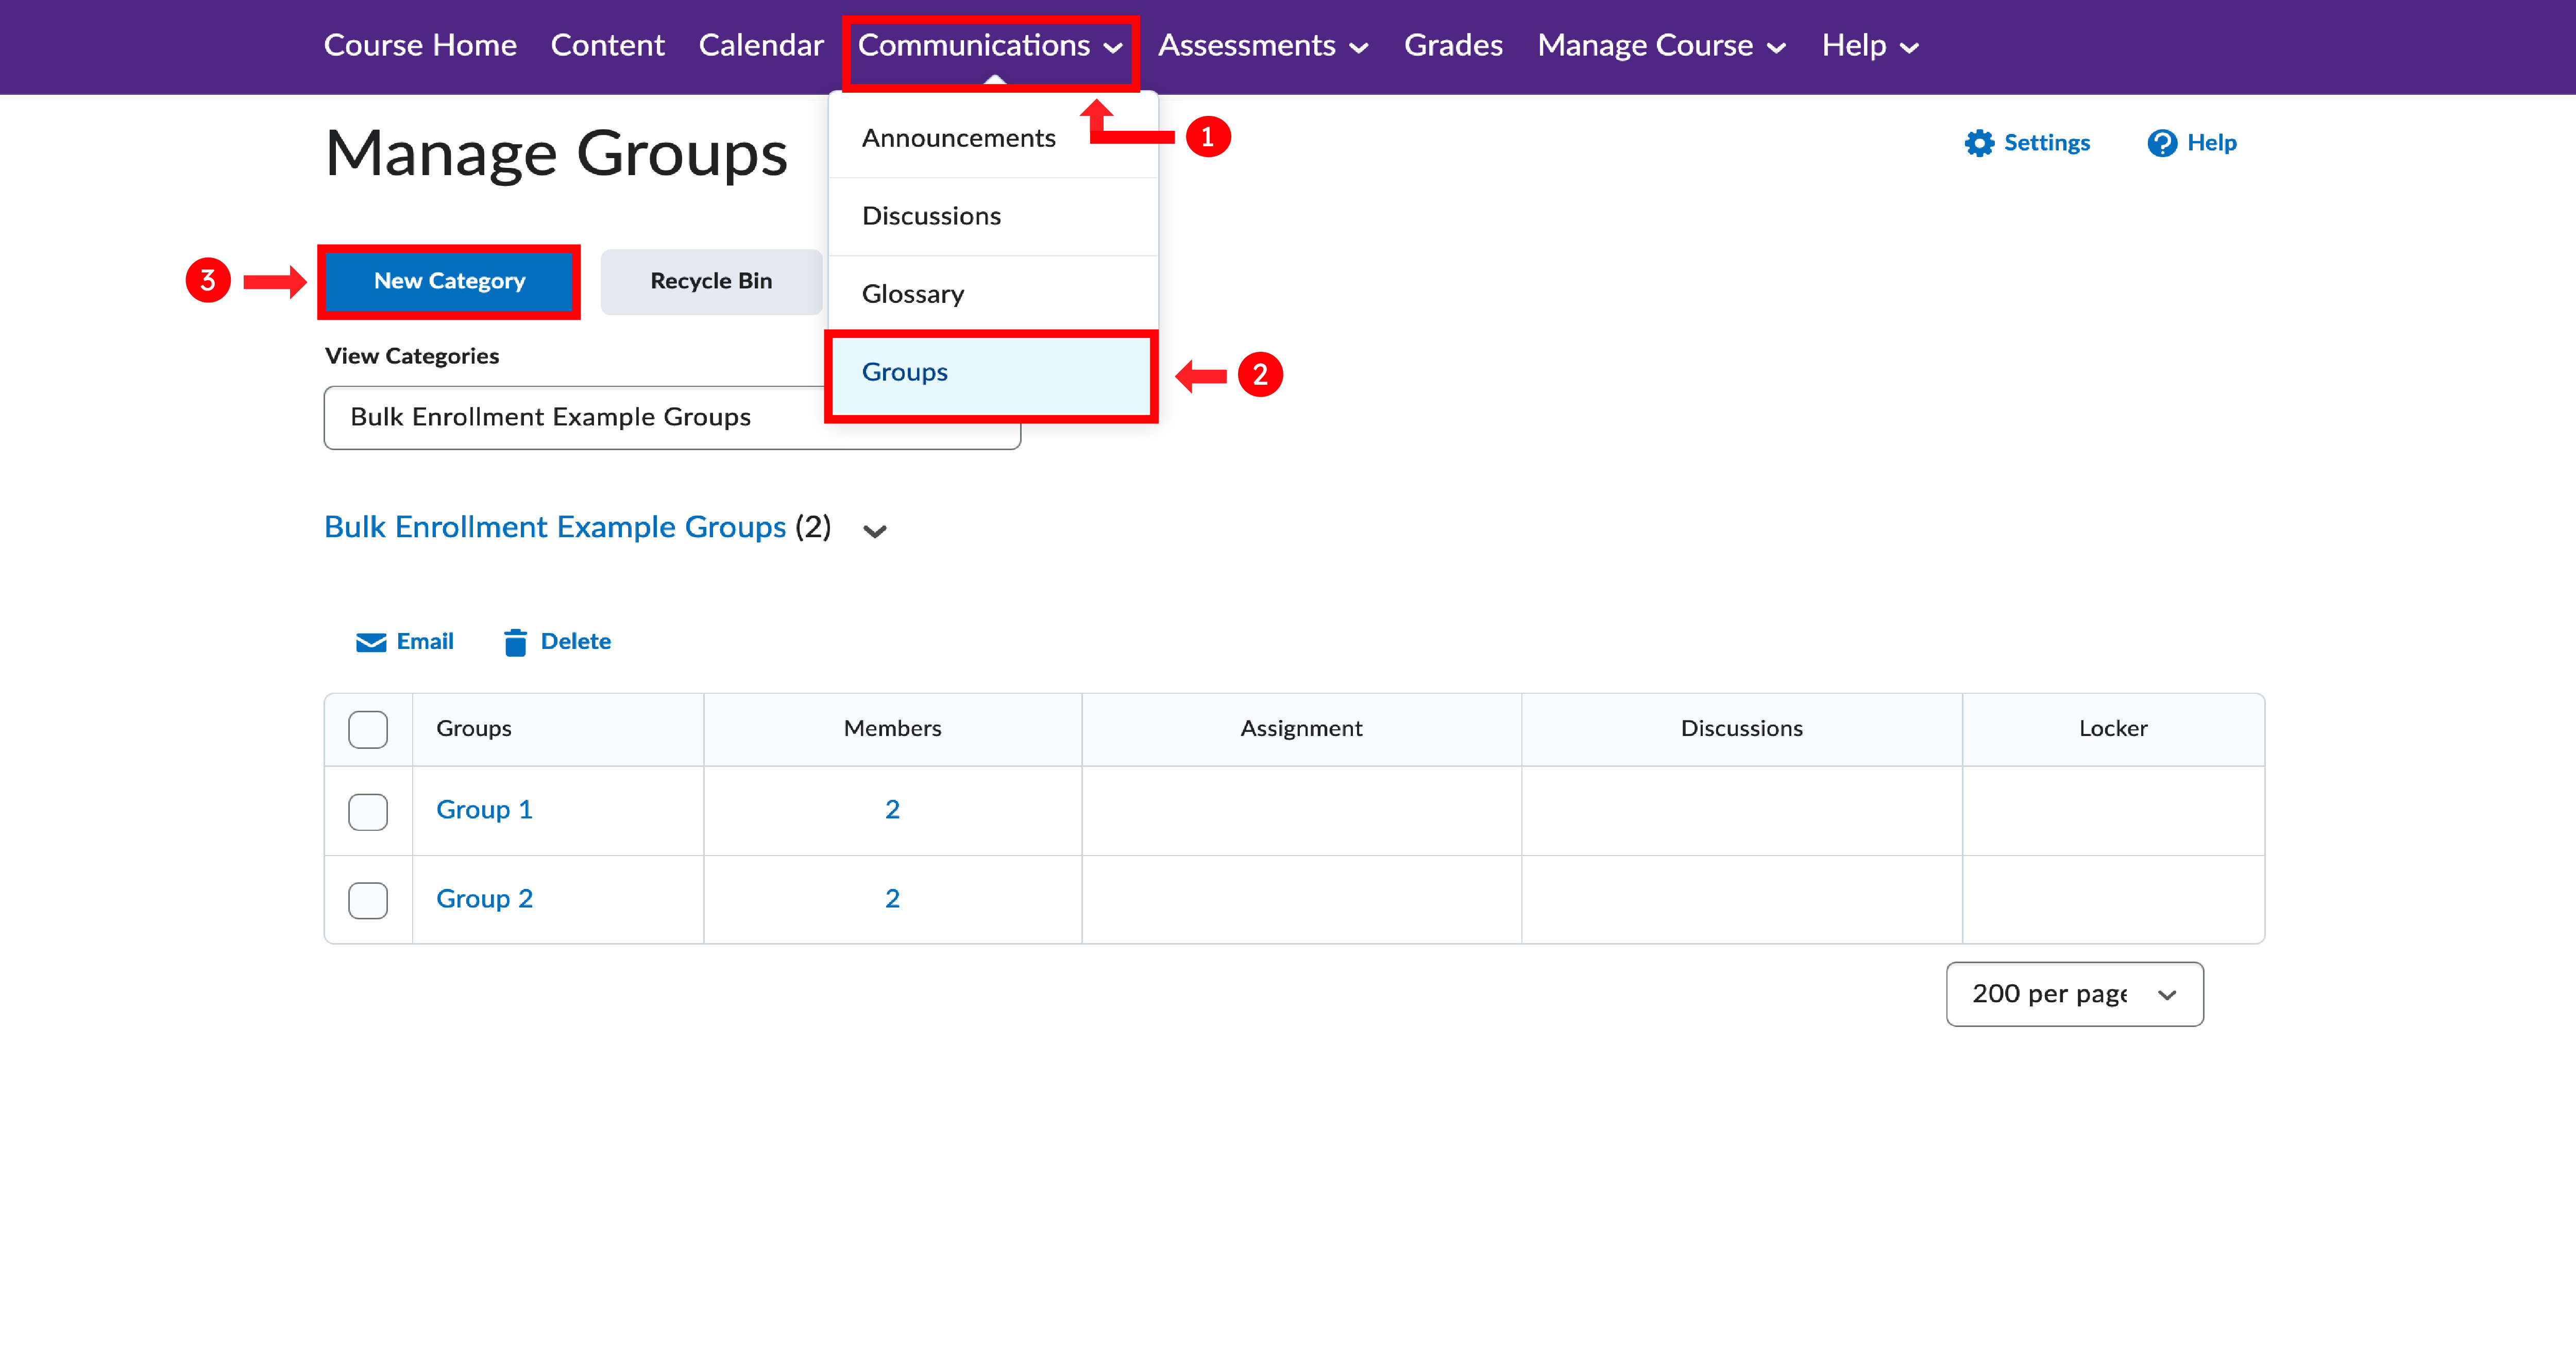
- Set up groups with limited enrollment to allow a specific number of students to join. For example, if you have 5 office hour slots, create 5 groups named after each time slot and set the enrollment limit to 1 (or more if you're okay with having multiple students in one slot).
Step 2: Create a Brightspace Calendar Invite with a meeting Link
- On the navigation bar, click on Calendar.
- Select Create Event on the Calendar page.
- Enter a name for the event, for example, "One-on-One with Your Instructor," and add a description if needed.
- Under the Attendees option, choose the group(s) you created earlier.
- Select the time for the event or set it to recur regularly. You can also add restrictions like making it visible a certain number of days before the event starts.
- Finally, add your meeting link in the location space and then create.
3. Click on 'Add Existing' at the top right of your screen, and then select 'External Tools Activity.'
4. From the list, choose Panopto Portal.