Search Website
Content
- Start Date: This is the date when the topic or module becomes available. Learners can see the titles of the topics or modules beforehand, but they cannot access the content until the start date.
- Due Date: This is the date by which the topic or module should be completed (viewed). If content is overdue, it will appear in the Course Schedule area of the Content tool, along with a direct link to that specific topic or module.
- End Date: This is the date when the topic or module will no longer be available. If there is no due date set, this event will be displayed in the calendar.
Manage Files: This tool allows you to upload and organize folders of content within your course. It helps you quickly and easily manage your files.
1. You have organized folders on your computer that contain files for different modules. (Each module could represent a week of content, a theme, or a unit.)
2. You know how to compress a folder. (Please note that "Manage Files" only recognizes individual files or zipped folders.)
3. You have named your computer files according to the naming conventions you would like to see in your course. (For example, use "Weekly Overview and Objectives" instead of "Word Doc 1.")
Video (Tips for Using Manage Files):
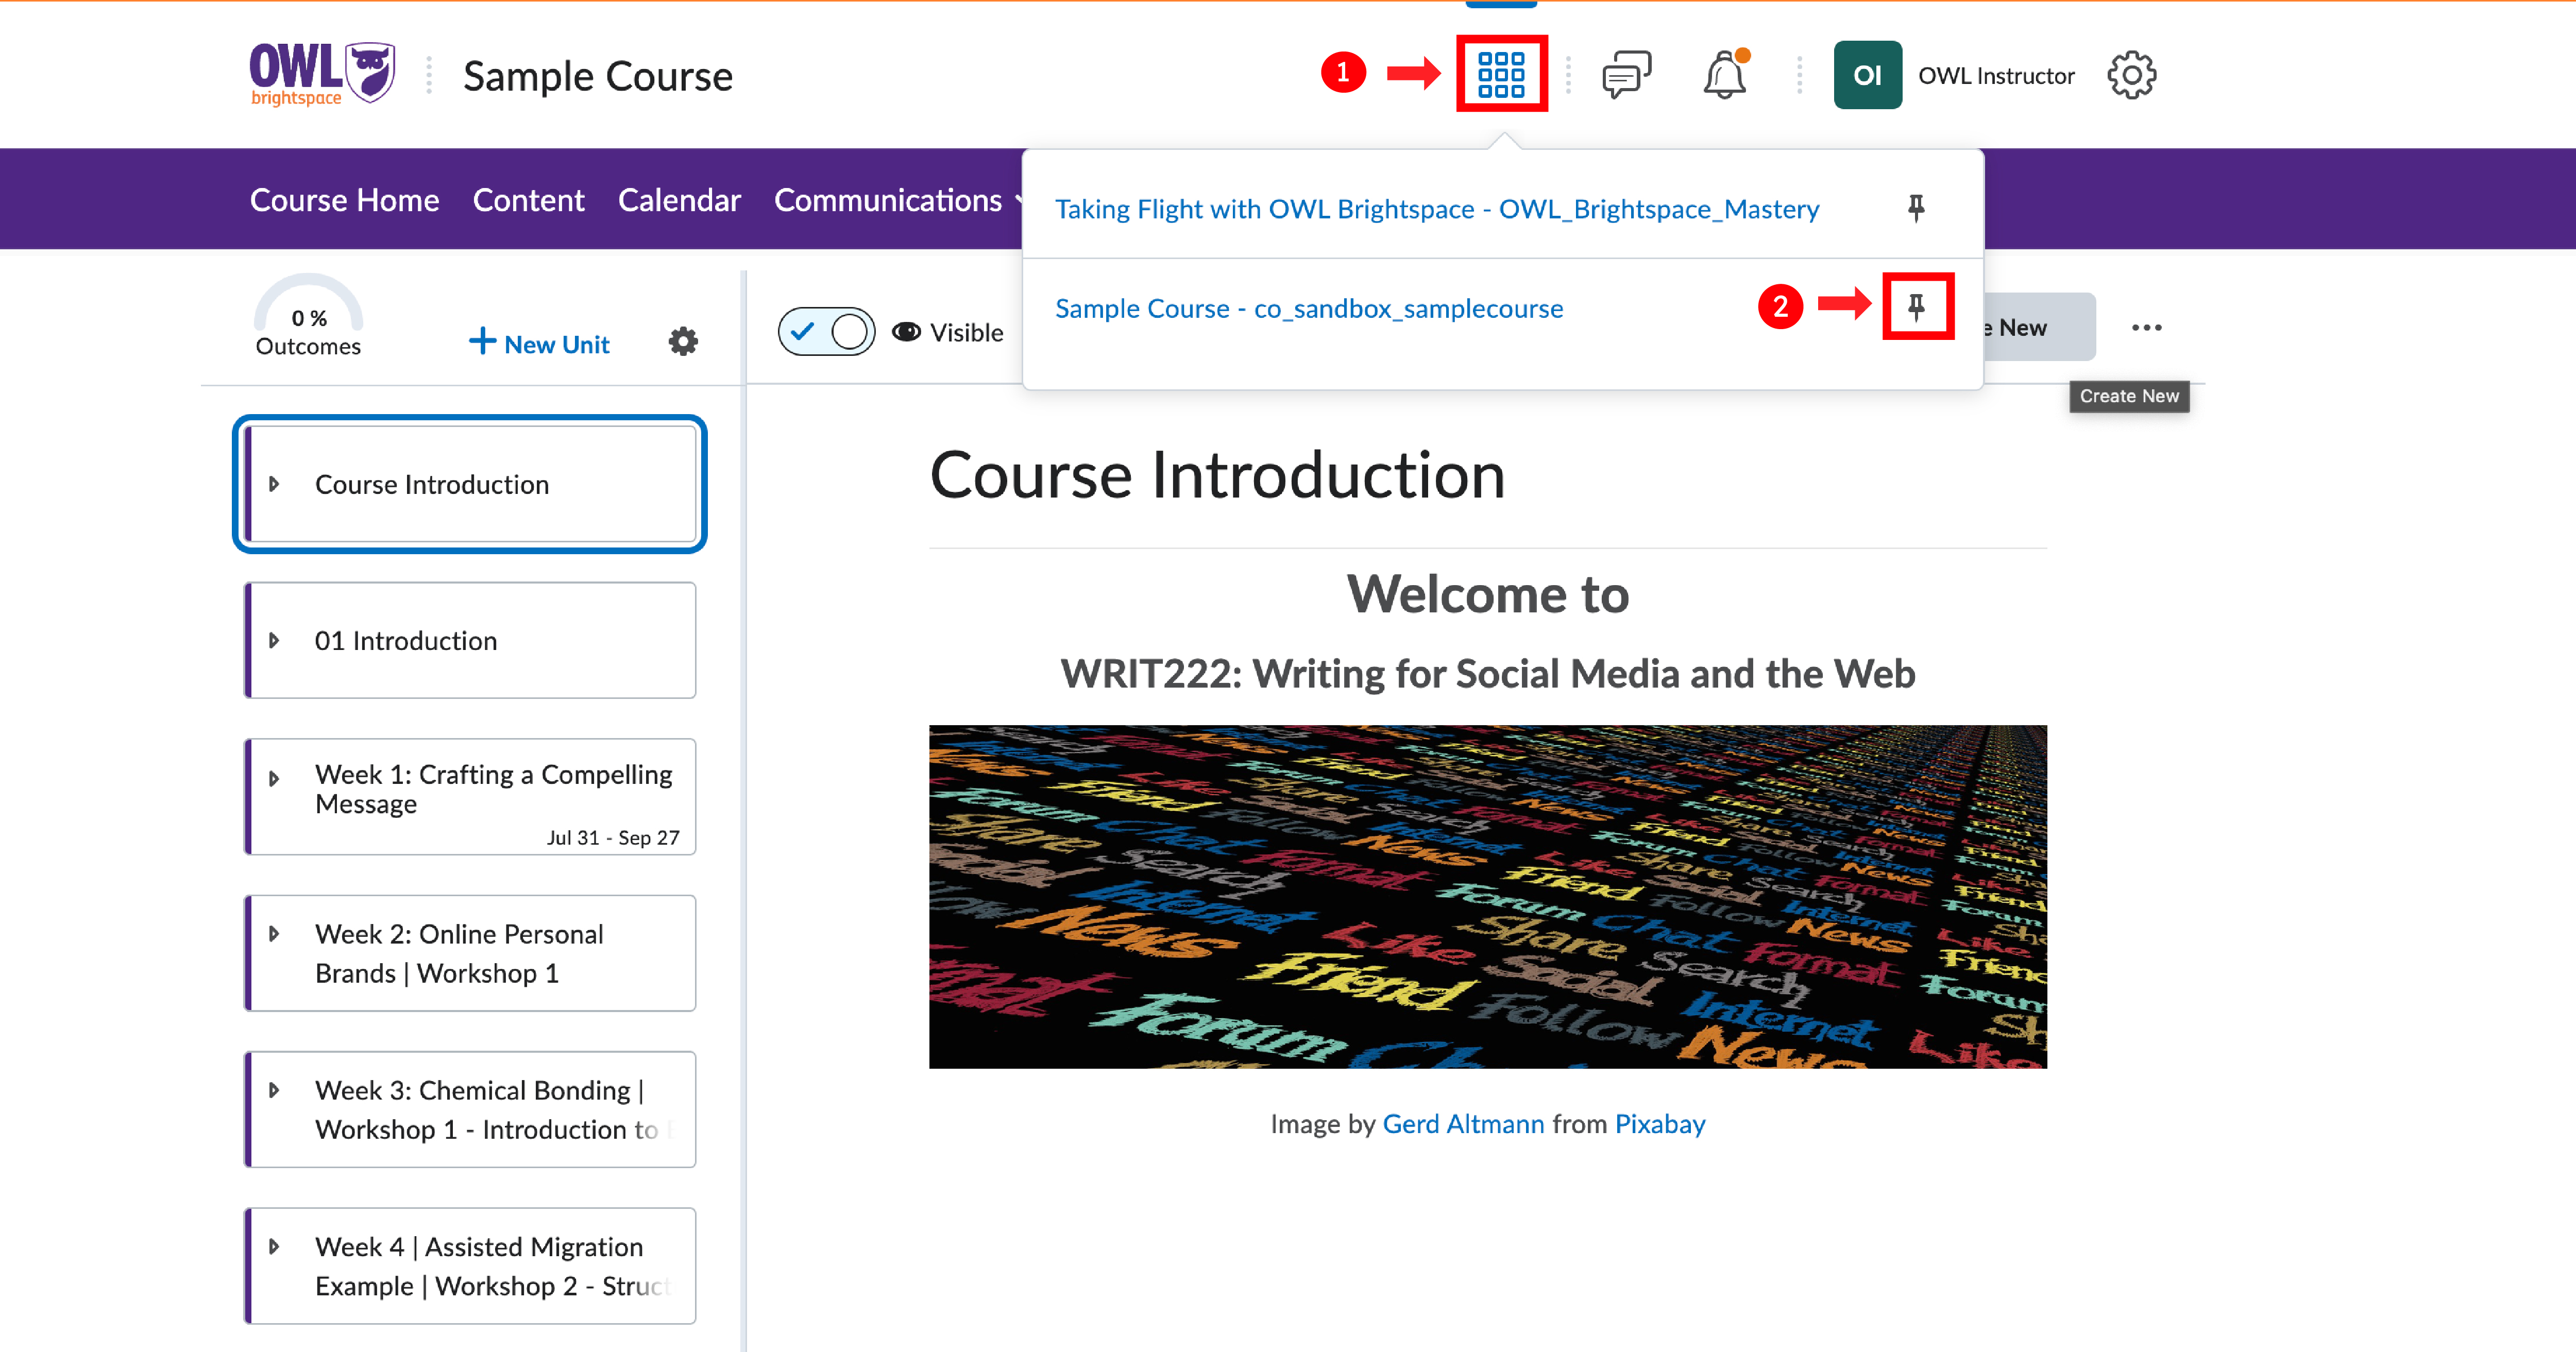
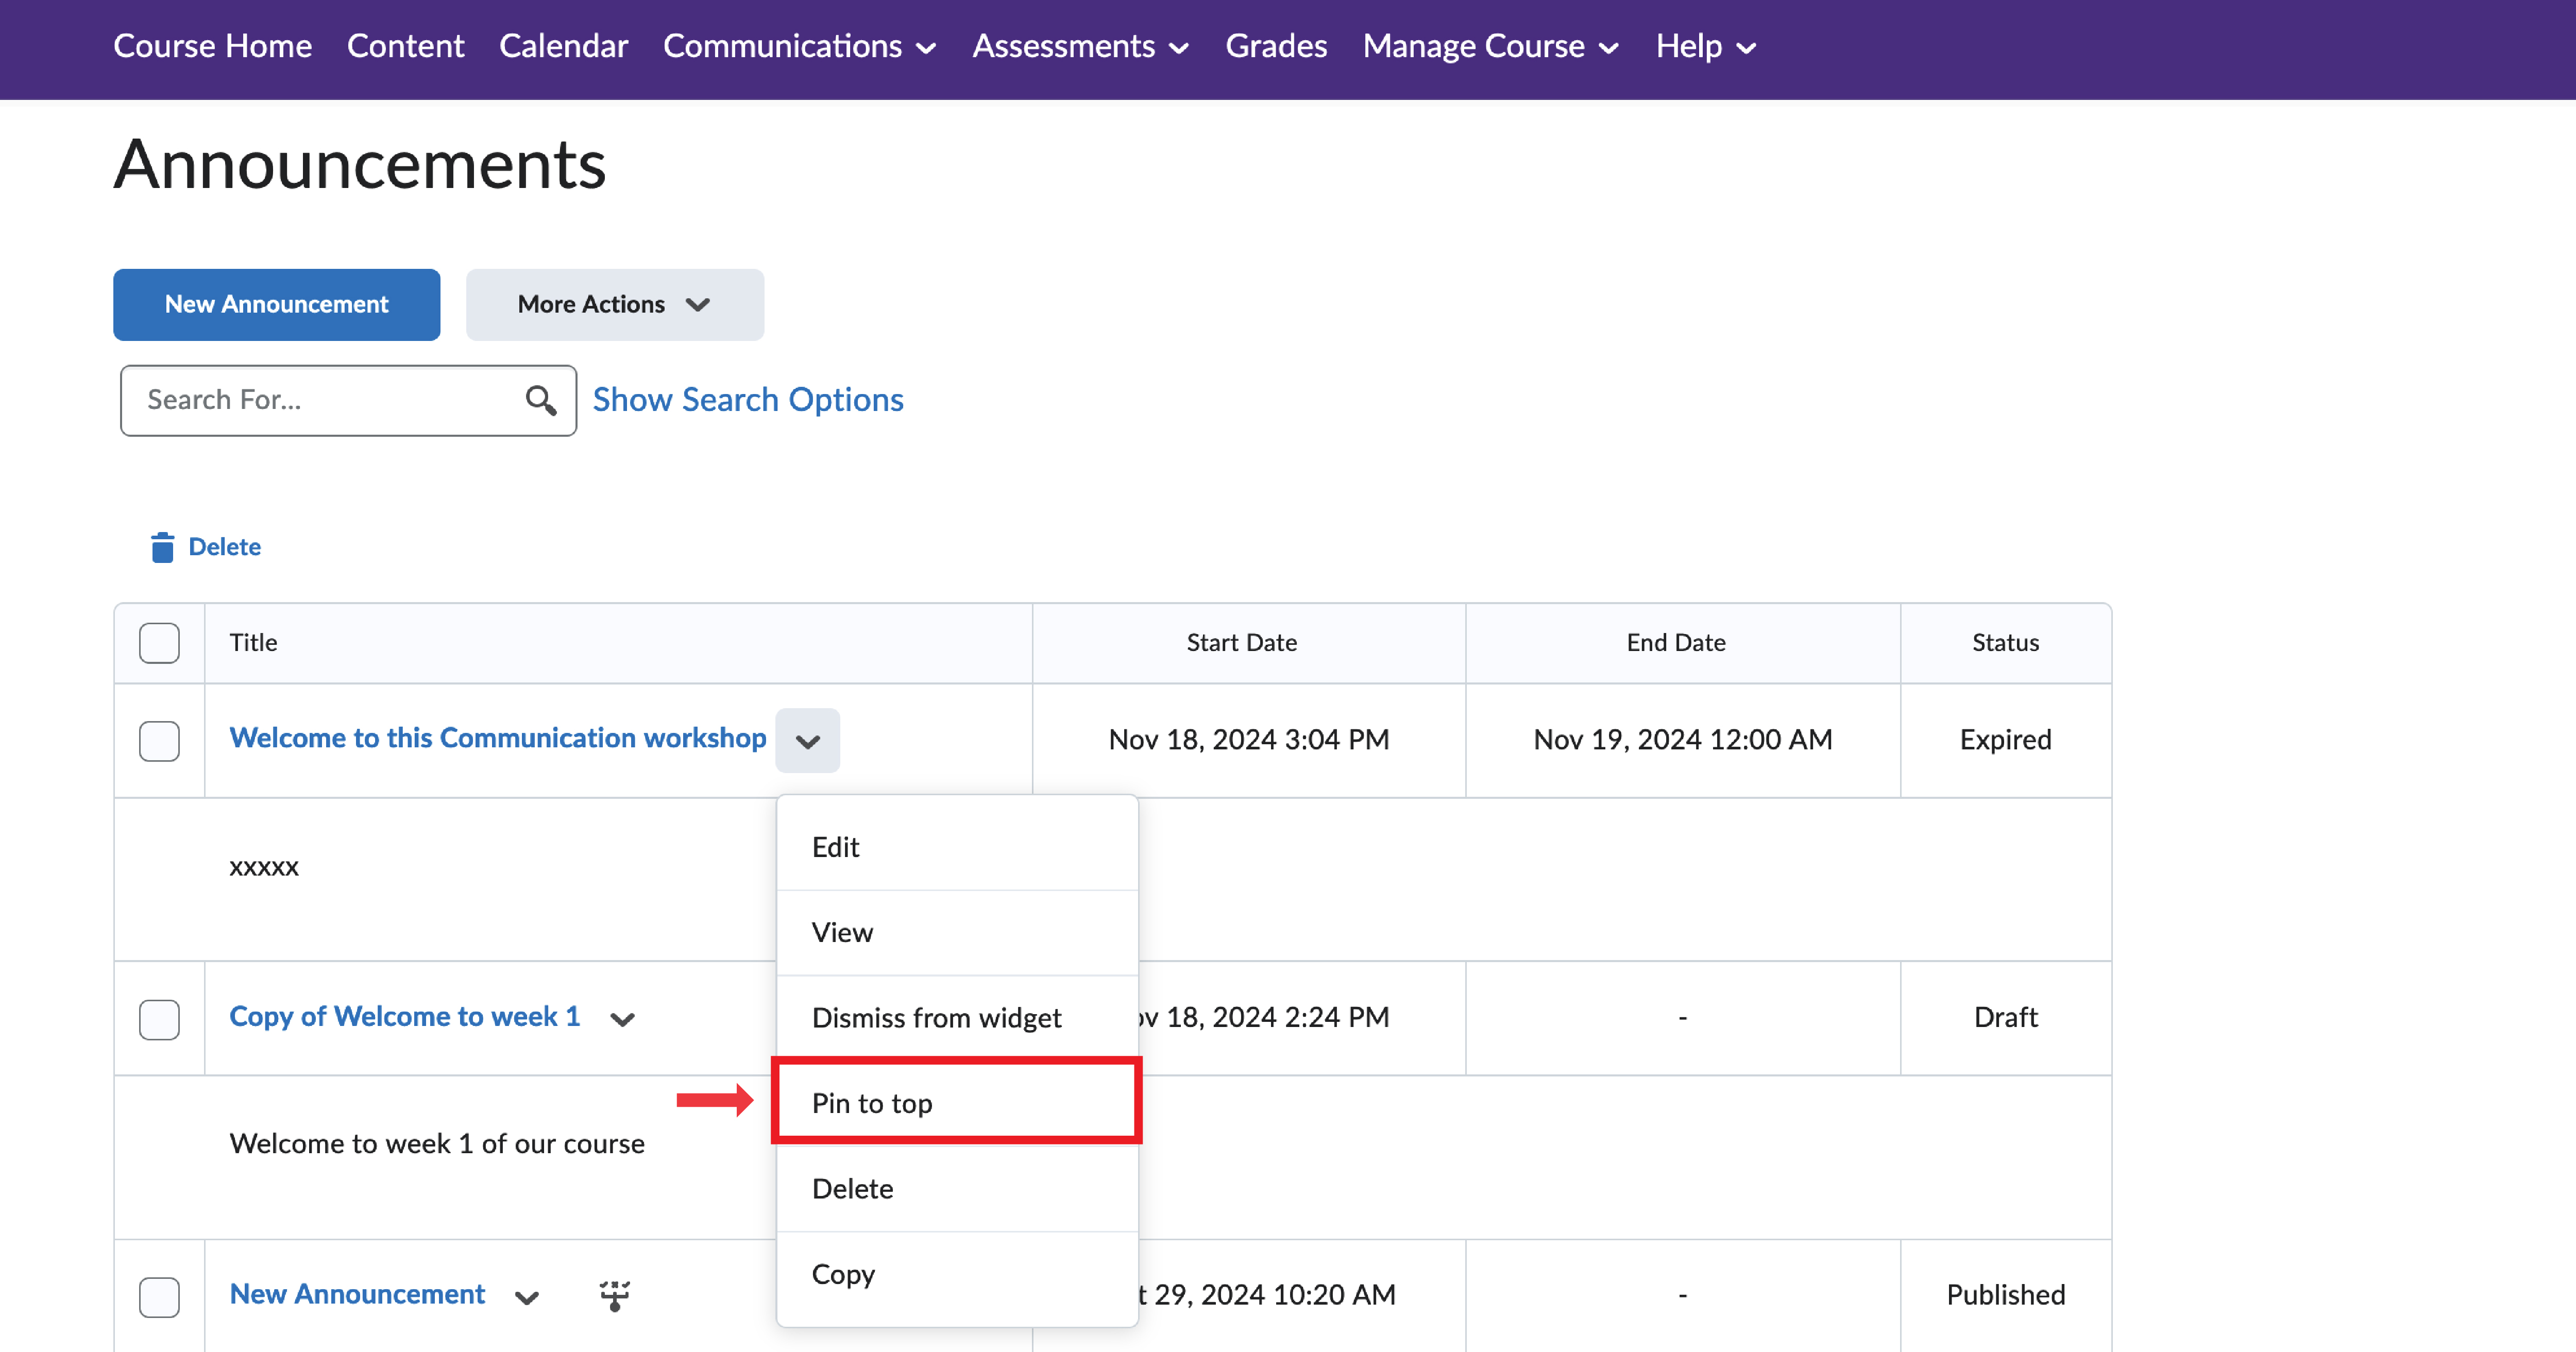
Use the announcement tool to inform learners of the specific course topic and link the page.
- Log in to OWL Brightspace and navigate to the announcement section of your navigation bar under communications.
- Then use the pin function from the dropdown to pin the announcement, making it visible once the learners log onto the page.
1. Go into the content section of your course.
2. Select the first level of a unit.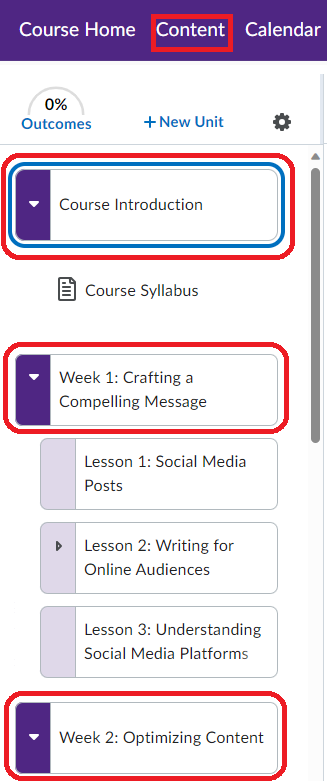
3. Edit the content and add the preferred image to the HTML page.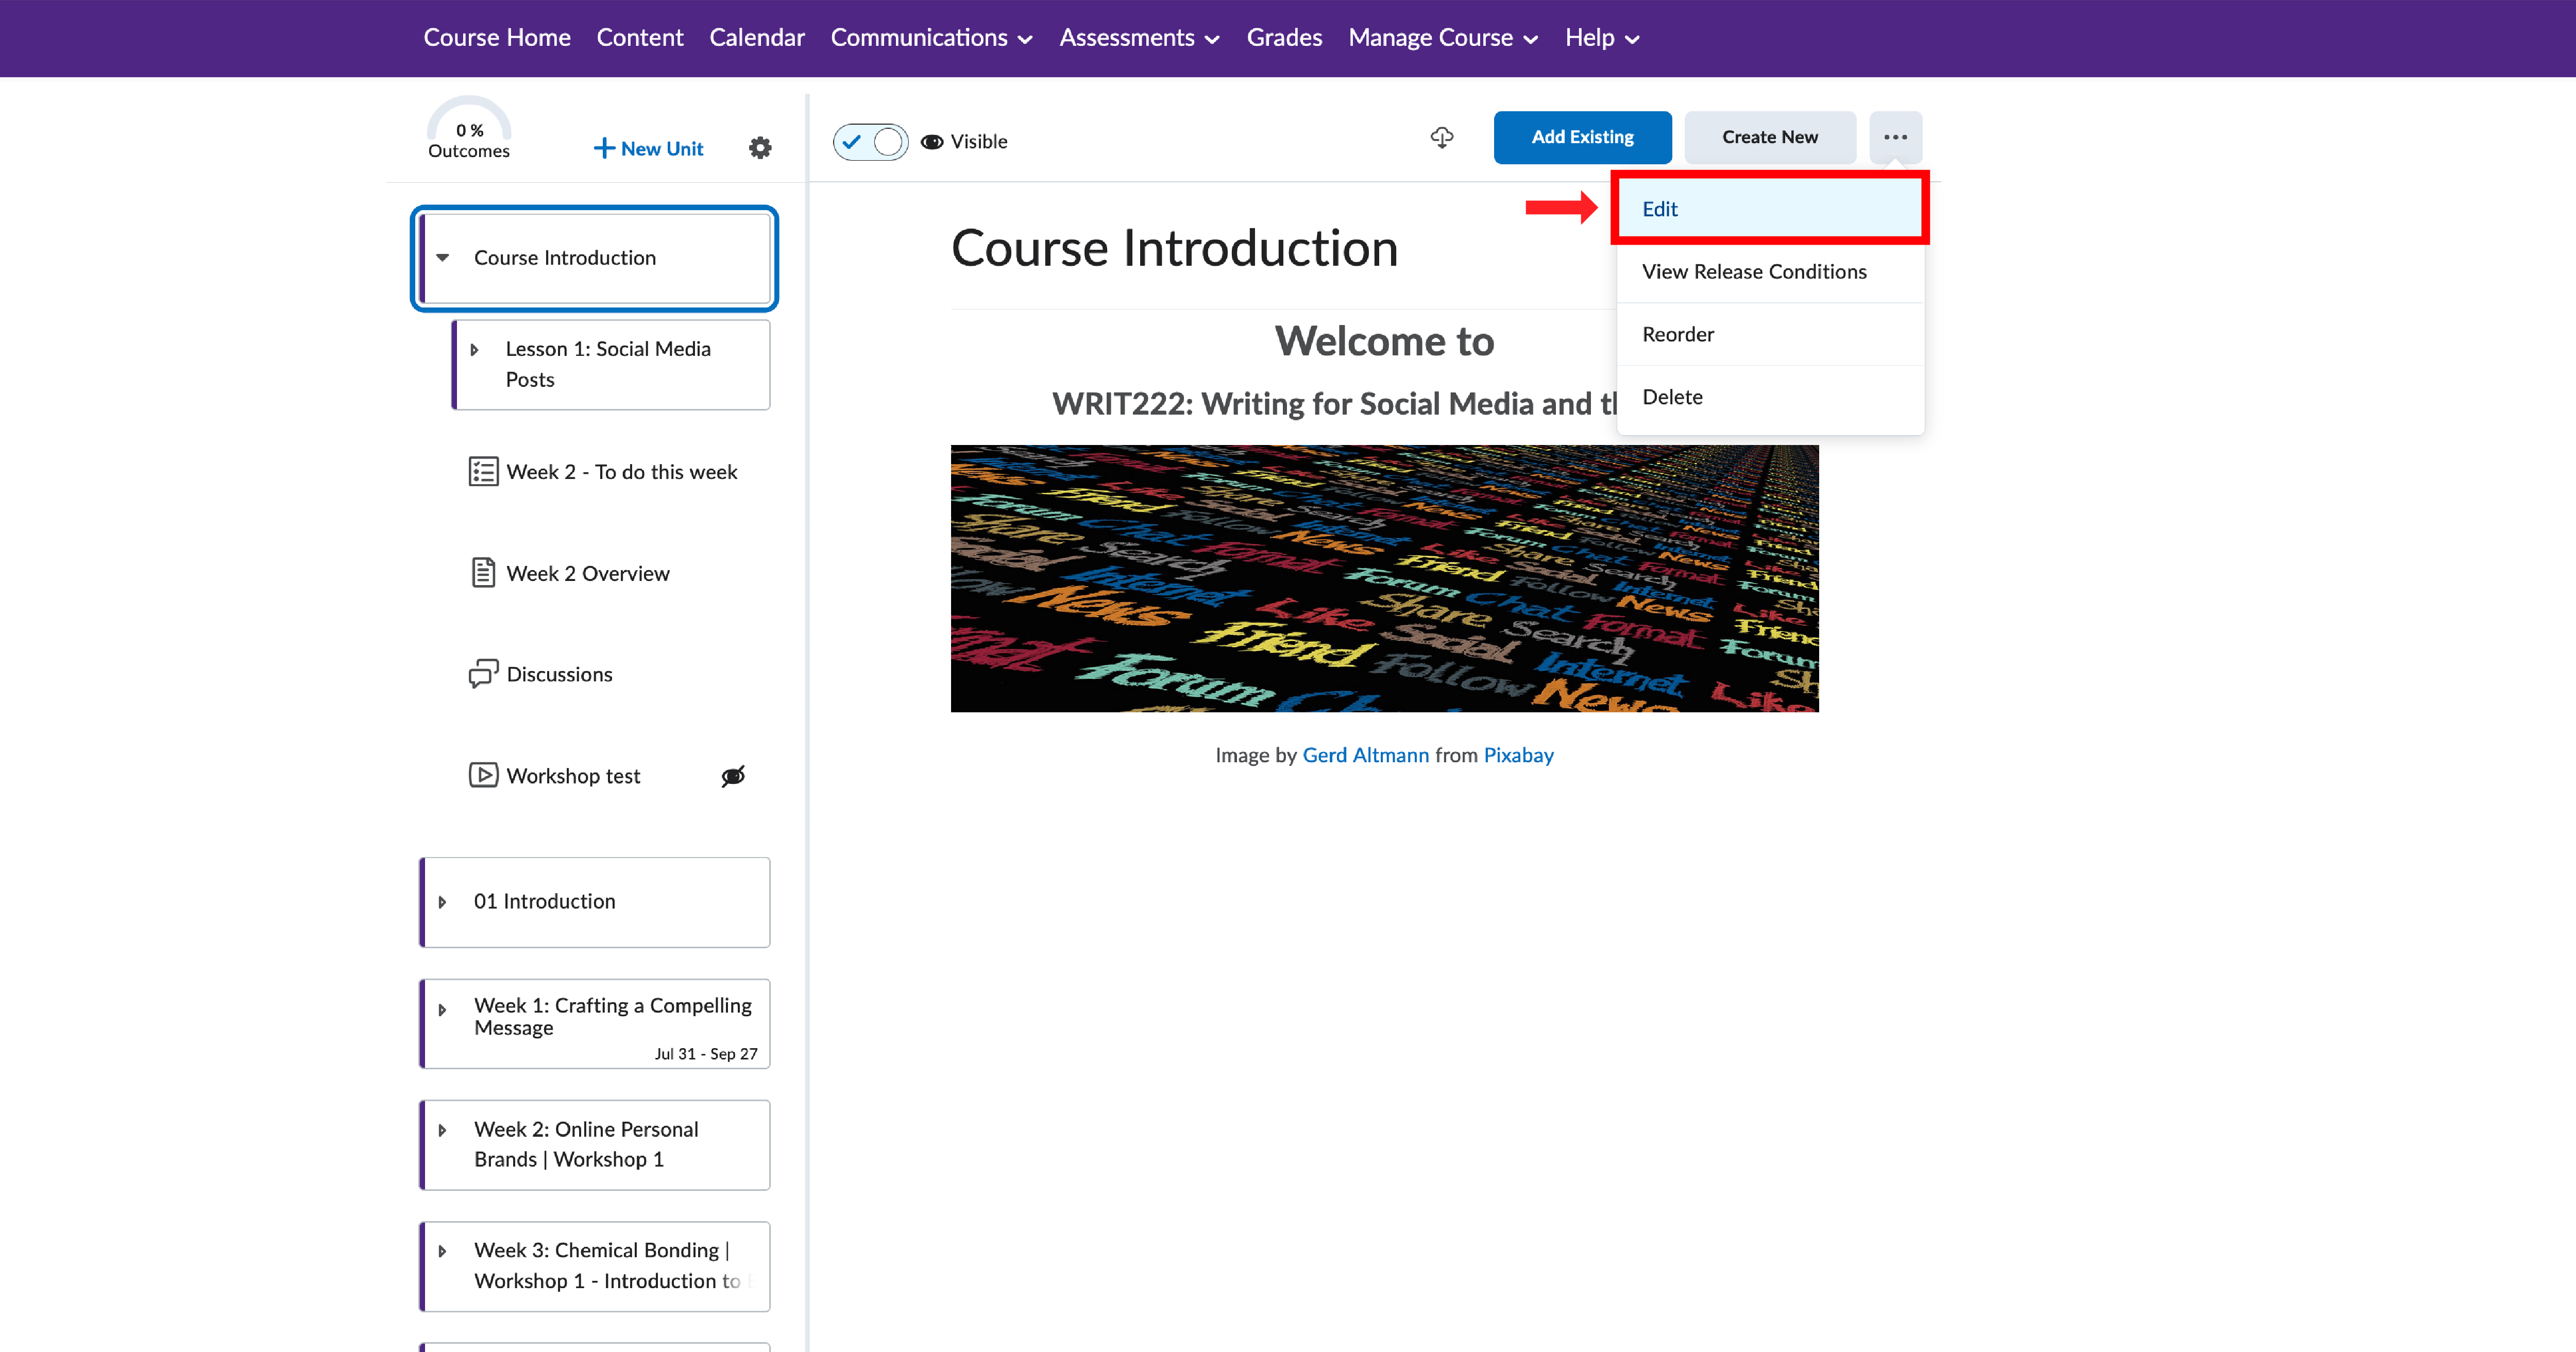
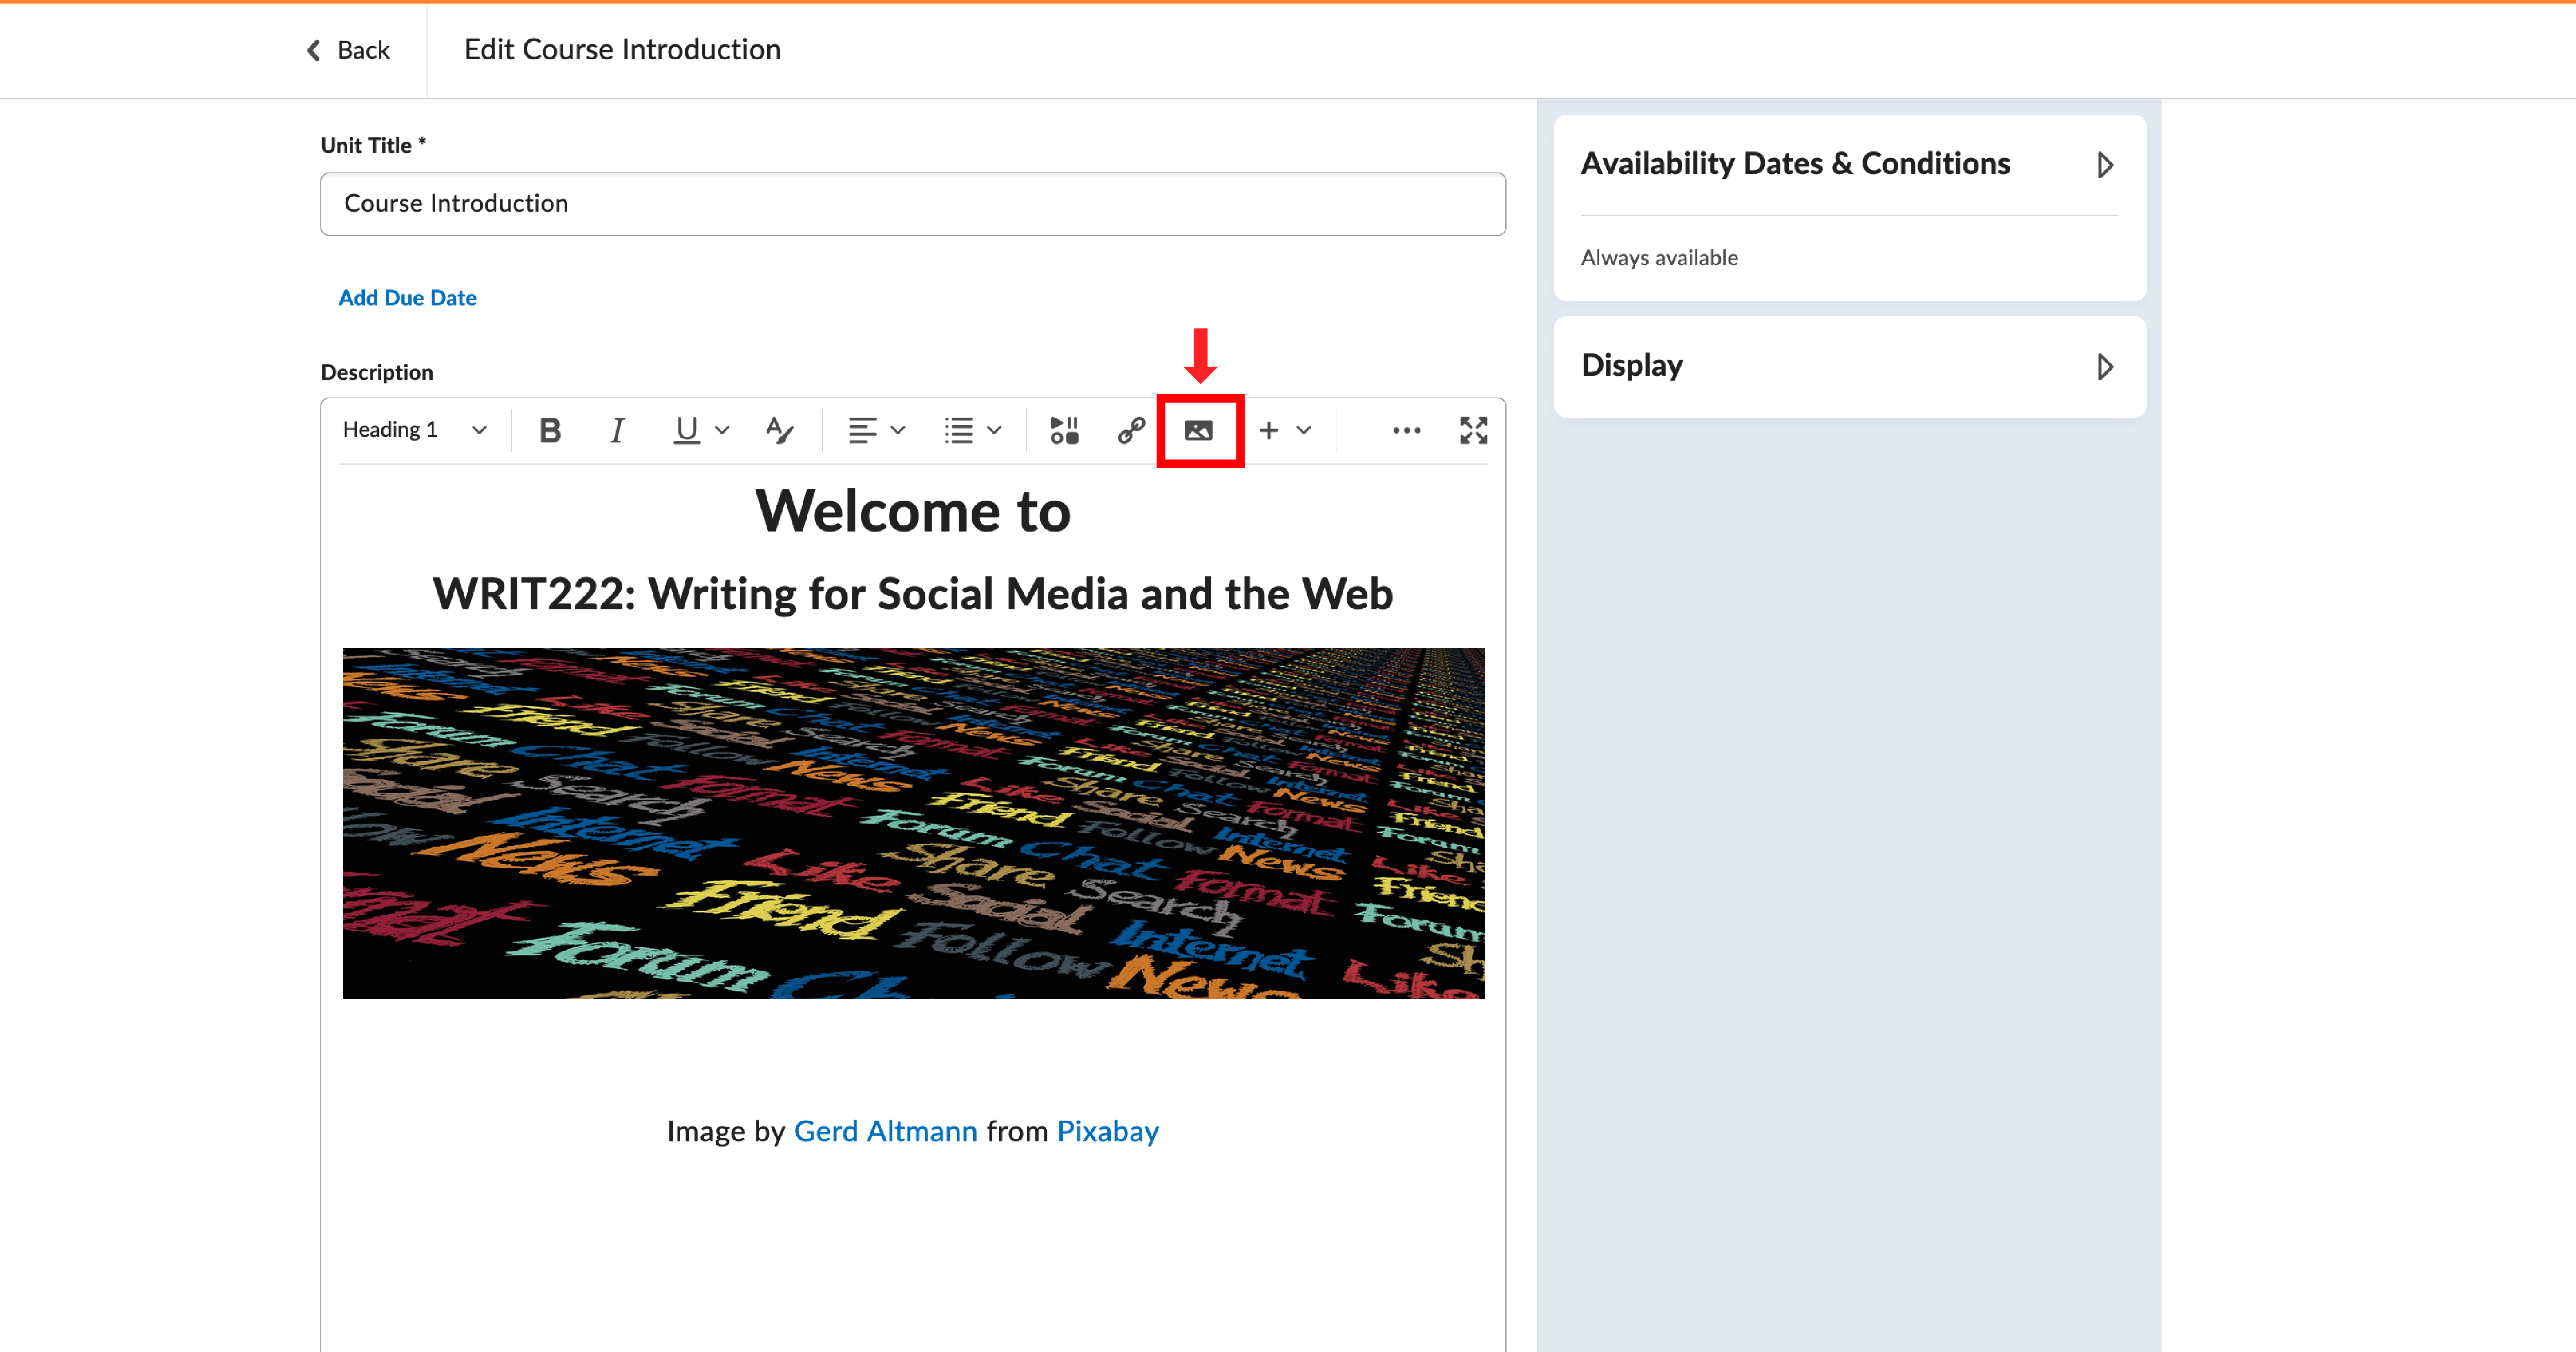
4. Save and close.
Once you have completed these steps, the image should show up on the Visual Table of Contents Widget on your homepage.
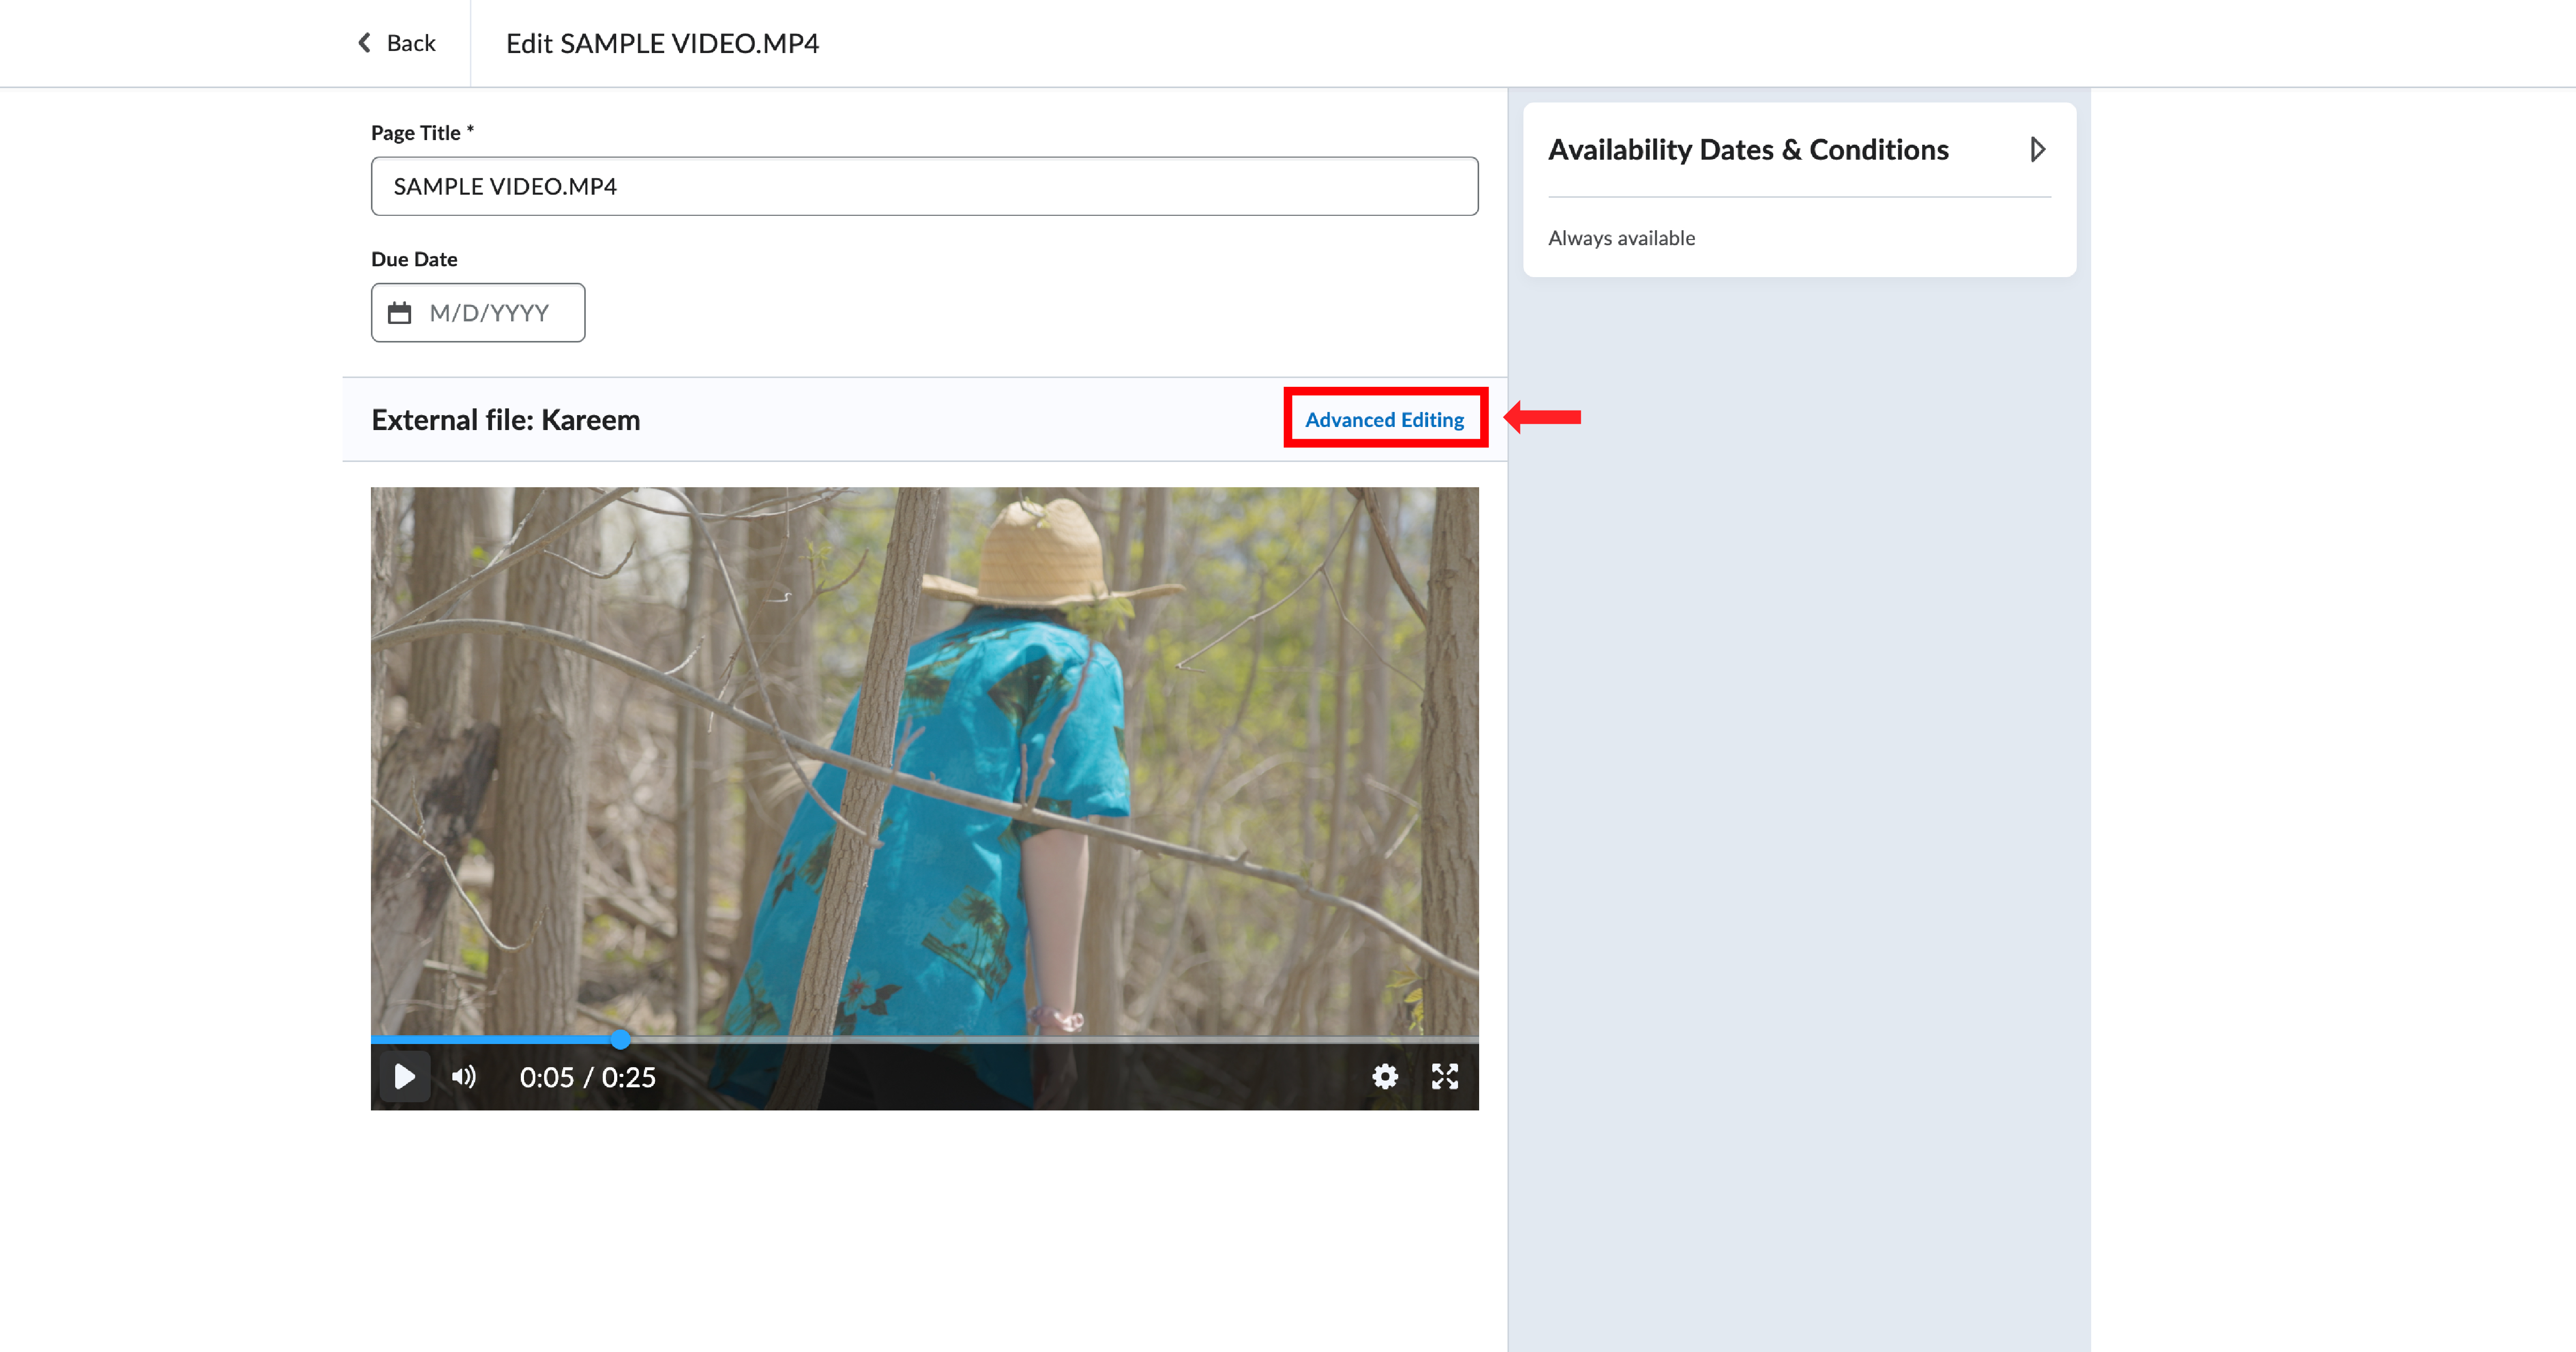
In Brightspace, when videos are uploaded, several features come into play when using the advanced editing tool in content editor:
-
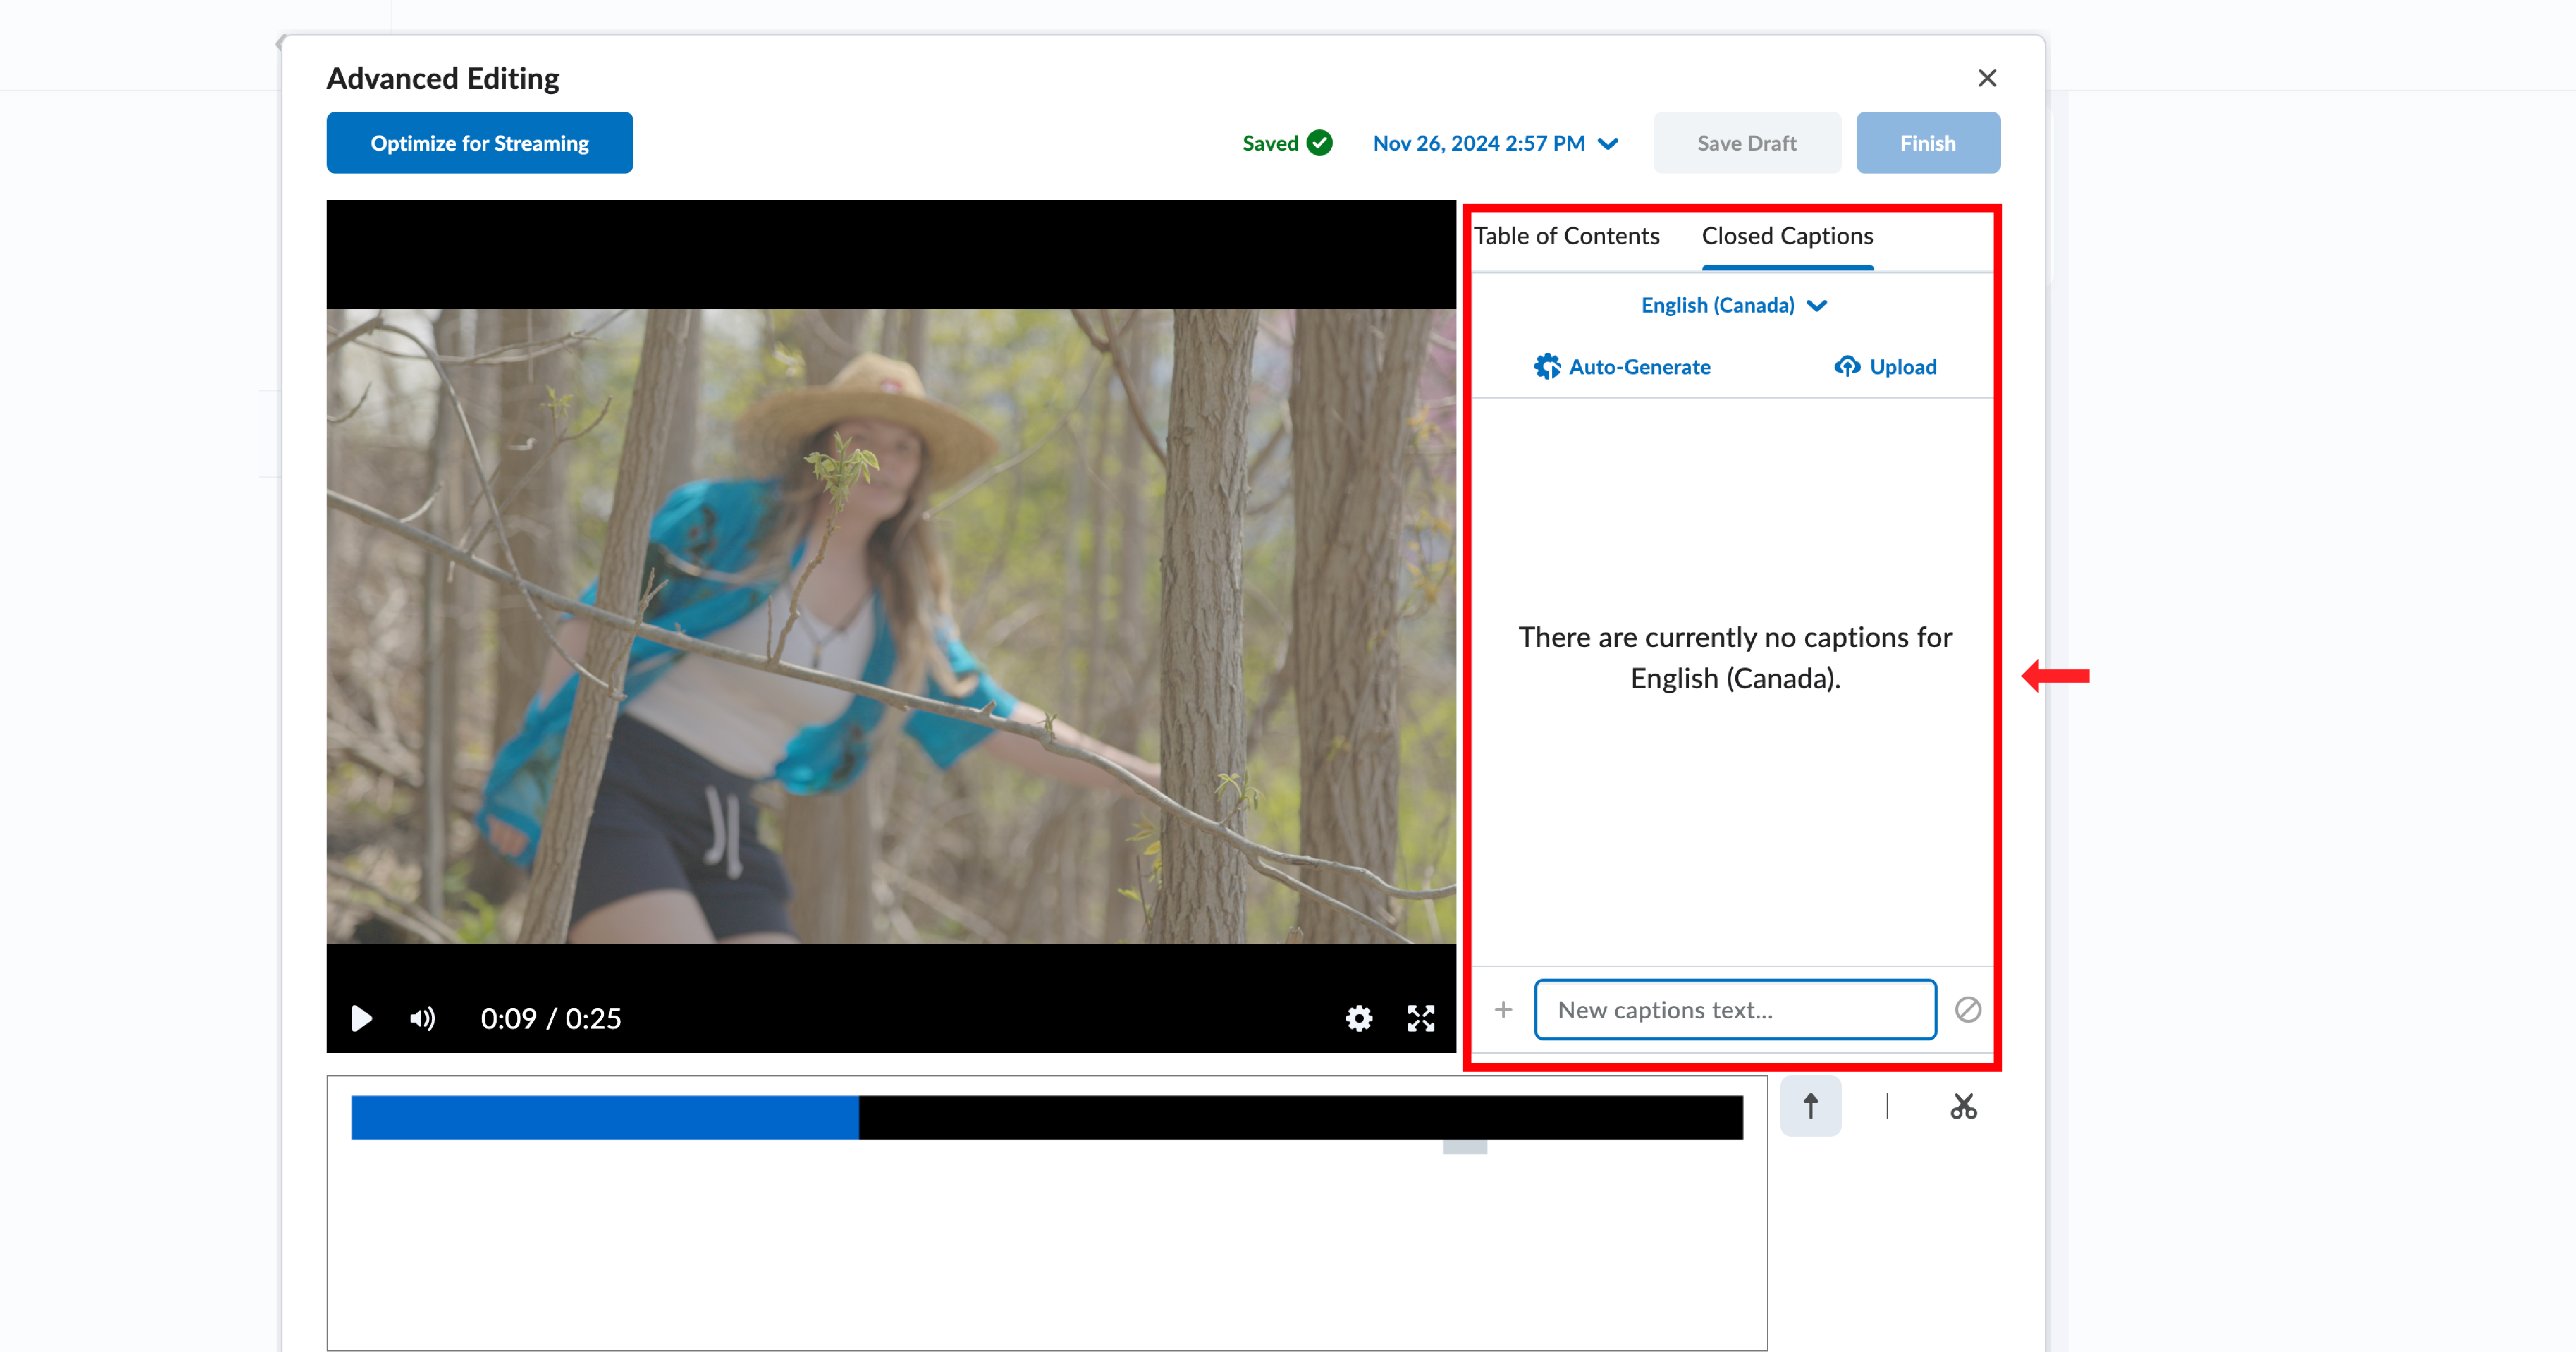
Auto-generate or manually upload captions:
- Brightspace offers the option to automatically generate captions for uploaded videos or allows you to manually upload pre-existing caption files. Users have the flexibility to edit captions.
-
Create a table of contents for videos:
- Enhancing the navigation experience, Brightspace allows the creation of a table of contents for videos, facilitating easy access to specific sections and aiding learners in finding relevant content efficiently.
-
Download auto-generated captions:
- Brightspace enables users to download auto-generated captions, offering the opportunity to refine and modify them into full transcripts.
By default, all content items are set to mandatory, meaning they can be tracked by Brightspace and contribute to learner progress data. When learners complete a unit, they receive a notification showing how many items they have completed.
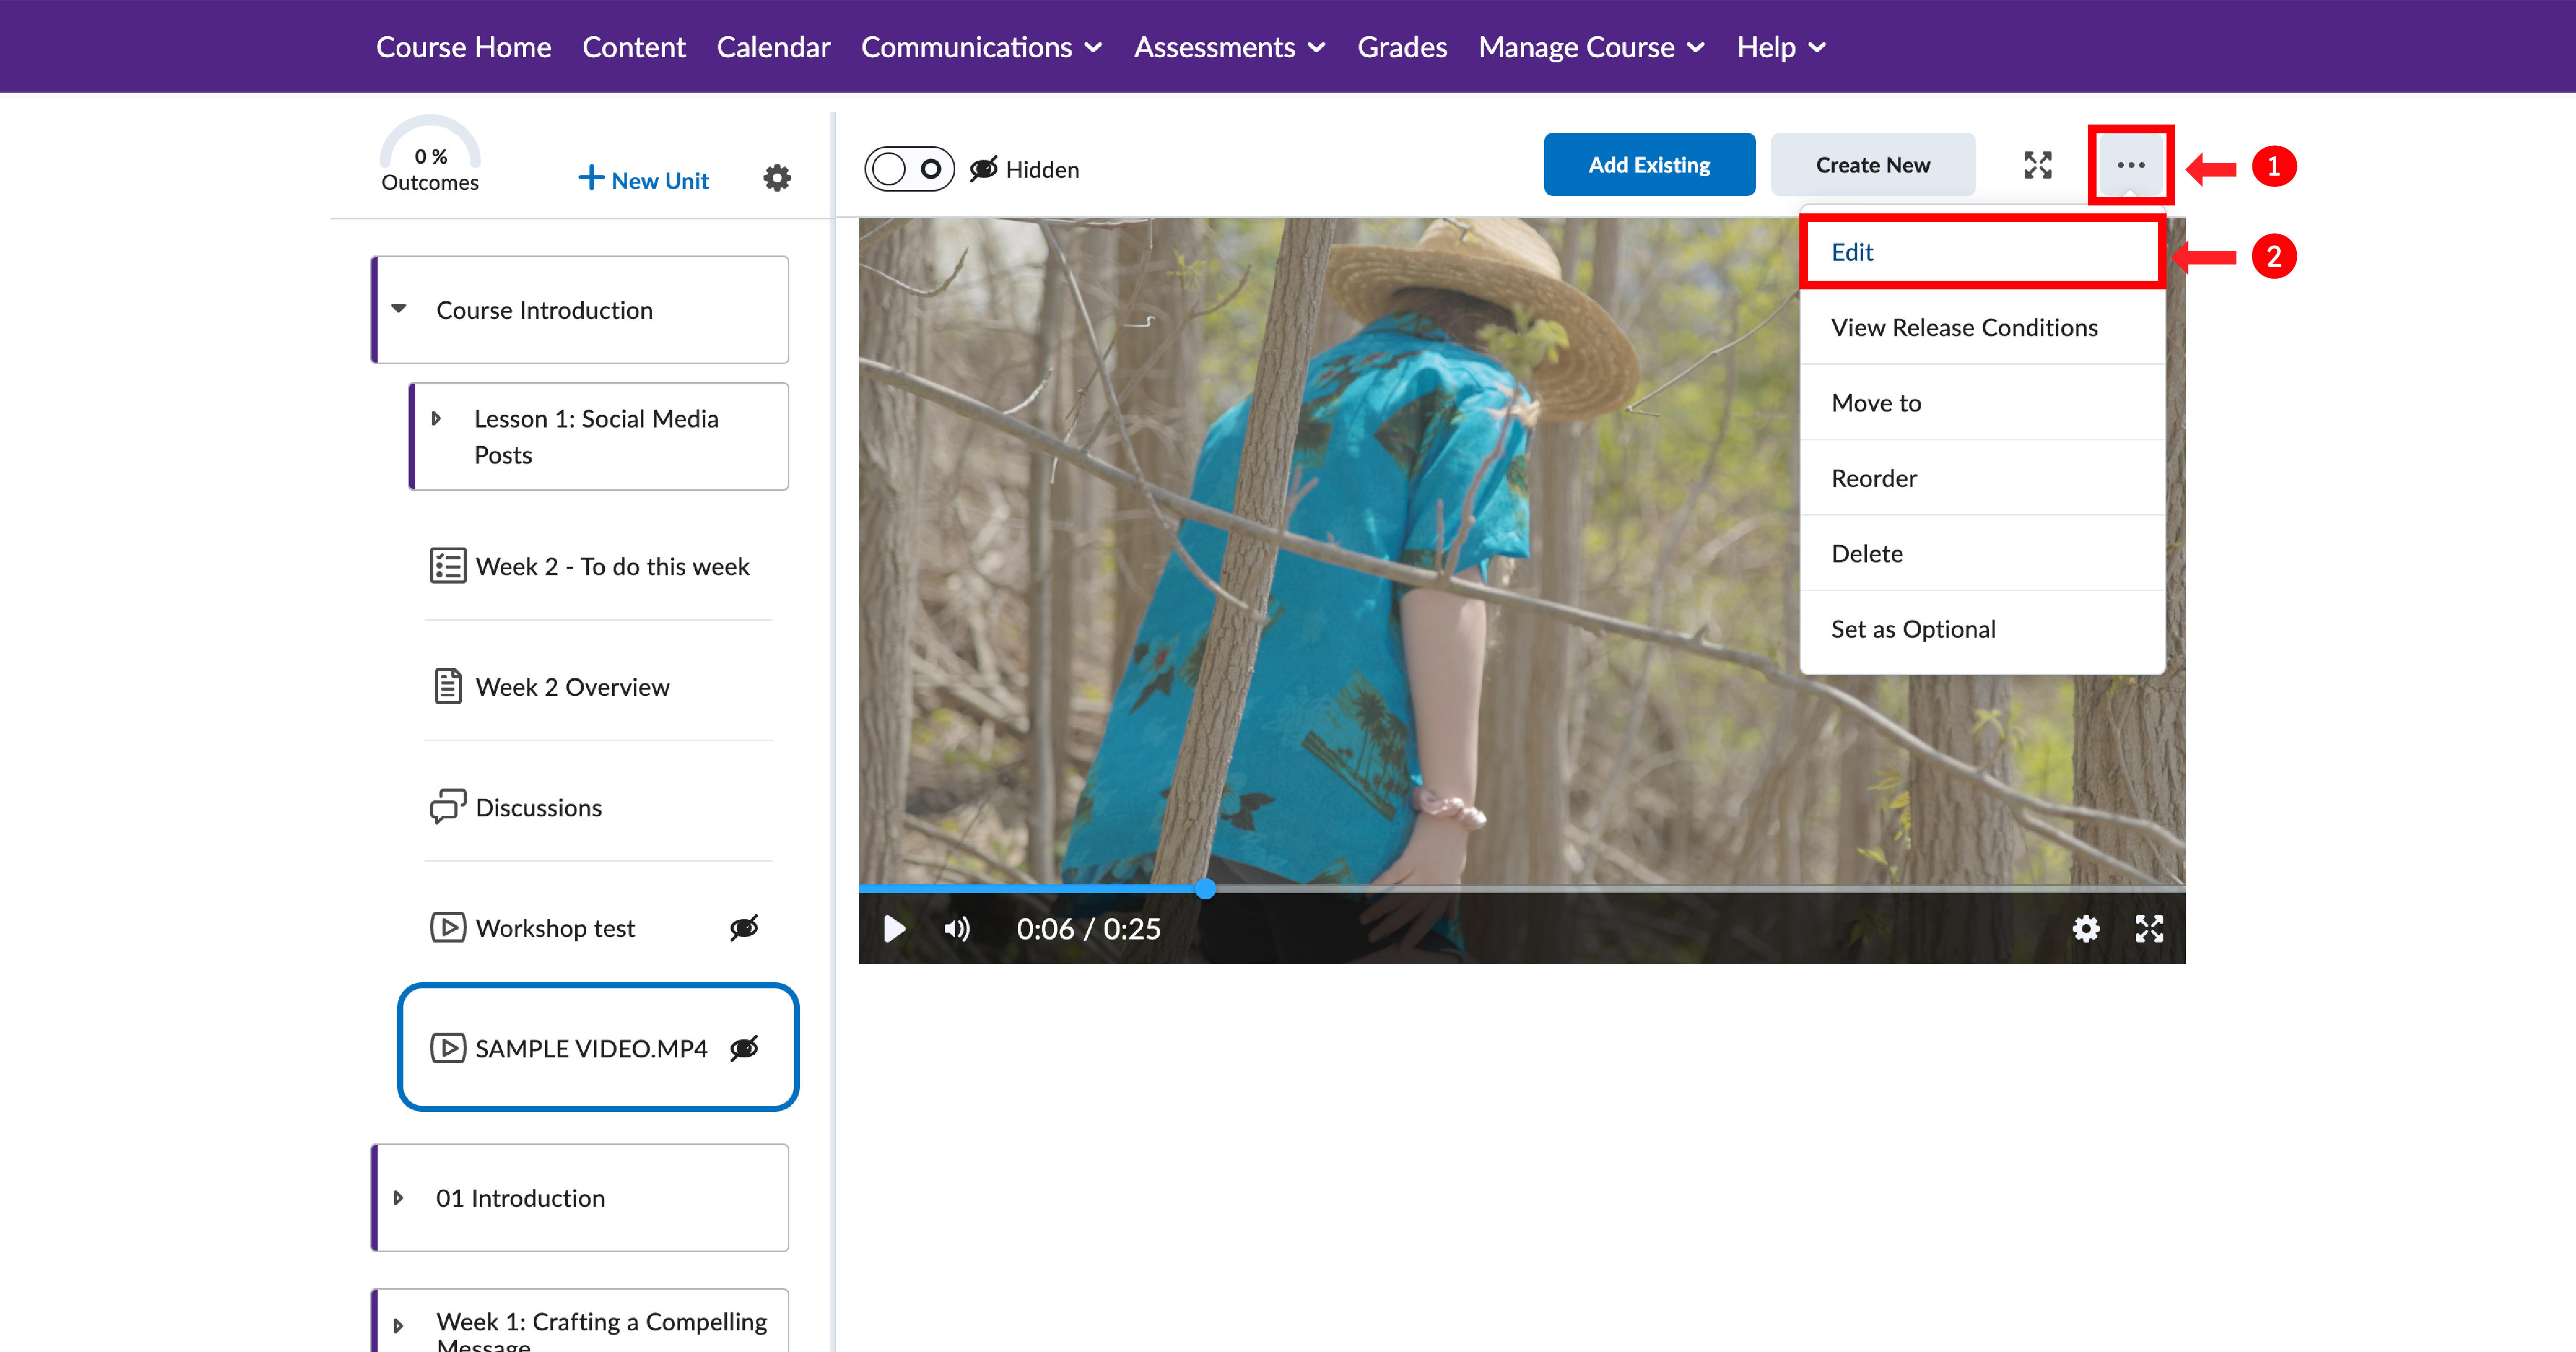
If an instructor prefers not to track a particular content item, they can set it as optional. To do this, follow these steps:
1. On your course page, navigate to the content section and select the specific item you want to make optional.
Note: If you select the main unit item, you will not see this option. Please choose the specific file or page instead.
2. Once the item is selected, click on the three dots at the top-right.
3. From the list of options, select "Set as Optional".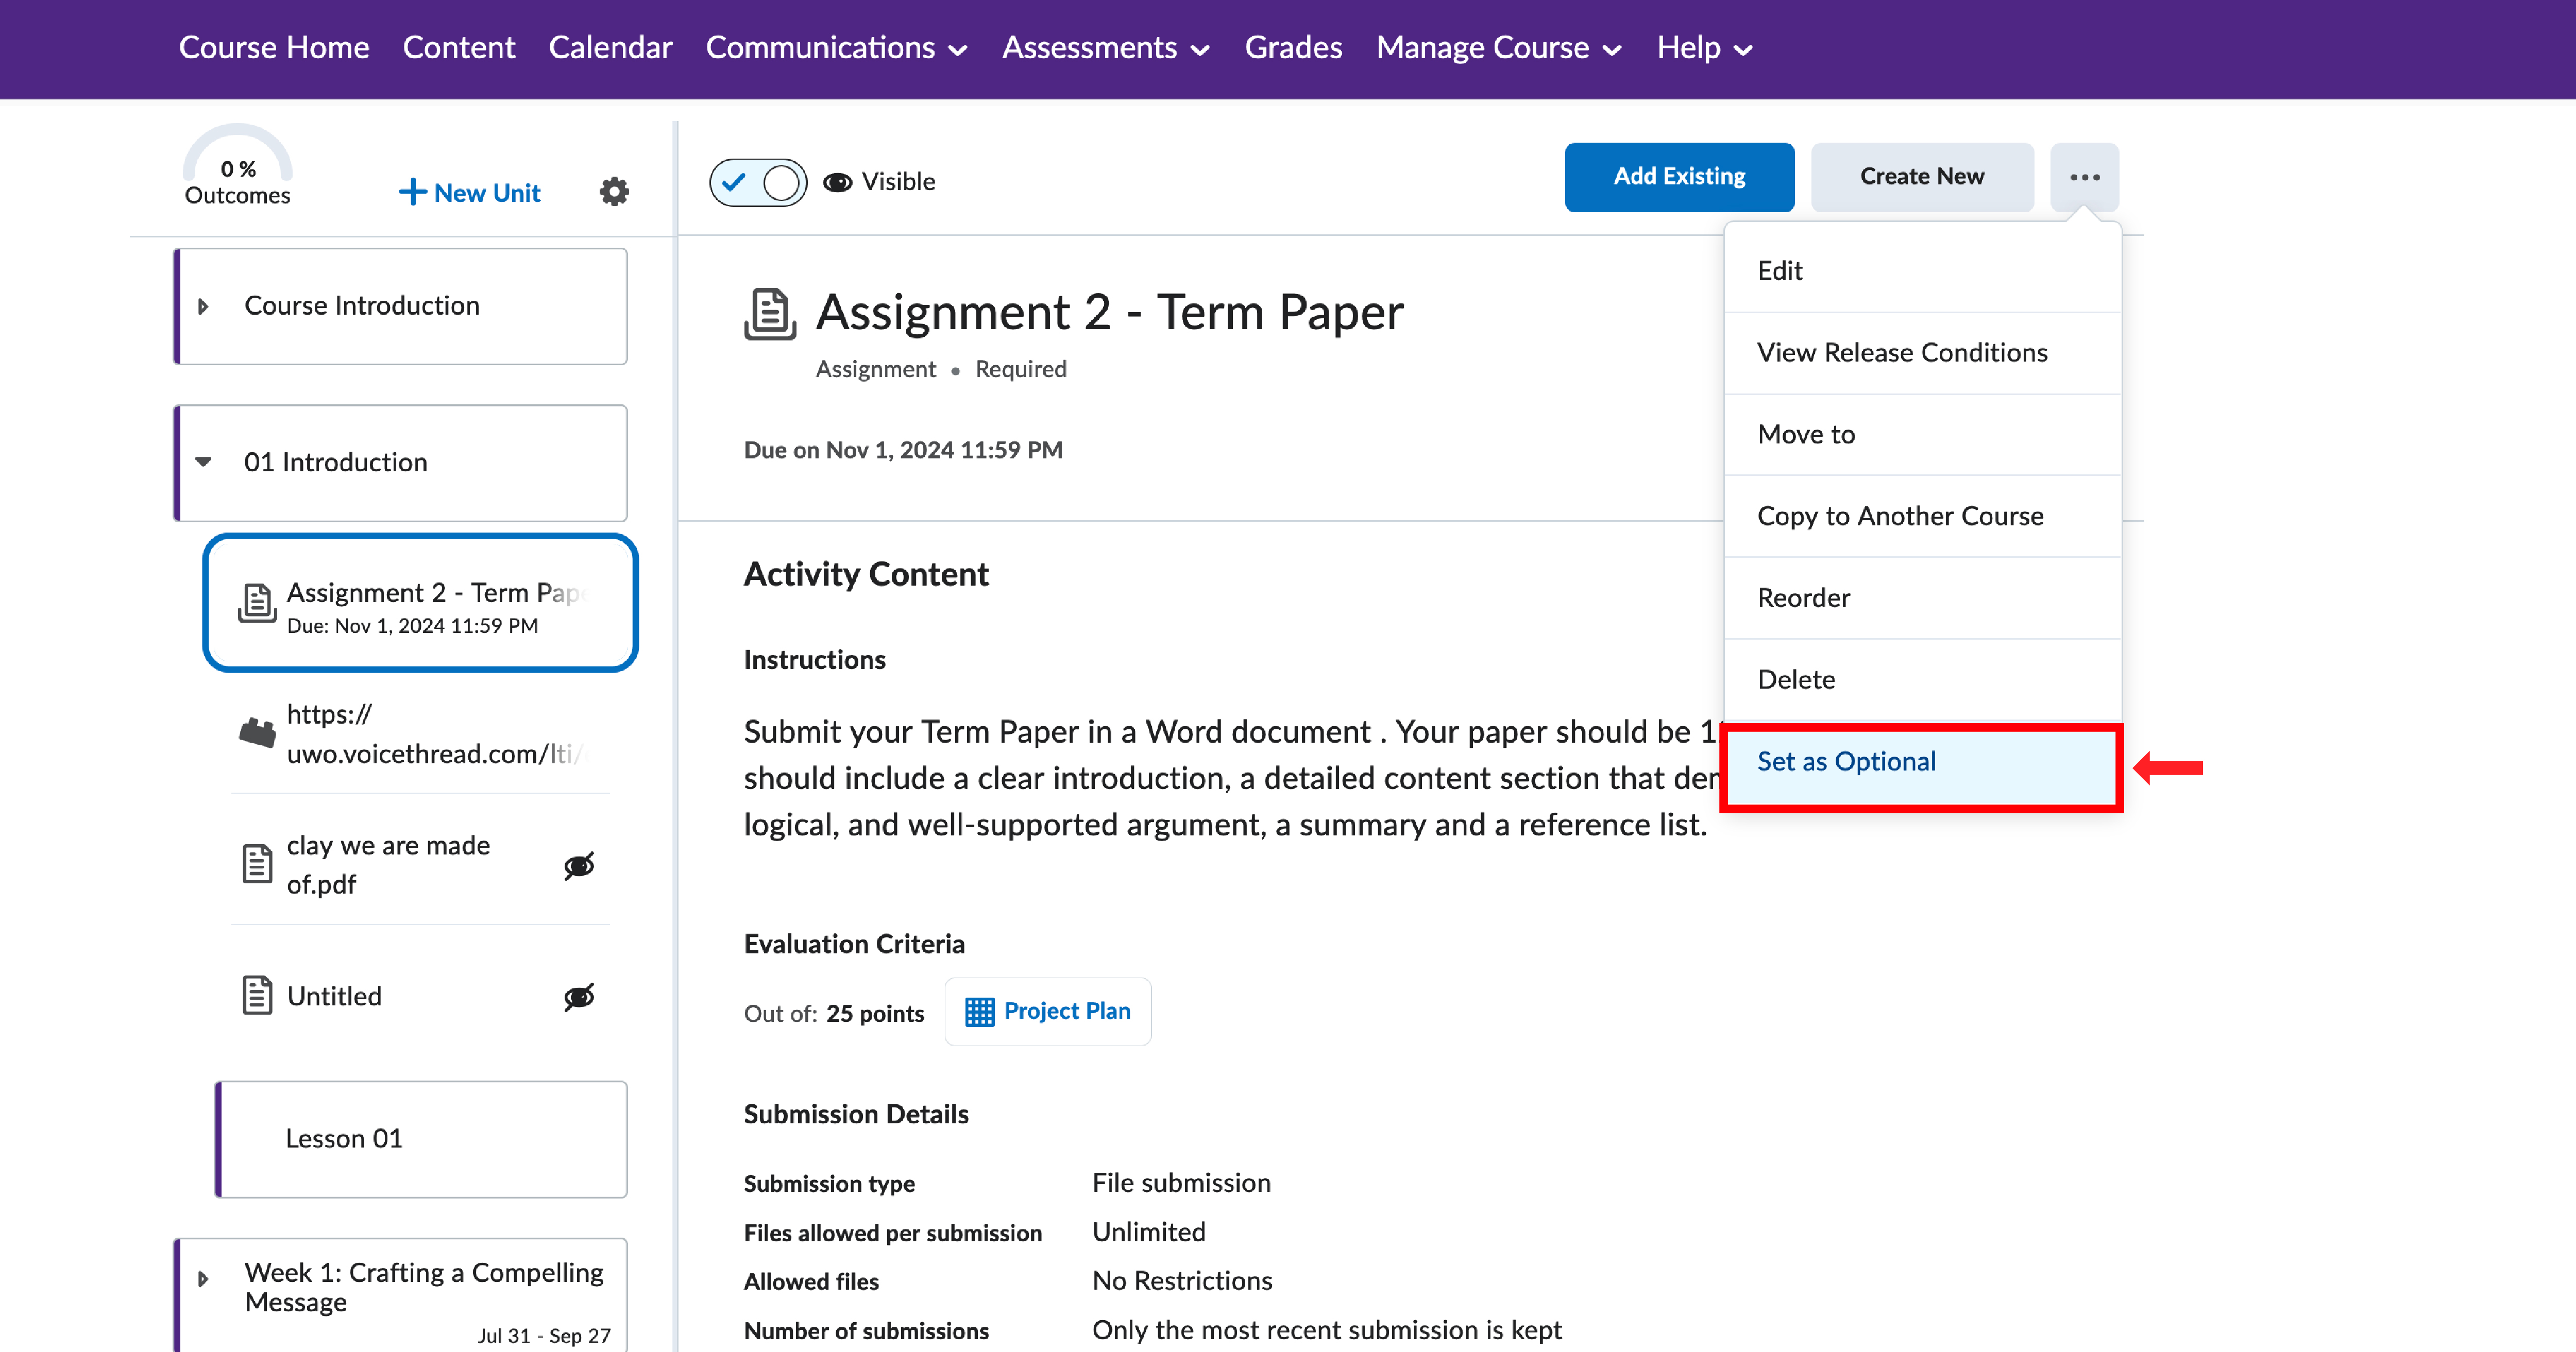
You can also utilize the pinning feature in other tools, such as announcements and discussions.